Knowledge Base Article
Add Donors
A Donor is any individual, household, or organization that gives to your nonprofit financially. Donors are created as constituents first, then designated as donors. This article covers how to add a Donor and what you can record on the Donor Workspace.
Start a new Donor
From the left-hand menu, choose Constituents (CRM) > Donors. This opens your donor list. Click the Add New button at the top of the list to open the Add A New Donor page.
Under Designate A Constituent As A Donor, start typing the constituent's name and select the person or organization you want to make a donor. Only constituents who are not already donors appear in the list. If the constituent does not exist yet, click the add icon to create a new constituent record without leaving this page (for help, see Add Constituent - Individual). A constituent is required.
With the constituent selected, click Add Donor & Enter Details. Argenta designates the constituent as a donor and opens the Donor Workspace.
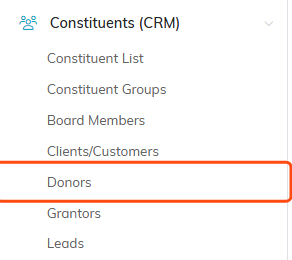
Donors sits under Constituents (CRM).

Add New at the top of the donor list.
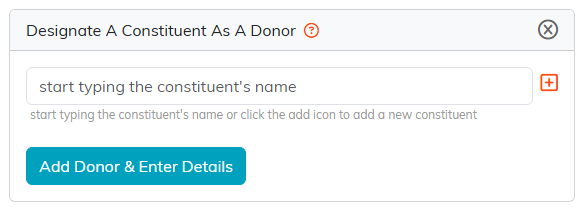
Only constituents who are not donors yet appear in this search.
Getting around the Donor Workspace
Across the top of the workspace is the Workspace Menu, a row of icons you click to move between the sections of the donor's record. The sections are: Donor Details, Constituent Groups, Fiscal Donations, Recurring Donations, Pledges, Material Donations, Follow-Up, Notifications, Contact Log, Email Log, Donor Files, Donor Notes, and Record Permissions.
To save, use the Save All Changes button to save and stay on the section, or Save All & Exit Record to save and return to the donor list. Exit Record leaves without saving, and Delete This Record removes the donor, but only while there is nothing to keep: once the donor has a donation, a material donation, an in-kind donation or a pledge recorded, Argenta refuses the delete. Mark them inactive instead. Only fields marked with a small orange asterisk are required; on a donor, that is the Active Date.

The Workspace Menu, with every section of the donor record.

The save buttons at the bottom of the section.
Donor Details
This is the section you land on first. At the top are two Record Level Permissions switches: Set As View Only restricts the record so only the user who created it, a master admin, or a user you grant access to on the Record Permissions section can edit it, and Lock This Record restricts it so only those same users can even view it.
Below that is the donor's Constituent Card, showing the constituent's name, photo, and core contact information. You can open the full constituent record from here to edit addresses, phone numbers, and other details.
The Donor Metrics panel is calculated for you and shows the donor's Donor Level, Total Lifetime Contributions, Most Recent Contribution, and Highest Previous Contribution. These fill in as donations are recorded.
The fields you can set on this section are:
- Active Date (required) – defaults to today; change it with the date picker if needed.
- Associated Team Member – start typing a name to link a member of your team to this donor.
- Is this donor a third-party giver? – select Yes or No.
- Donor Type and Donor Category – choose from the lists; if a value you need is missing, add it with the add icon.
- Preferred Payment Method – the donor's usual way of giving.
- Acquisition Source – how you came to know this donor.
- Associated Campaign – start typing to link the donor to a campaign.
- Chapter, Division, and Department – tie the donor to a part of your organization for tracking and reporting.
On political accounts, this section also includes District, Precinct, and a Donor gives to state campaigns Yes/No choice. Click Save All Changes when you are done.

The two record level permission switches at the top.
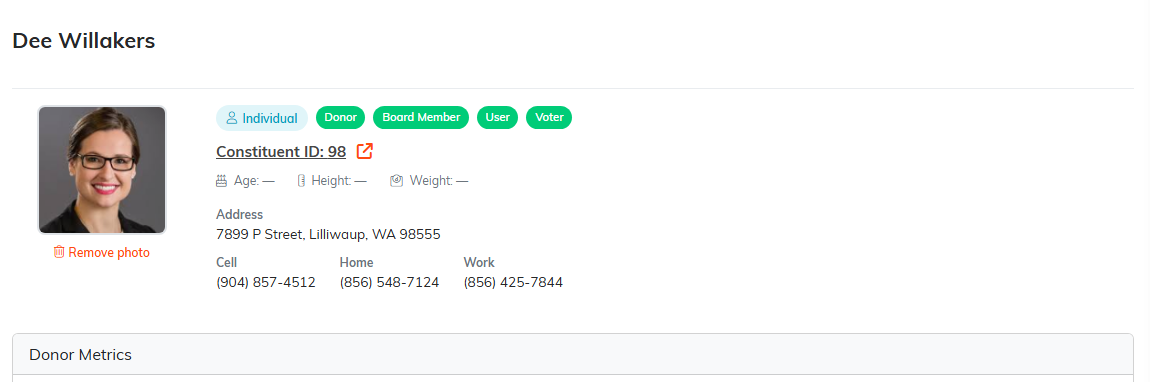
The constituent card. The Constituent ID link opens the full record.

Donor Metrics is worked out for you and fills in as gifts are recorded.

Active Date is the only required field on a donor.

Your own donor types and categories, plus how they usually give.

How you came to know them, and the campaign they belong to.

Chapter, Division and Department drive tracking and who can see the record.
Donations
The next four sections track what the donor has given. Each one is empty for a brand-new donor until you record activity:
- Fiscal Donations – the donor's monetary gifts. Add one with Add New; see Add Fiscal Donations.
- Recurring Donations – any gifts scheduled to repeat monthly or annually, the two schedules a donation offers.
- Pledges – gifts the donor has committed to give; see Add Pledges.
- Material Donations – non-cash, in-kind gifts; see Add Material Donations.
Follow-Up and Notifications
Use Follow-Up to schedule outreach to the donor. Click Add New, then set a team member, a reason, a follow-up date and time, and an optional notification date and time so Argenta emails you a reminder. Follow-ups also appear on your calendar. The Notifications section shows the notices tied to this donor.
Logs and related records
The remaining sections keep a history for the donor: the Contact Log (contacts you have logged; see How To Use The Contact Log & Follow-Up Features), the Email Log (system emails sent to the donor), Donor Files (related files you upload; see Add Related Files), and Donor Notes (related notes; see Add A Note to the Notes Section).
Record Permissions
This section controls who can see and edit the donor record. It has two panels:
- View Only Access – when the record is set to View Only, the users you list here can still edit it. In the Add User box, start typing a user's name, select them, and click Add.
- Locked Record Access – when the record is Locked, the users you list here can still access it. Add users the same way: type the name in Add User, select, and click Add.
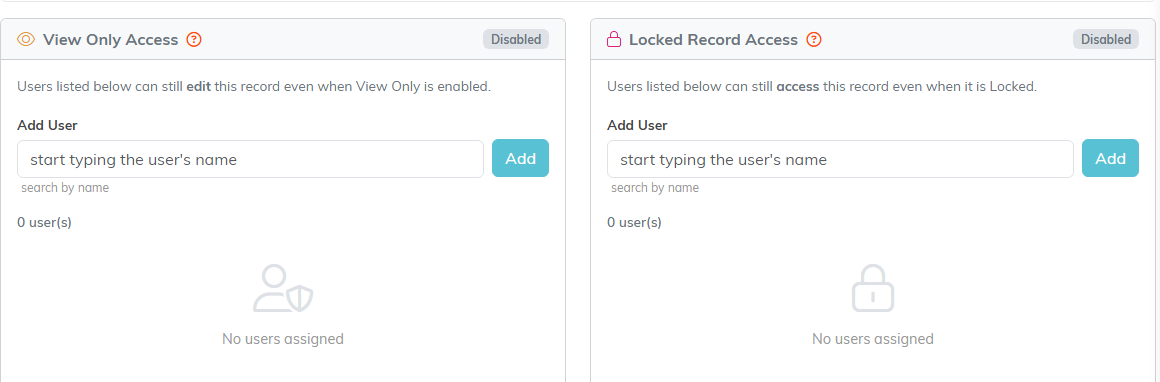
The two panels on the Record Permissions section.
Permissions also work alongside any chapter, division, district, precinct, or department restrictions you have set for your users.
