Knowledge Base Article
Add Material Donations
Plenty of organizations are given goods rather than money: food, clothing, school supplies, building materials. Argenta records those gifts as material donations, tracks what they were worth, and puts the goods into your material inventory so you can hand them back out again.
Before you start, make sure the items you received already exist in your inventory. You record a donation by entering quantities against items you already track, so anything new has to be added first. See How To Add Material Items Into Inventory.
Create the donation
Choose Materials Management > Material Donations from the main menu, then click Add New. A short form opens asking for the Donor and the Date of Donation. Fill those in and click Add & Enter Details, and Argenta creates the record and opens it in the Material Donation Workspace, starting on Donation Details. Cancel & Exit leaves nothing behind. The workspace has five pages: Donation Details, Donation Items, Donation Files, Donation Notes, and Record Permissions.
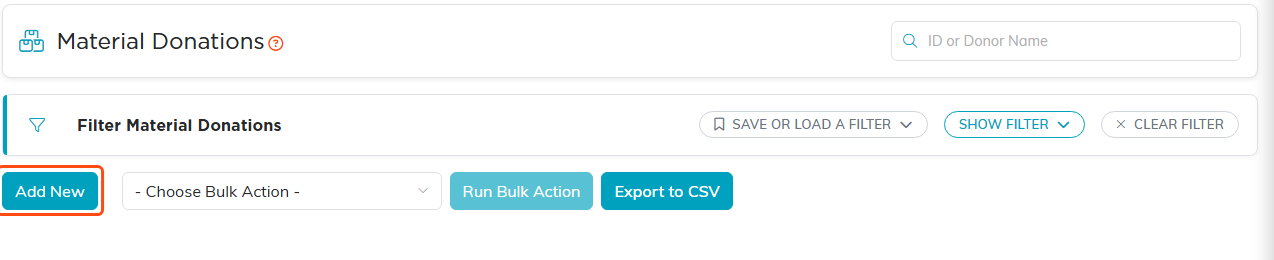
Add New opens a short form for the donor and the date.

The workspace menu holds the five pages of the donation.
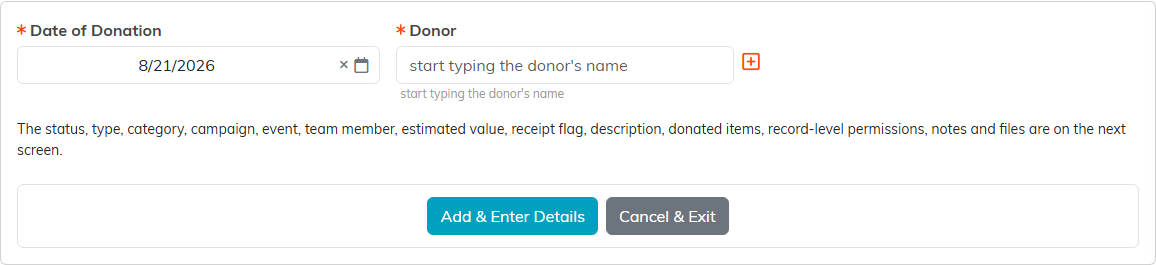
Donor and date first. Cancel & Exit leaves nothing behind.
Fill in Donation Details
Two fields are required, both marked with an orange asterisk:
- Date of Donation. Type the date or pick it from the calendar.
- Donor. Start typing the donor's name to find them. If they are not in your system yet, use the add icon on the field to create the constituent without leaving the page.
Then add whatever else you track:
- Our Associated Team Member. Whoever on your team took the donation in.
- Material Donation Status, Material Donation Type, and Material Donation Category. These are your own classification codes, so the choices are the ones your team has set up. Use the add icon on the field to create a new one as you go.
- Total Approx. Value. If you itemize the donation, leave this alone. Argenta recalculates it from the items and their per-unit values every time you save the item list, which is why the field is marked as auto-filled. Type a value here only when you are not itemizing.
- Receipt Given. A switch. Turn it on once the donor has their receipt.
- Donation Description. A plain description of what came in.
- Chapter, Division, and Department. Use these when the donation belongs to one part of your organization, or to control which team members can see it. Political organizations also get District and Precinct; pick the district first, since it determines the precinct list.
- Associated Campaign and Associated Event, to tie the gift to a fundraising effort.
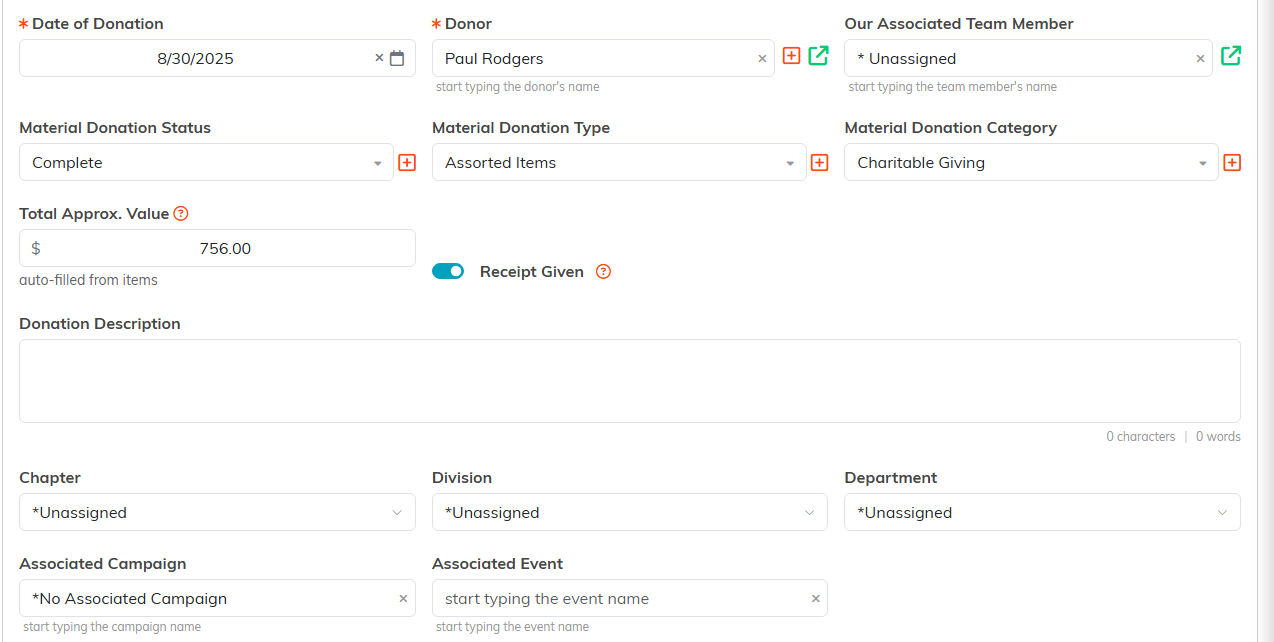
Date of Donation and Donor carry the orange asterisk.
At the top of the page, Set As View Only stops other team members editing this record, and Lock This Record stops them opening it at all. In both cases the person who created the record, master admins, and anyone you name on the Record Permissions page keep their access.

Both switches sit at the top of Donation Details.
Save with Save All Changes & Continue to stay on the record, or Save All Changes & Exit to return to the list. There is also a Save icon (a floppy disk) in the workspace title bar.

The save row at the foot of Donation Details.
Itemize the donation
Open the Donation Items page. There is no separate add-an-item step and no item picker. The page lists the material items you already track, and you record the donation by typing the number received in QTY Donated beside each item, then saving. Use the row's save icon for a single line, or Save All Changes for the whole list. Setting a quantity back to 0 removes that item from the donation.
Each row shows the item, its unit of measure, and its approximate value per unit, and the totals line above the list keeps a running count and value. Search by item ID or name to find something in a long list.
Saving does two things beyond recording the donation:
- It adds the goods to your inventory. The quantity you enter goes straight onto that item's on-hand count. Do not add the same stock again through Material Inventory.
- It updates the donation's value. Total Approx. Value on Donation Details is recalculated from the items.
The same applies in reverse when you edit. If lowering or clearing a quantity would push an item's on-hand count below zero, Argenta shows Not Enough Inventory, skips that one line, and saves everything else you changed.
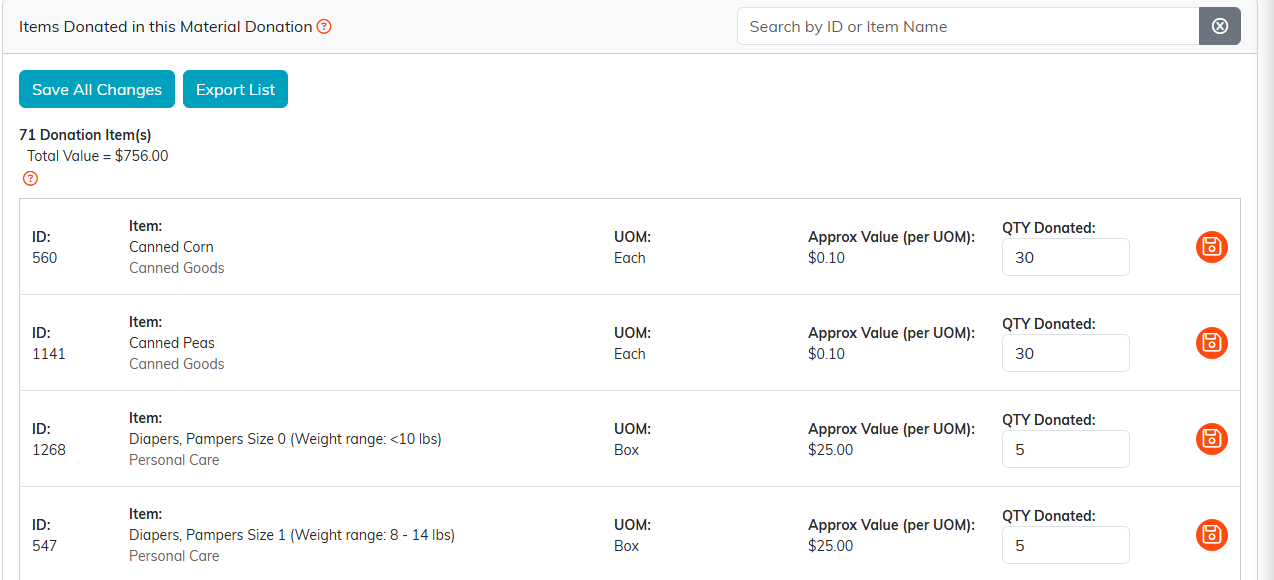
Type the number received beside each item, then save.
Send the donor their confirmation
Saving the donation does not email anybody. When you are ready, use Send Donor The Confirmation Email on Donation Details, or the envelope icon in the title bar, and the donor receives their itemized confirmation. Afterwards the panel shows who it went to and when, and the button becomes Send It Again.

Nothing is emailed until you use this button.
Files, notes, and permissions
- Donation Files. Attach as many files as you need, such as scanned receipts or photos of the goods. Save the record first. See Add Related Files.
- Donation Notes. Anything your team should know about the gift. See Add A Note to the Notes Section.
- Record Permissions. If you marked the record view-only or locked, name the specific team members who should still be able to edit or open it. Start typing a user's name and click Add.
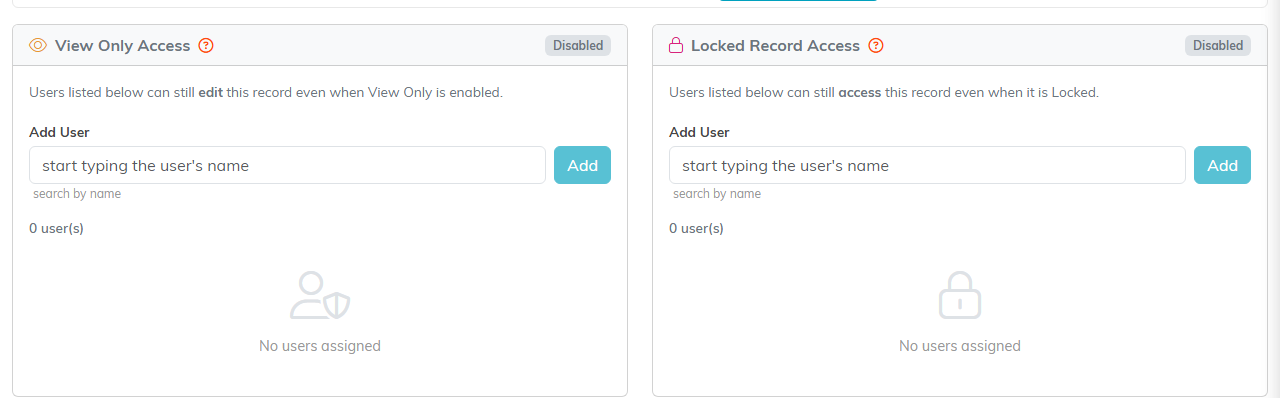
Name the team members who keep access on a view-only or locked record.
To hand these goods back out, see Add Material Distributions. For the short version of this article, see How to Record a Material Donation.
