Knowledge Base Article
Add Leads/Opportunities
A lead (or opportunity) is someone who has shown interest and could become a donor, a member, a volunteer, or a customer. This article covers adding one and every tab in the Lead Workspace, so you know what each field is for before you fill it in.
Open the lead list
Go to Marketing & Engagement > Leads/Opportunities, or Constituents (CRM) > Leads. Both open the same list. You need the Marketing Manager permission or an admin account to get in.
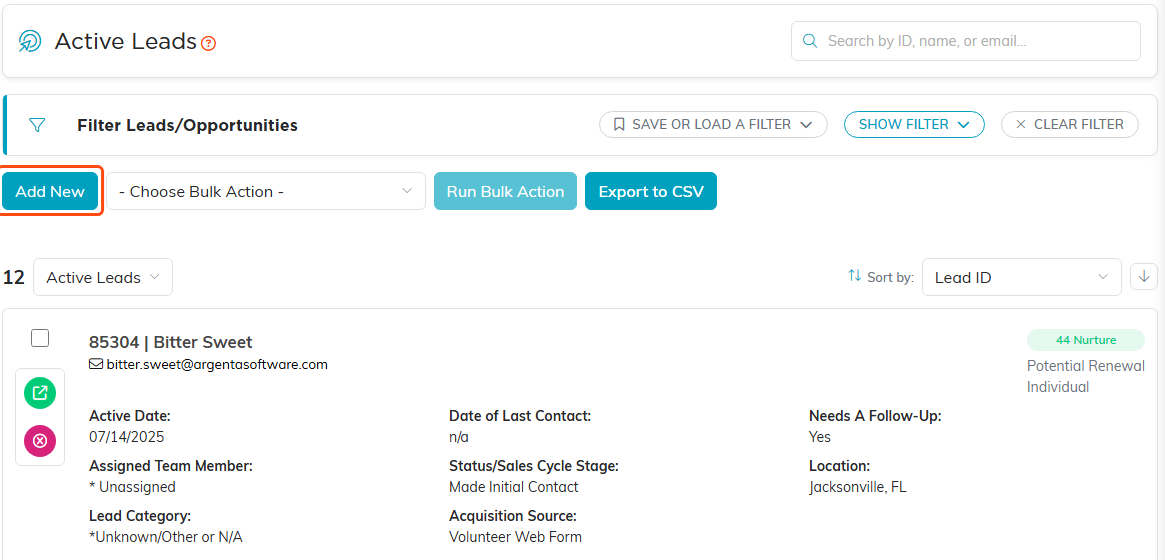
Add New sits above the list. The pill on the right of each row is that lead's score band.
Add a new lead
- Click Add New. The Designate A Constituent As A Lead screen opens.
- Start typing a name in the lookup box and pick the person from the results. Every lead starts from an existing constituent record, which is what keeps duplicates out of your database. Anyone who is already a lead is left out of the results.
- If the person is not in your system yet, click the add icon on the lookup and create them without leaving this screen. See Add Constituent - Individual.
- Click Add Lead & Enter Details. Argenta creates the lead and drops you into the Lead Workspace on Lead Details.
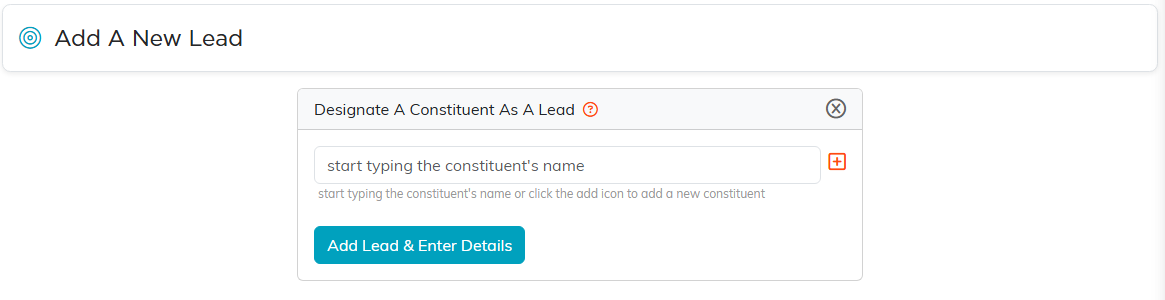
Every lead starts from a constituent who is already in your system, which is what keeps duplicates out.
Bringing in a whole list at once? Use Import & Export under the Settings menu. See Using the Import & Export Hub.
Getting around the Lead Workspace
The Workspace Menu runs across the top of the record. The tabs, in order, are Lead Details, Connections, Sales Cycle, Lead Score, Engagement, Follow-Up, Notifications, Email Log, Contact Log, Lead Files, Lead Notes, and Record Permissions. Some organizations also see a Conversion tab built for their own workflow.
The title bar carries a Save icon, a convert icon, a delete icon, a back arrow, and a back to list icon, and they follow you from tab to tab.

Boxed: the Save icon, then the convert, delete, back, and back to list icons.
Lead Details
The core of the record. Across the top you get:
- Record Level Permissions. Two switches. Set As View Only makes the record read only for everyone except the person who created it, master admins, and anyone you name on the Record Permissions tab. Lock This Record goes further and hides it from everyone else entirely. See How To Set Record Level Permissions.
- The audit line. Who created the record and when, and who touched it last.
- The constituent card. Photo, name, and contact details, right on the tab. Click the photo to change it, or the Constituent ID link to open the full constituent record in a new tab.
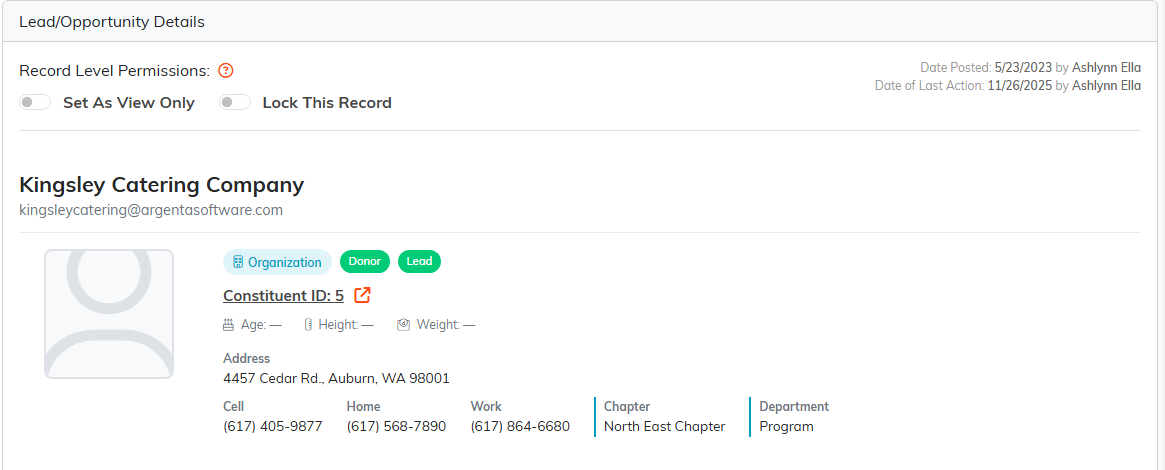
The constituent card sits right on the tab, so you do not have to open the full record to see who you are dealing with.
Under Lead/Opportunity Information you can fill in:
- Student Status. This Is A Student, or This Is NOT A Student.
- Physical Collateral. Whether they asked for something printed and mailed.
- Affiliated Organization or Short Description of Lead/Opportunity. Their organization, or a one line description of the opportunity.
- Active Date. Required. The date this lead should be considered active. Type it or use the calendar.
- Assigned Team Member. Who owns this lead. Changing it emails the new owner.
- Ambassador (Referred By). The constituent who sent them your way.
- Status / Sales Cycle Stage. Where they sit in your pipeline.
- Lead/Opportunity Type. What kind of relationship this could become (potential volunteer, potential donor, potential sale). It is your own note about the destination, and it makes the right conversion obvious later.
- Lead/Opportunity Category. How well qualified they are, such as Information Qualified, Marketing Qualified, or Sales Qualified.
- Acquisition Source. Where they came from.
- Lead Weight. How likely they are to convert (cold, warm, hot).
- Contact Person's Role or Job Title. A signal of how much authority your contact actually has.
- Chapter, Division, and Department, plus District and Precinct for political organizations.
- Referring Web Form. Filled in for you when the lead arrives through one of your public Argenta forms.
- UTM Code. The tag that tells you which campaign or platform sent this traffic.
- Financials. Anything you know about their budget or income.
- Competition. Who else is after this lead, and how you stack up.
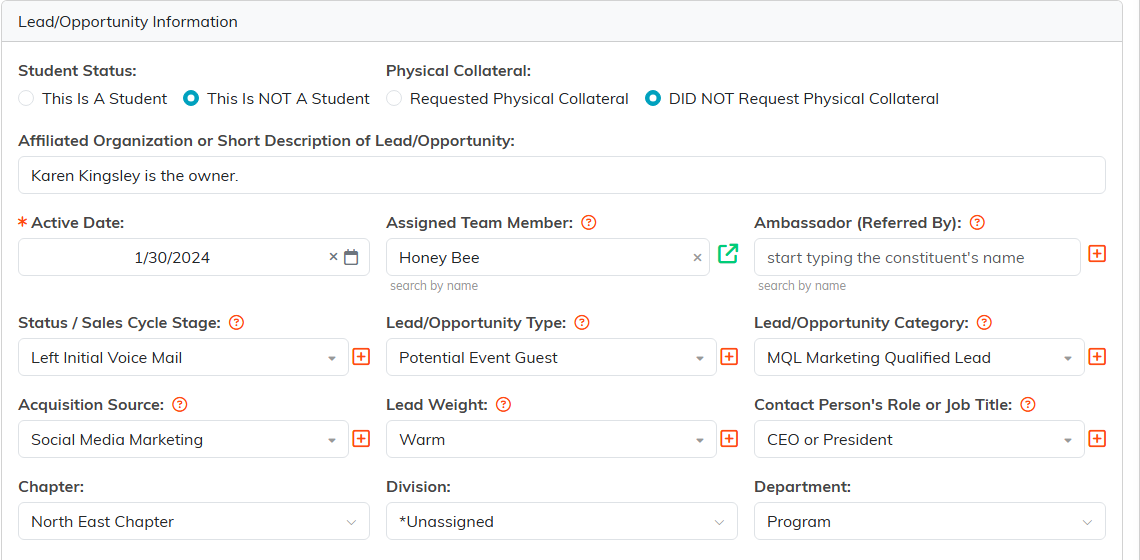
The small orange plus beside a field adds a new classification code without leaving the page.
Status, Type, Category, Source, Weight, and Role all come from your own classification codes. If you are an admin or a master builder, the orange add icon beside the field creates a new value on the spot.
Three of the status codes mark the lead as a lost opportunity in your sales and marketing reports: No Opportunity RIGHT NOW, No Possible Opportunity, and x DO NOT CONTACT. That last one goes further and marks the constituent do not email, do not mail, do not phone, do not text, and do not solicit.
Finish with Save All Changes to stay in the record or Save All & Exit Record to go back to the list. Convert Lead..., Delete This Record, and Cancel & Exit sit in the same row.

This row sits at the foot of the tab.
Connections
Two panels, Associated Campaigns and Associated Programs. Start typing a campaign title or program name to connect one, and use the remove icon to disconnect it. Removing a connection never deletes the campaign or program itself.
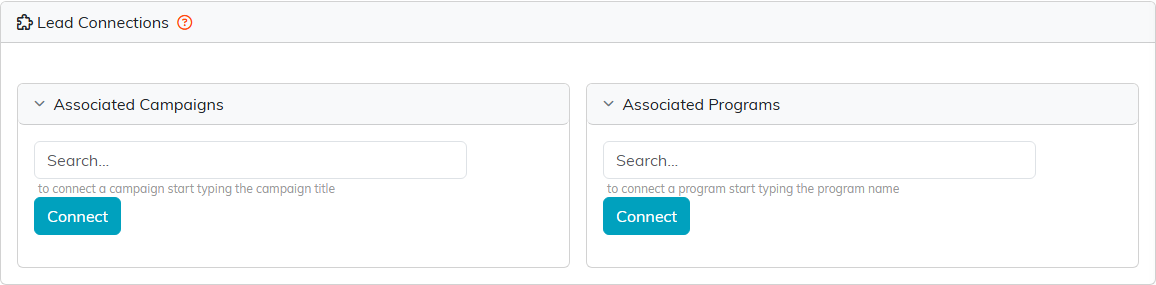
Type into either box to connect one. Disconnecting it here never deletes the campaign or program.
Sales Cycle
Everything about how the opportunity is progressing: Status / Sales Cycle Stage, Lead Category, Lead Weight, Acquisition Source, Last Date of Contact, Is Follow-Up Needed? (with a Create A Follow-Up link right beside it), Acquired By Campaign, Date Converted, and a Final Outcome write up. Date Converted only opens up once the status is Successfully Converted.
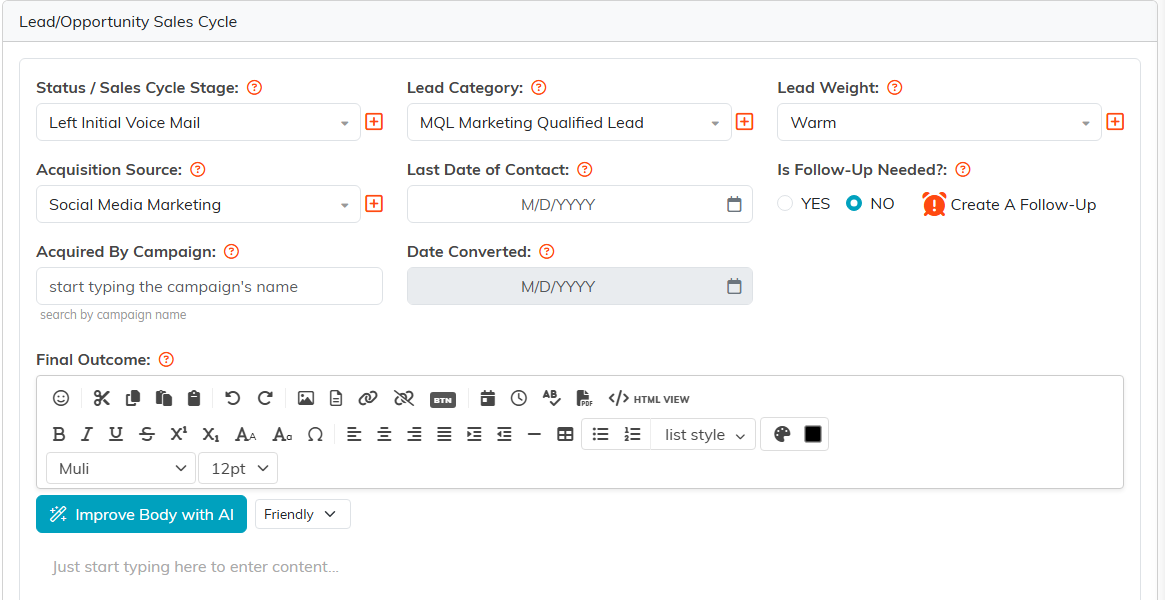
Date Converted stays locked until the status is Successfully Converted.
Lead Score
A 0 to 100 score built from four parts, Fit, Intent, Engagement, and Urgency, each shown with its weight and a plain English explanation of how it got there. The band (Hot, Warm, Nurture, Dormant) also appears as a pill on the lead list so you can spot the good ones at a glance. Scores refresh nightly and after every save, and Recalculate Now forces a fresh one. If you do not see scores, an administrator can switch scoring on under Subscription > Lead Scoring.
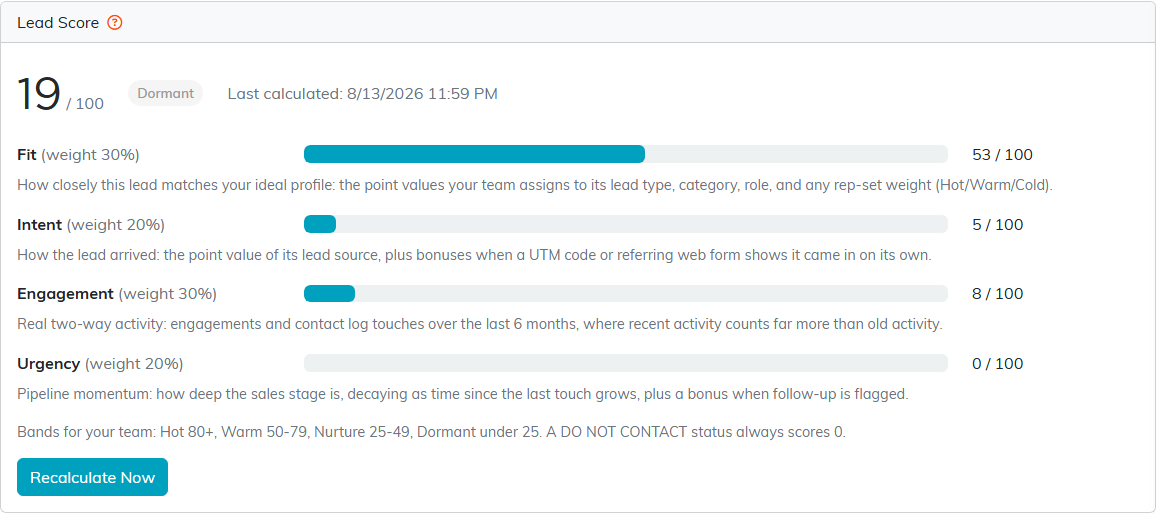
Each of the four parts shows its weight and how it got there, so a low score tells you where the work is.
Engagement
Every logged interaction with this lead. Add New records another one, and Export To CSV takes the list with you.
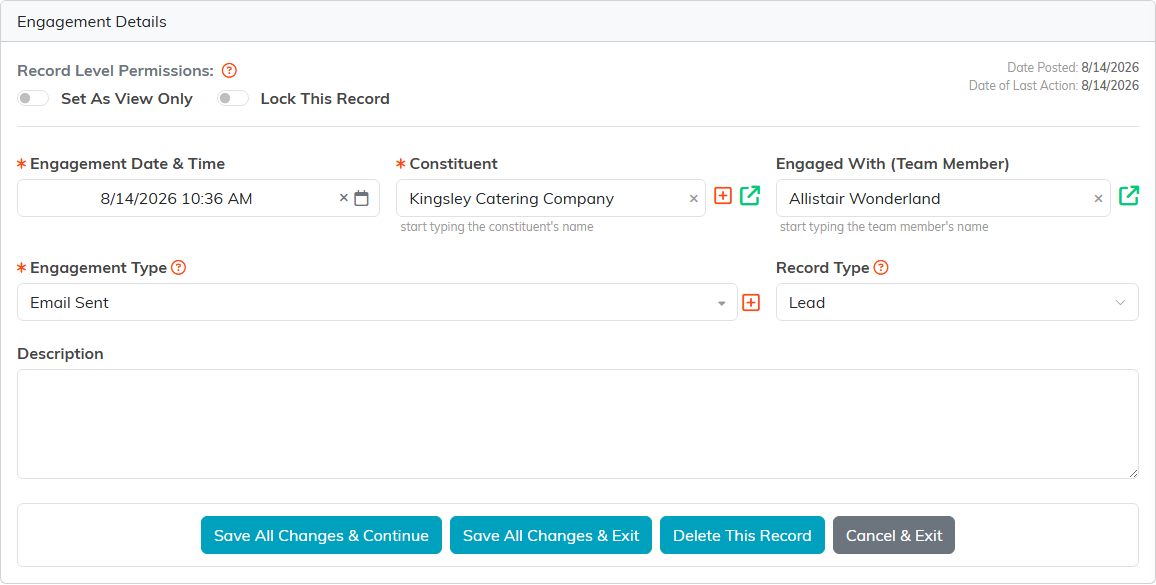
Add New opens this. Engagement Type comes from your own classification codes.
Follow-Up
Schedule as many reminders as you need. Click Add New, then set the Team Member, a Follow-Up Reason, and the Follow-Up Date & Time (all three required). The team member's email is filled in for you. You can also add a Notification Date & Time, send a copy to a second email address, and write up the Follow-Up Outcome once it happens. See How to Use Follow-Up Tasks to Track Action Items.

Each follow-up carries who owns it and when the reminder goes out.
Notifications
Send an email tied to this lead. Click Add New, then fill in Date/Time To Send (or tick Send immediately), Send To Email, Send From Email, a Subject, and the Message. Click Save Notification to schedule or send it. Everything you have sent stays listed underneath.
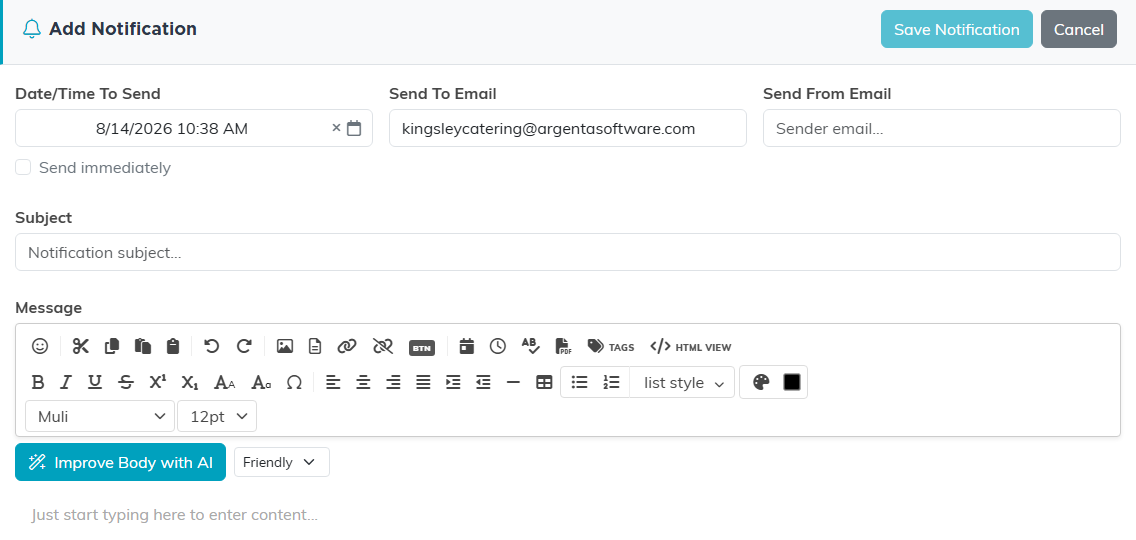
Ticking Send immediately sends it the moment you save.
Email Log
Every email Argenta has sent this person. Narrow it by date range or search the contents.
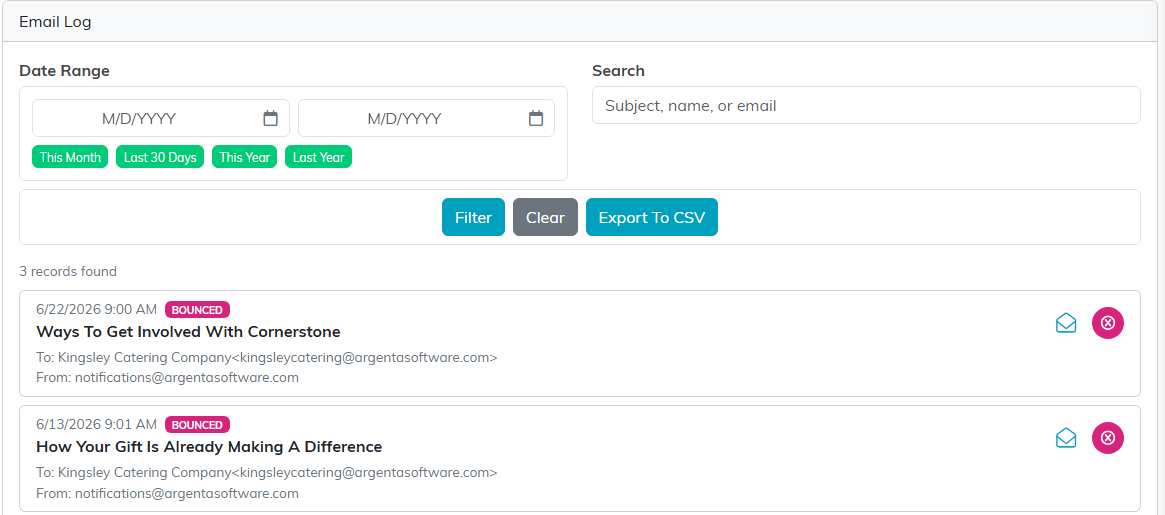
The tag on each row tells you whether it was opened or bounced.
Contact Log
A running record of your conversations. Add New asks for the Contact Date, the Team Member, Mark Contact As An Engagement?, and a Contact Description. Answering that engagement question with a type logs an engagement at the same time, which saves you doing it twice. See How To Use The Contact Log & Follow-Up Features.
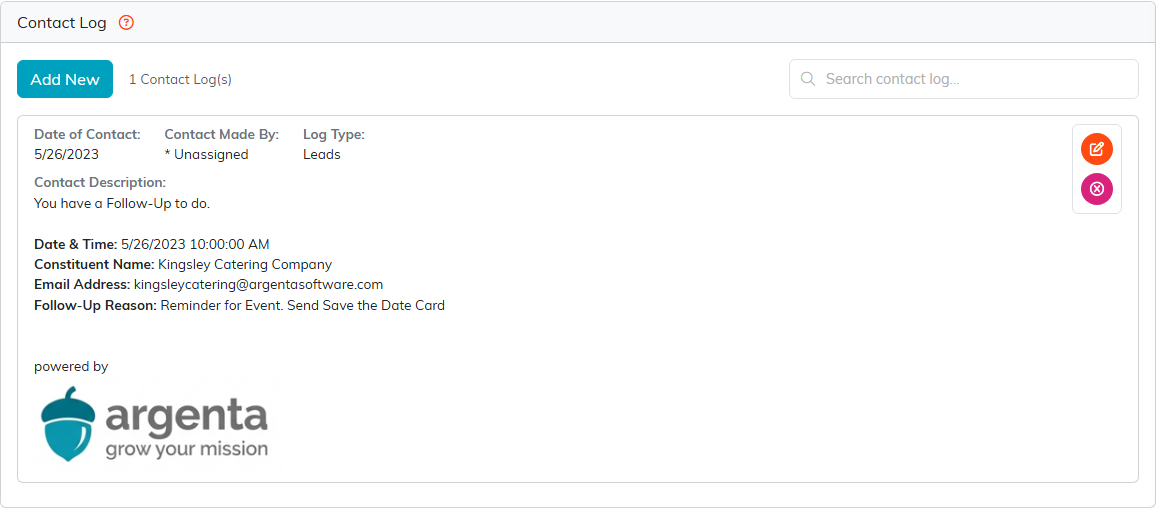
A contact log entry can double as an engagement, so you do not record the same touch twice.
Lead Files
The Related Files panel. Drag files onto the drop zone or click it to browse, then click Save The Selected File(s) to finish the upload. There is no limit on how many you attach.
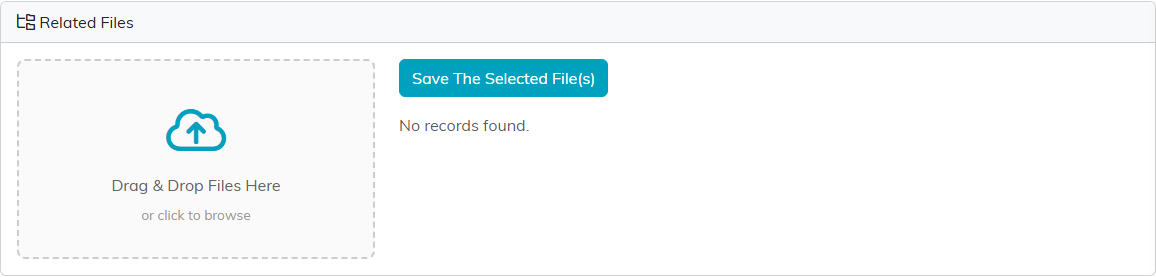
Drop files on the zone or click it to browse, then save.
Lead Notes
Click Add A New Note, write as much as you want in the editor, and click Add This Note. Notes are dated and stamped with your name, so the record reads as a history rather than a wall of text.
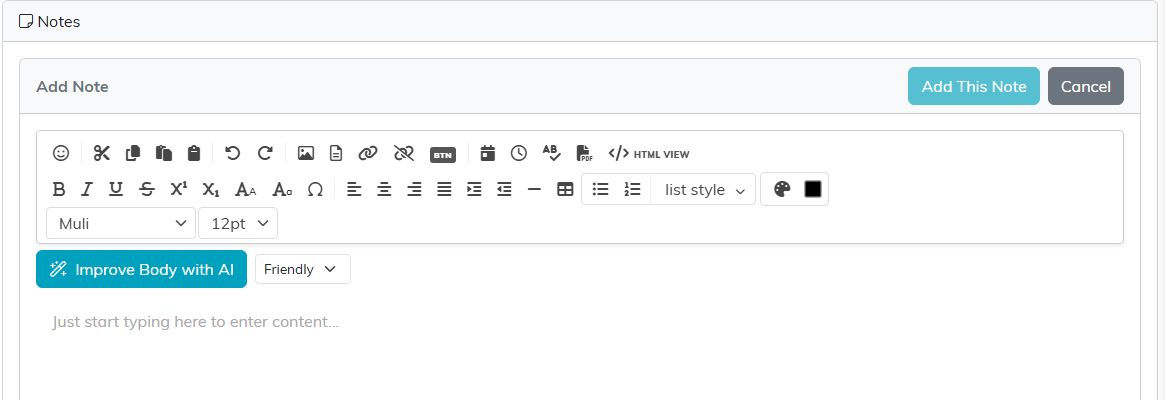
Notes are stamped with your name and the date.
Record Permissions
Two panels that decide who gets past the switches on Lead Details. View Only Access lists the people who can still edit a view only record. Locked Record Access lists the people who can still see a locked one. In either panel, type a name into Add User, pick the person, and click Add. Master admins always have access.
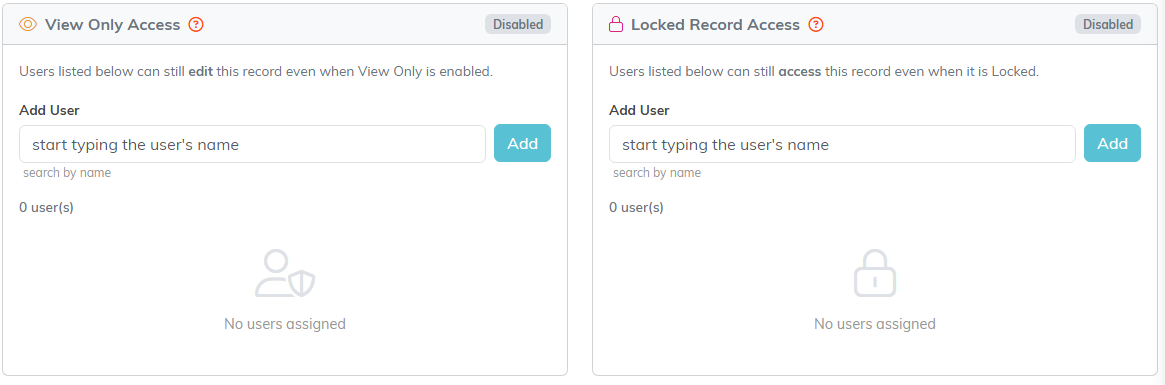
These two lists decide who gets past the switches you set on Lead Details.
