Knowledge Base Article
How to Use The Bulk Update Leads Feature
Updating leads one at a time is fine for a handful. When you need to reassign forty leads to a new team member or drop a filtered set into a mailing list, bulk actions do it in one pass.
The three steps
Every bulk update follows the same shape: narrow the list, select the records, run the action.
1. Narrow the list
- Go to Marketing & Engagement > Leads/Opportunities.
- Click Show Filter to open the filter panel. You can narrow by Lead/Opportunity Status, Lead/Opportunity Type, Team Member Assigned, Category, Lead Weight, Acquisition Source, Industry Type, Organization Size, State, Chapter, Division, Department, Constituent Type, Other Constituent Affiliations, Is Student, Needs Follow-Up, Has A UTM Code, and three date ranges (Date Lead Was Created, Active Date, Date of Last Contact). Political organizations also get District and Precinct, and teams using lead scoring get a Lead Score band.
- Click Apply Filter. Clear Filter resets everything.
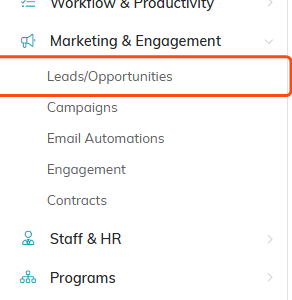
Leads/Opportunities sits under Marketing & Engagement.
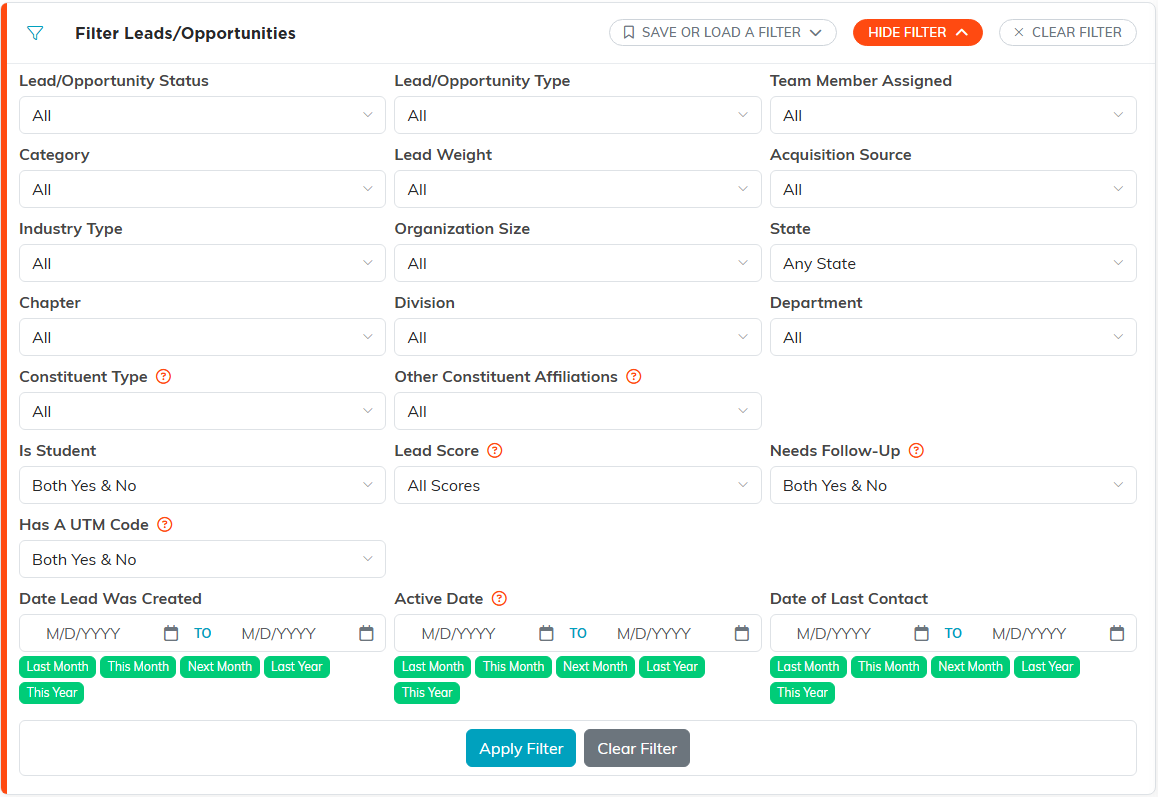
Show Filter opens the whole set. Apply Filter runs it.
2. Select the records
Tick the box on each record you want, or use the selection helpers at the top of the - Choose Bulk Action - dropdown:
- Select All Records That Meet The Current Filter Criteria, which reaches across every page, not just the one you are looking at
- Unselect All Records
- Select Records Only on This Page
- Unselect Records Only on This Page
These four take effect the moment you pick them. They do not need the Run Bulk Action button. A running count of how many records are selected shows next to the dropdown.
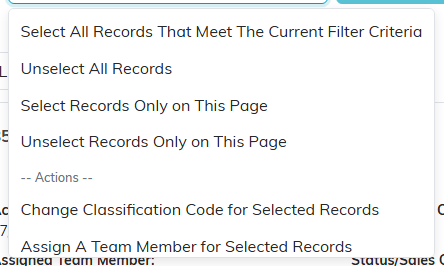
The four selection helpers sit above the divider. They take effect the moment you pick one.

The running count sits right next to the button.
3. Run the action
Open the - Choose Bulk Action - dropdown again, pick what you want to do, then click Run Bulk Action. The available actions are:
- Change Classification Code for Selected Records. Pick the code type (status, type, category, weight, source, role) and the new value.
- Assign A Team Member for Selected Records. Hand a batch of leads to one person.
- Add Engagement for Selected Records. Log the same interaction against all of them, useful after an event or a mailing.
- Add A Note for Selected Records. One note, written onto every selected record; locked records, and records set to View Only for you, are skipped unless you are a Master Admin, and Argenta tells you how many.
- Add Selected Records To Constituent Group
- Add Selected Records To Event Participants/Guests (only for users with the Event Manager permission, and for Master Admins)
- Add Selected Records To A Campaign
- Unsubscribe Selected Leads. See How To Unsubscribe A Lead.
- Create A New Mailroom List With Selected Records
- Add Selected Records To An Existing Mailroom List (these two Mail Room actions only appear for users with the Mail Room Manager permission, and for Master Admins)
- Delete All Selected & Unlocked Records
Most actions open a window first so you can confirm the details, such as which team member, which classification code, or which campaign. Confirm there and the change is written to every selected record, except that the note, engagement, classification code and team member actions skip records that are locked, or set to View Only for you, unless you are a Master Admin, and tell you how many they skipped.
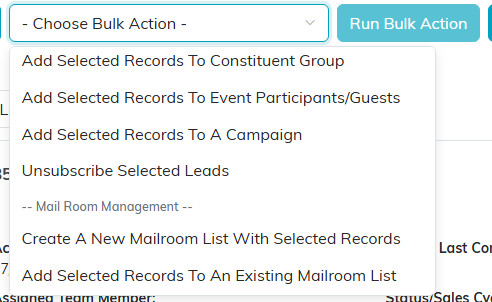
The actions themselves sit below the divider, grouped as you scroll.
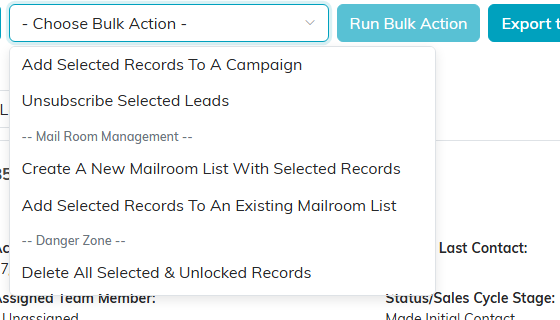
Bulk delete sits on its own under a Danger Zone divider.
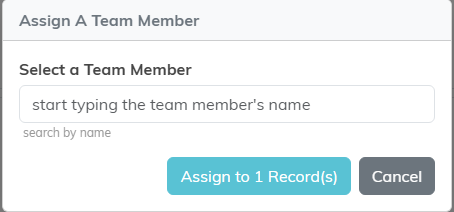
Most actions open a window like this one so you can confirm the details first.
Worth knowing
- Bulk delete cannot be undone. It asks you to confirm, shows a progress bar as it works, and reports how many records it removed.
- Locked records are skipped by the bulk delete and listed back to you so you know what was left behind.
- One action at a time. If you need two different changes, run the first, then re-select and run the second.
- Check your filter before you select all. "Select all records that meet the current filter criteria" means exactly that, including the pages you have not looked at.
For the list itself and what you can do with a single lead, see Overview, Working with Leads.
