Knowledge Base Article
Overview, Working with Leads
Leads (also called opportunities) are the prospective supporters, customers, and contacts your organization is cultivating. This article is the tour of the Leads/Opportunities screen: finding records, opening them, editing, deleting, and working on a batch at once.
Getting there
Choose Marketing & Engagement > Leads/Opportunities or Constituents (CRM) > Leads from the main menu. Both open the same list. You need the Marketing Manager permission or an admin account.
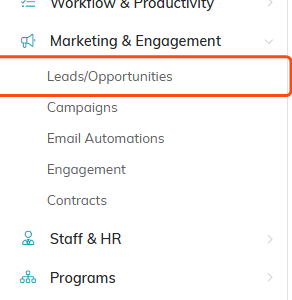
Leads/Opportunities under Marketing & Engagement. Constituents (CRM) > Leads opens the same list.
The lead list
The list opens on Active Leads, which is everything except the closed out statuses (converted, no possible opportunity, no opportunity right now, do not contact). Switch that dropdown to All Leads to see the whole file.
Each card shows the lead ID and name, the email address, the lead type, the active date, date of last contact, whether a follow up is needed, the assigned team member, the status, location, category, acquisition source, other affiliations, and the chapter, division, and department. Teams using lead scoring also get a colored score pill.
To find something specific:
- Search by ID, name, or email address.
- Show Filter opens the full filter panel: status, type, team member assigned, category, lead weight, acquisition source, industry type, organization size, state, chapter, division, department, constituent type, other constituent affiliations, is student, needs follow up, has a UTM code, and date ranges for date created, active date, and date of last contact. Political organizations also get district and precinct. Click Apply Filter to run it.
- Sort by lead ID, lead score, name, date created, active date, date of last contact, status, category, assigned team member, or any of the organizational segments.
Add New starts a new lead. Export to CSV downloads whatever your current filter is showing, and appears for users with export permission.

Search, the filter bar, and the Add New, bulk action and export controls.
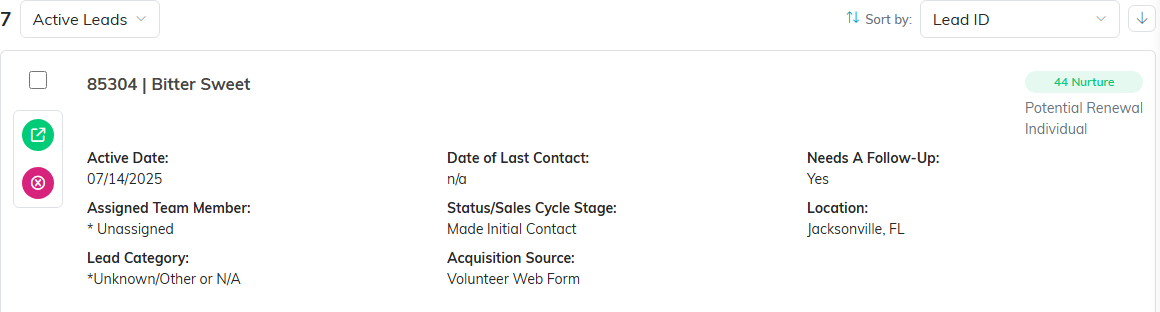
One lead card. The green icon opens the record, the pink one deletes it.
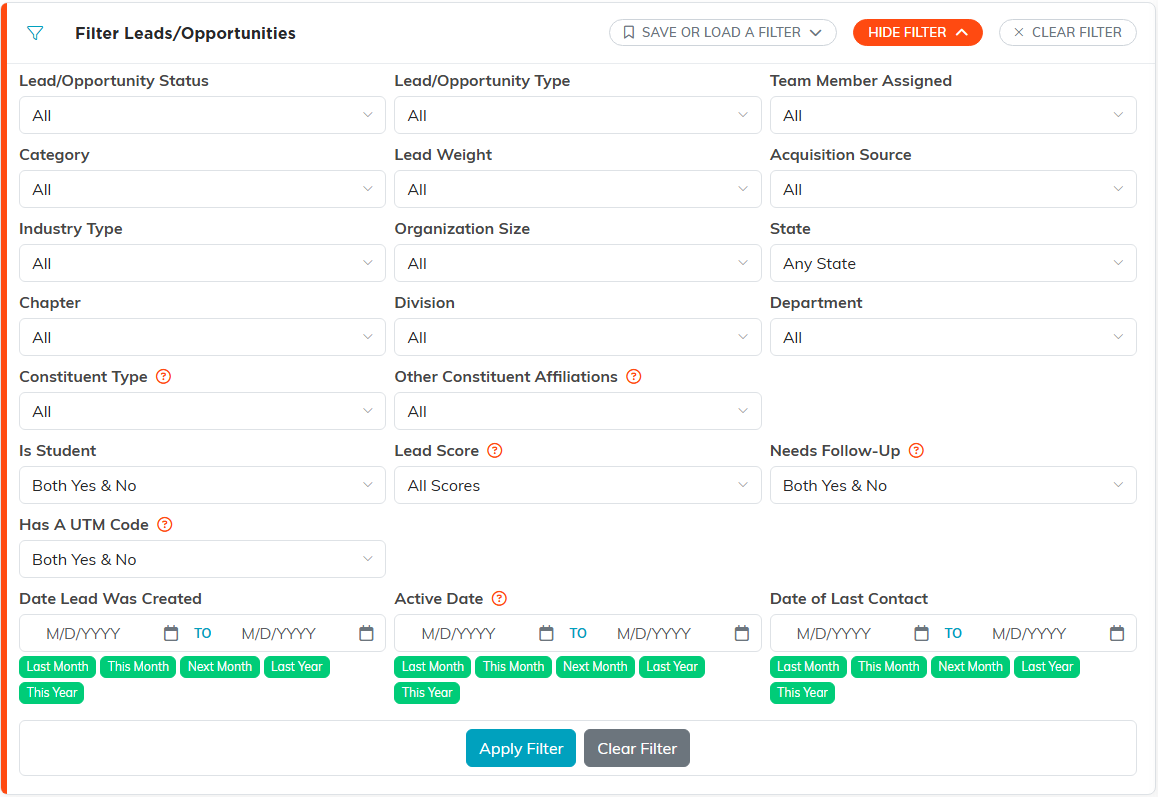
Show Filter opens the whole panel. Apply Filter runs it.
Open a lead
Click the green open icon beside the record. That opens the Lead Workspace, starting on Lead Details.
At the top you get the record's audit line (who created it, who touched it last) and the constituent card with the photo, name, and key contact details. Click the photo to change it. Click the Constituent ID link to open the person's full constituent record in a new browser tab.
Alongside Lead Details, the workspace holds Connections, Sales Cycle, Lead Score, Engagement, Follow-Up, Notifications, Email Log, Contact Log, Lead Files, Lead Notes, and Record Permissions. Some organizations also see a Conversion tab set up for their own workflow. Every tab is walked through in Add Leads/Opportunities.

The Lead Workspace opens on Lead Details, with the rest of the tabs across the top.
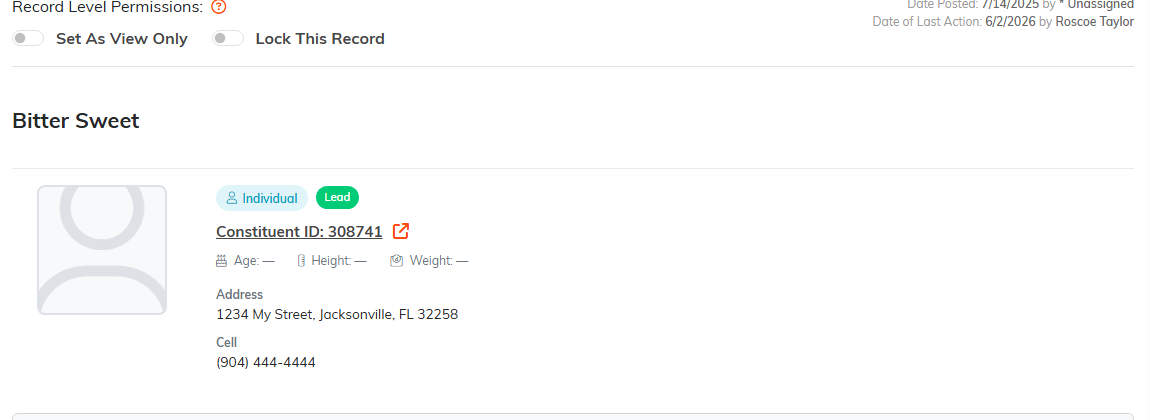
The audit line, the two permission switches, and the constituent card underneath.
Edit a lead
Below the constituent card, click into any field or open any dropdown and change it. When you are done, click Save All Changes to save and keep working, or Save All & Exit Record to save and go back to the list. The Save icon (a floppy disk) in the title bar does the same thing from any tab.
A couple of edits do more than they look like they do. Changing the assigned team member emails the new owner. Setting the status to a closed out value writes the lead into your lost opportunity reporting, and x DO NOT CONTACT also flags the constituent do not email, mail, phone, text, or solicit.

The buttons at the bottom of the record.
Delete a lead
Delete from the list with the pink delete icon beside the record, or from inside the record with Delete This Record. Either way a window asks you to confirm.
Deleting a lead removes the lead record and everything hanging off it: its notes, files, engagements, contact log entries, and its campaign and program connections. The person's constituent record is not deleted, so anything else they are to your organization stays intact, and a copy of the lead is kept so the Leads History Report still counts it. This is final and cannot be undone, so be sure before you confirm.
Locked records cannot be deleted, from the list or from the workspace, which keeps a locked record from being wiped out by accident. Argenta shows a message pointing you at the workspace; what you do once you are there is untick Lock This Record, then delete. A Master Admin can delete a locked record without unlocking it.
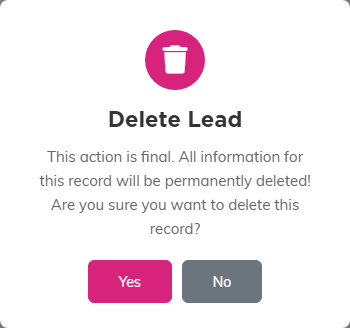
The confirmation you get either way. There is no undo after this.
Bulk actions
Filter the list down, tick the records you want, choose an option from the - Choose Bulk Action - dropdown, then click Run Bulk Action. The dropdown also carries selection helpers (Select All Records That Meet The Current Filter Criteria, Unselect All Records, Select Records Only on This Page, Unselect Records Only on This Page) which take effect the moment you pick them.
The available actions are:
- Change Classification Code for Selected Records. Choose the code type and the new value to apply.
- Assign A Team Member for Selected Records. Choose the team member to take them on.
- Add Engagement for Selected Records. Record one engagement against every selected lead.
- Add A Note for Selected Records. Type a note that gets added to each record.
- Add Selected Records To Constituent Group. Search for and pick the group.
- Add Selected Records To Event Participants/Guests. Pick the event. This one only appears for users with the Event Manager permission, and for Master Admins.
- Add Selected Records To A Campaign. Search for and pick the campaign.
- Unsubscribe Selected Leads. Marks them do not email, do not text, and do not solicit, after a confirmation.
- Create A New Mailroom List With Selected Records. Builds a brand new mail room list from the selection.
- Add Selected Records To An Existing Mailroom List. Search for and pick the list. These Mail Room actions only appear for users with the Mail Room Manager permission, and for Master Admins.
- Delete All Selected & Unlocked Records. Confirms first, skips locked records, and cannot be undone.
The step by step version lives in How to Use The Bulk Update Leads Feature.
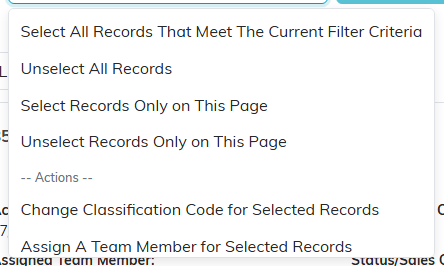
The dropdown, with the four selection helpers above the actions themselves.
