Knowledge Base Article
Add Material Distributions
A material distribution records your team handing donated goods to a recipient: a food box, a bag of clothing, school supplies, emergency supplies after a storm. It captures who received what and when, and it takes the goods out of your material inventory as you record them.
Start the distribution
Choose Materials Management > Material Distributions from the main menu. The list shows every distribution you have recorded. Click Add New to open the Add A New Material Distribution page.
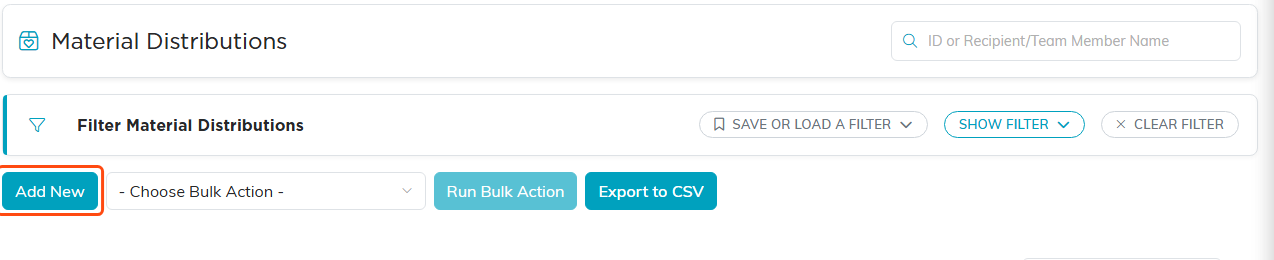
Add New opens the Add A New Material Distribution page.
All three fields here are required:
- Distribution Date. It starts on today's date; change it if the goods went out on a different day.
- Recipient. Start typing the recipient's name to find them. If they are not set up yet, use the add icon on the field to designate one without leaving the page. Only constituents who have been designated as recipients appear here, so for the full picture see Add Material Recipients.
- Distributed By. The team member who handled it. Start typing their name. Only active team members can be chosen.
Click Add & Enter Items. Argenta creates the distribution and opens it in the Material Distribution Workspace, which has six pages: Distribution Details, Distribution Items, Payments, Distribution Files, Distribution Notes, and Record Permissions.
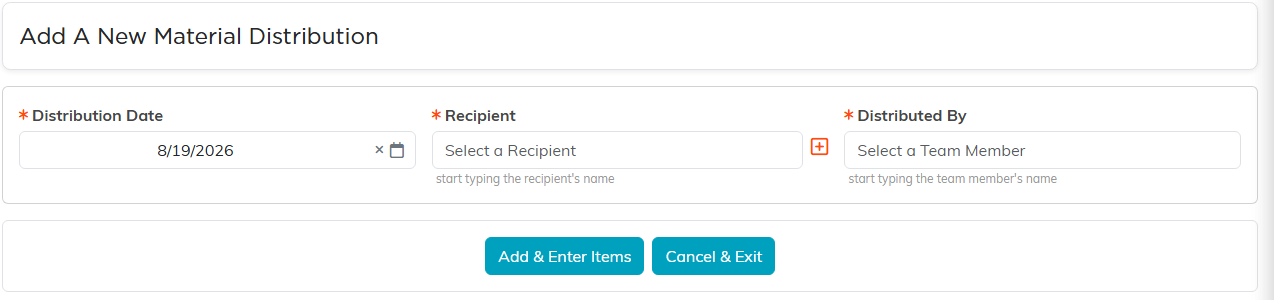
All three fields are required before you can go on.

The workspace menu carries the six pages of the distribution.
Record the items you handed out
Open Distribution Items. As the page says on screen, to add an item to this distribution you just enter a quantity and save. There is no item picker and no add-item button.
- Find the item in the list. Search by item ID or name if the list is long.
- Check the Available column, which shows how many you have on hand right now.
- Type the number handed out under QTY Distributed.
- Save the line with its save icon, or use Save All Changes to save every line you changed at once.
Saving takes the goods out of inventory automatically, so you never adjust the item's on-hand count separately. Two things to know:
- You cannot distribute more than you have. Argenta stops that line with a Not Enough Inventory message asking you to check the quantity on hand. Your other lines still save, and the summary tells you how many were updated, removed, or skipped.
- Clearing a quantity to 0 removes the item from the distribution and returns that stock to inventory.
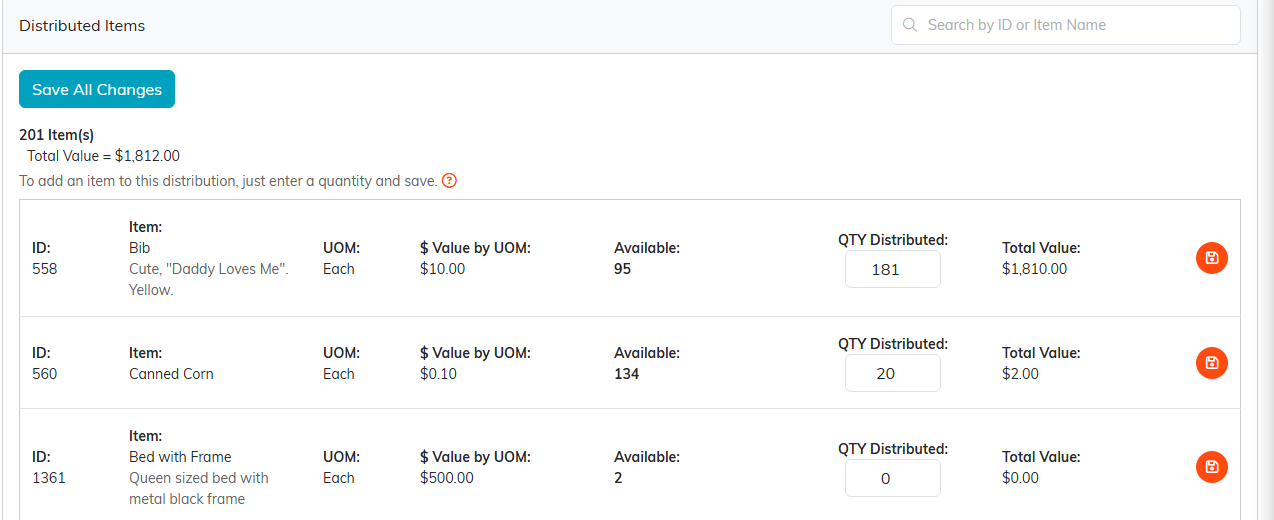
Available tells you what is on hand before you type a quantity.
Finish Distribution Details
The date, recipient, and team member carry over from the previous screen, and you can correct any of them here. Add the rest:
- Distribution Status, Distribution Type, and Distribution Category. All three are your own classification codes, so the choices are whatever your team has set up. Use the add icon on the field to create a new one.
- Chapter, Division, and Department, when the distribution belongs to one part of your organization or you want to limit who can see it. Political organizations also get District and Precinct; choose the district first, since it drives the precinct list.
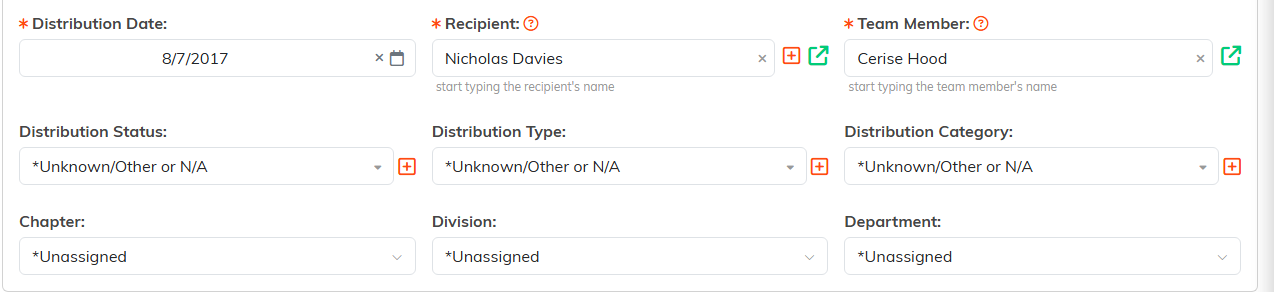
The date, recipient, and team member carry over and can be corrected here.
At the top of the page, Set As View Only stops other team members editing this record and Lock This Record stops them opening it. The person who created the record, master admins, and anyone named on Record Permissions keep their access either way.

Both switches sit at the top of the details page.
Save with Save All Changes & Continue or Save All Changes & Exit.

The save row at the foot of Distribution Details.
If the recipient pays something
For a sliding-scale fee, a copay, or any amount the recipient contributes, open the Payments page and click Add A New Payment. The page keeps a running count and total of every payment tied to that distribution, and you can export the list.
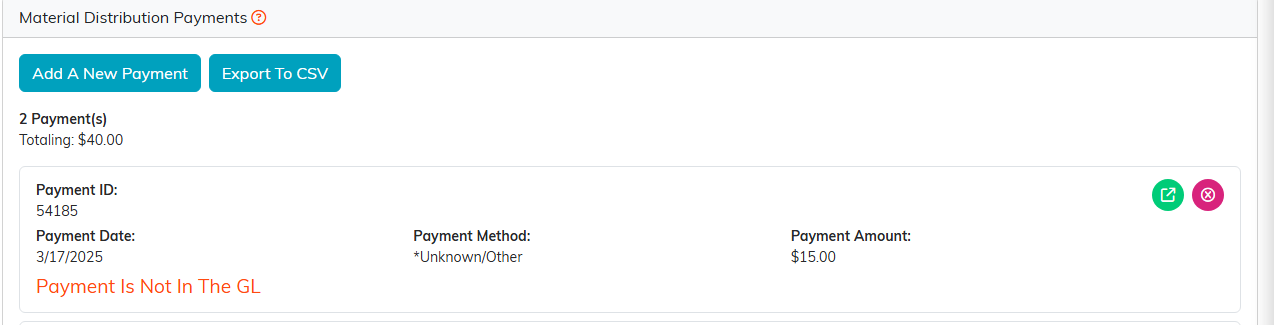
The Payments page keeps a count and total for the distribution.
Files, notes, and permissions
- Distribution Files for a scanned distribution sheet or a signed receipt. Save the record first. See Add Related Files.
- Distribution Notes for anything your team should know. See Add A Note to the Notes Section.
- Record Permissions to name the team members who can still edit or open a view-only or locked record. Start typing a user's name and click Add.
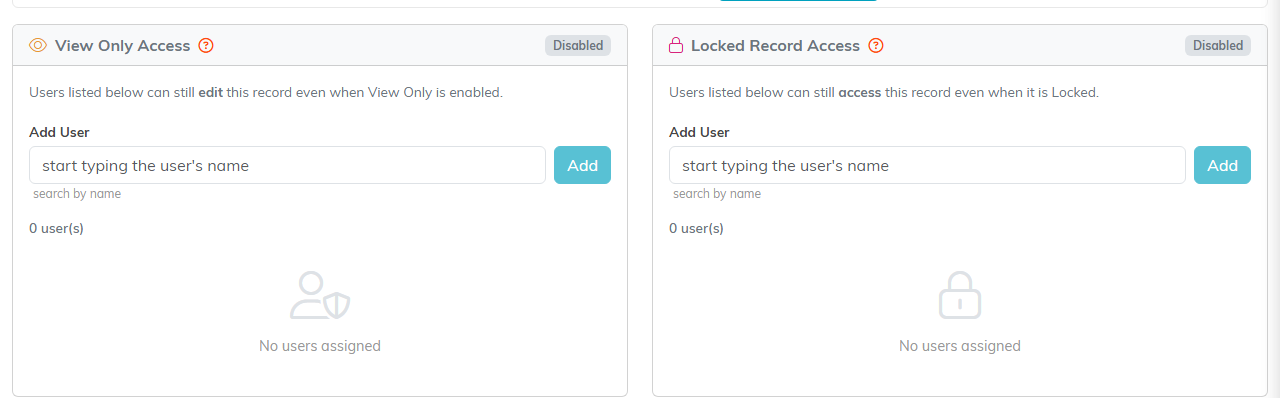
Name the team members who keep access on a view-only or locked record.
Report on your distributions
- Material Distribution Report for overall activity.
- Materials Distribution Detail Report for the line-by-line view.
- Material Distributions Demographics Report for who you served.
- Material Distribution Types Report for a breakdown by type.
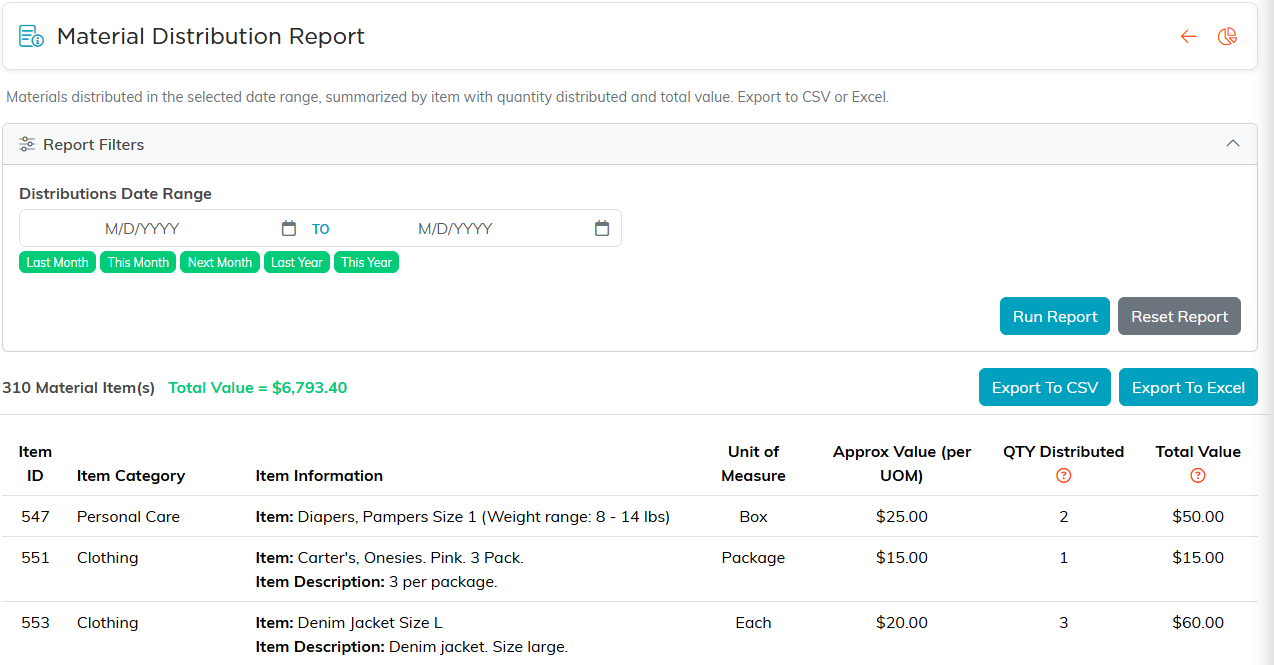
The Material Distribution Report totals what went out by item.
To bring goods in rather than send them out, see Add Material Donations.
