Knowledge Base Article
Add Misc. Payments and Income
Use Payments & Income to record other income that does not belong anywhere else, like interest from the bank or a non-fiscal-donation source.
Do not use it for fiscal donations (see Add Fiscal Donations) or for deposits (see How To Manage Deposits). Grants are your call: list them here or as donations/grants.
To add one, select General Financials > Payments & Income in the left sidebar. The list shows your entries. Click Add New and an Add A New Payment box opens asking for four required things: Who Made The Payment, the Payment Type, the Payment Date and the Amount. Payment Type decides which list the payment turns up in afterwards. Coming in on the unfiltered list there is no type to inherit, so it starts at *Unknown/Other or N/A, and a payment left on that does not appear under any of the named types. Fill those in and click Add Payment & Enter Details, and the payment is created with the Payment Workspace open on it. Cancel & Exit closes the box without adding anything.
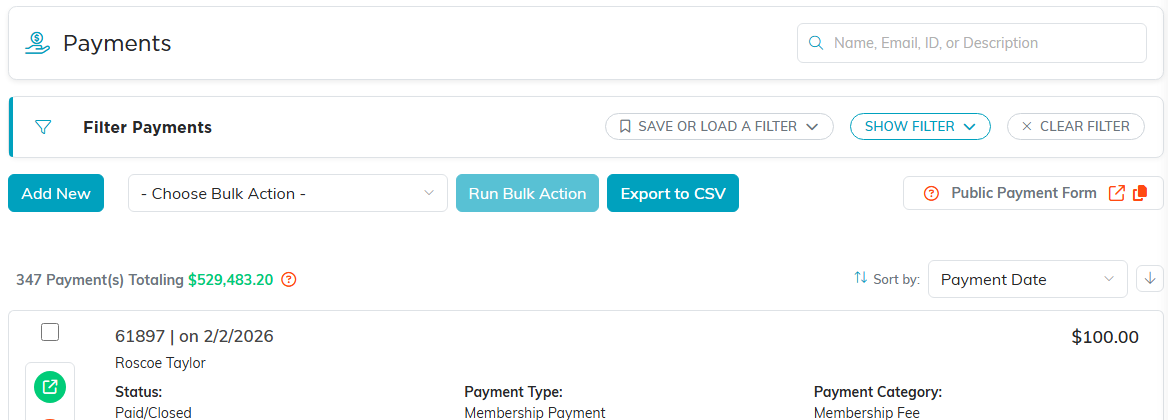
The Payments & Income list.
The workspace has six tabs: Payment Details, Connections, Refunds, Payment Files, Payment Notes, and Record Permissions.

The six tabs in the Payment Workspace.
1. Payment Details
- Record Level Permissions – the Set As View Only and Lock This Record switches. Either way the record stays available to the creator, master admins, and anyone granted access on the Record Permissions tab.
- Add To General Journal – turn this on to post the payment to your books, then choose the Fund, the Deposit / Bank Account Used it was received into, and the Account to record it against. (Argenta uses double-entry, fund accounting.)
- Paid by Constituent – use the lookup to find who made the payment. If they are not in your system yet, add them with the add (+) icon (required).
- Payment Date – defaults to today; change it if needed (required).
- Payment Amount (required).
- Payment Method – how you received it (check, cash, card, and so on).
- Payment Status, Payment Type, and Payment Category – classify the payment.
- Check #/Reference # and Payment Description – optional details.
- Chapter / Division / Department (and District / Precinct for political teams) – tie the payment to part of your organization.
- You can also mark that a receipt was given, or turn on make this a recurring payment to repeat it on a schedule.
- Convert This Payment To Another Payment Method – if a payment made online should have been an invoice payment or a mission trip payment, pick the right type and click Trigger Conversion. Once converted it moves out of Payments & Income into the right section.
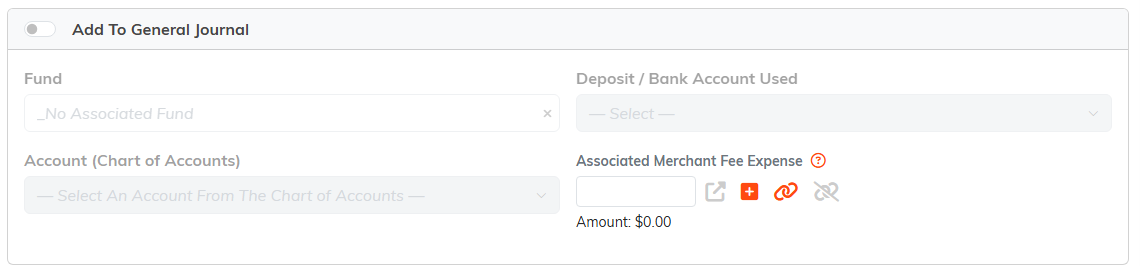
The Fund, Deposit Account and Account fields stay greyed out until you turn the switch on.

The orange plus beside the lookup adds a constituent who is not in your system yet.

The fields that classify the payment.

Chapter, Division and Department.

Make this a recurring payment, and the receipt controls below it.

Pick the right classification, then Trigger Conversion.
Save with Save All & Continue or Save All & Exit. You can also use Copy & Add New or Delete This Record. A payment that came in through Stripe will not delete.

The buttons at the bottom of the record.
2. Connections
Link the payment to related records using the lookups on this tab, then save.
3. Refunds
Any refunds against this payment show here. Add one with the refund panel and enter the refund details (category, date, amount, method, and whether to post it to your financials). For the full walkthrough, see How To Manage Refunds in the Argenta General Financials Module.
4. Payment Files
Attach related files to the payment (save the payment first). See Add Related Files.
5. Payment Notes
Add notes to the payment. See Add A Note To The Notes Section.
6. Record Permissions
This tab controls who can see and edit the payment. View Only Access lists the users who can still edit it when it is view only; Locked Record Access lists the users who can view or edit it when it is locked. In either panel, start typing a user's name in the Add User box, select it, and click Add. Master admins and the creator always keep access.
When Argenta will not let you delete a payment
A payment that came in through Stripe will not delete. To reverse one, open the Refunds tab on the payment and issue the refund there. Argenta sends it to Stripe for you and records it against the payment. See How To Manage Refunds in the Argenta General Financials Module.
