Knowledge Base Article
Working With Volunteer Task Groups
Volunteer tasks can be grouped together so they show as one event on your public volunteer task calendar. This article covers creating a task group and filling in its details. To put tasks inside the group, see Add Volunteer Tasks To A Task Group.
Create a task group
- In the menu on the left, open Volunteerism and choose Volunteer Task Groups.
- Click Add A New Task Group above the list.
- Enter a Task Group Title. It is required and holds up to 140 characters.
- Click Add & Enter Details. Nothing is saved until you do, and the workspace for your new group opens next.
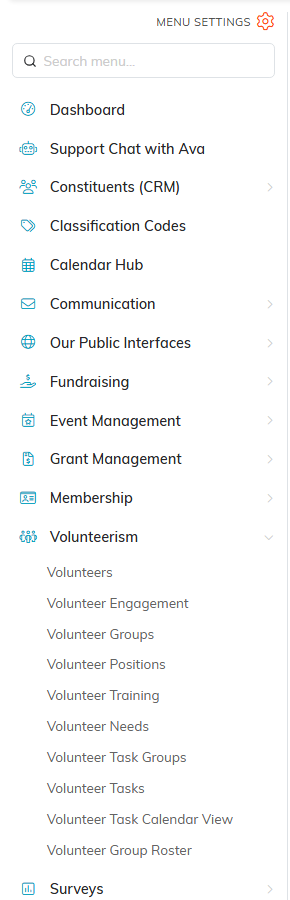
Step 1. Volunteer Task Groups sits under Volunteerism.
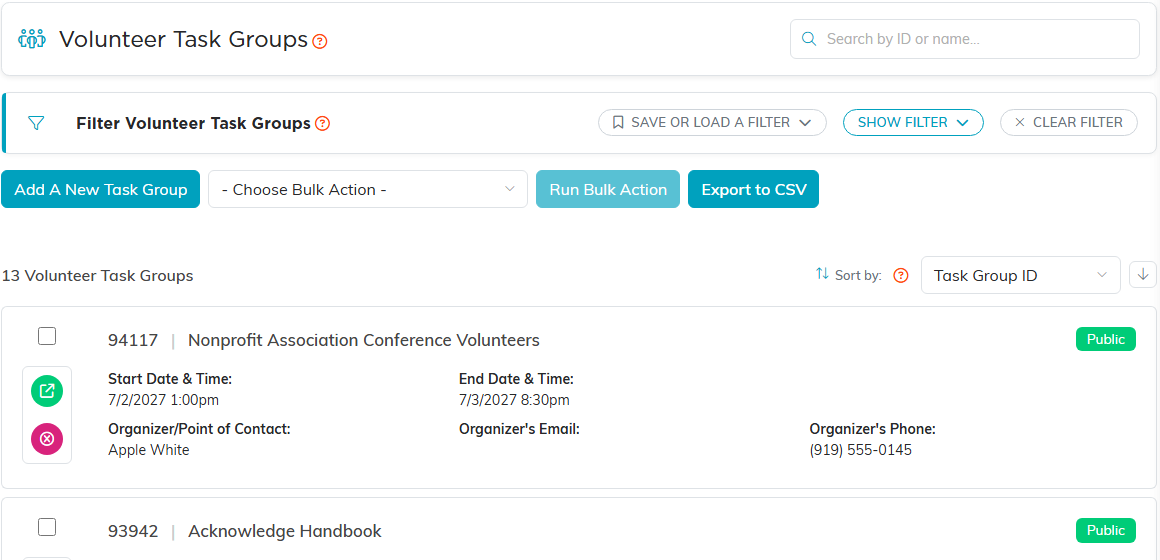
Step 2. Add A New Task Group.
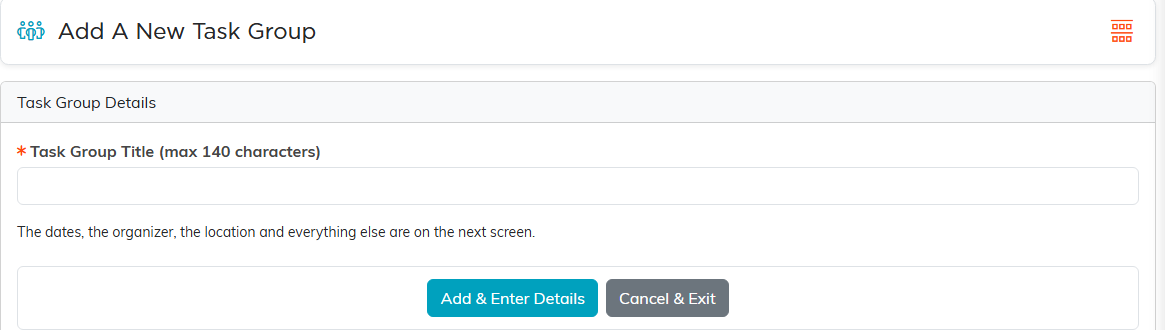
Steps 3 and 4. The title is all you need to start.
The task group workspace
The group opens on Task Group Details. The other tabs across the top hold the tasks in the group, the volunteer roster, the public sign-up form, files, notes and record permissions. Each of those pages has a short Show Me How To Use This Page video beside the group's name; click it to watch, and use its chapters to jump to the part you need.

The workspace menu. Picking a tab saves your changes before it moves.
Fill in the details
- Task Group is Active - Display on the Public Calendar is the switch that puts the group on your public volunteer task calendar. Turn it off to keep the group private.
- Task Group Title is the name you entered when you added the group, and you can change it here. It shows at the top of the group's page on the calendar, so it is worth choosing well. The counter under the box tells you how many characters you have left out of 140.
- Start Date & Time and End Date & Time cover the whole group, not the individual tasks. Both are required, so a new group asks for them the first time you save it. For a week-long event, this is the span of the event and each task keeps its own schedule. Type a date or pick one from the calendar icon, and use the small x to clear it.
- Group Organizer/Contact is the single point of contact for the group. Start typing a constituent's name and pick them from the list, or use the orange plus icon to add someone new.
- Chapter, Division and Department place the group inside your organization's structure.
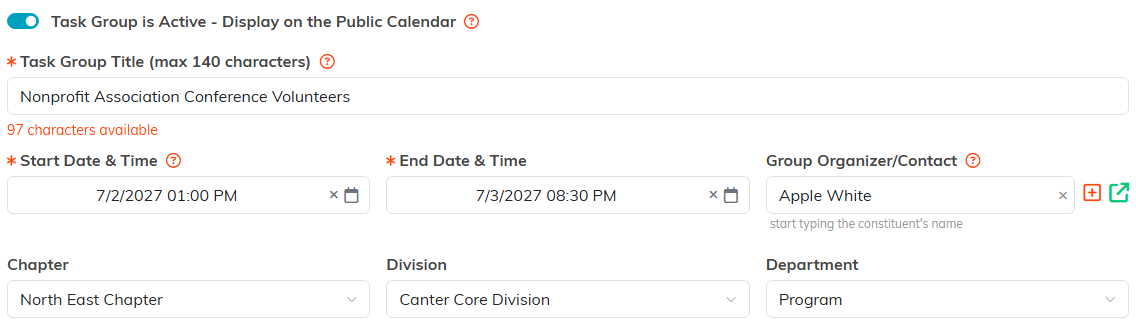
The top of Task Group Details. An orange asterisk marks a required field.
Where the tasks take place
The Task Location section holds the address for the group.
- If every task happens in the same place, fill the location in here.
- If the tasks happen in different places, leave this and add the location to each task instead.
- Start typing in Associated Organization/Location to pick a place you already have on file, or use the orange plus icon to add one.
The group's location is the one that shows on the public task calendar. It takes precedence over the location on an individual task.
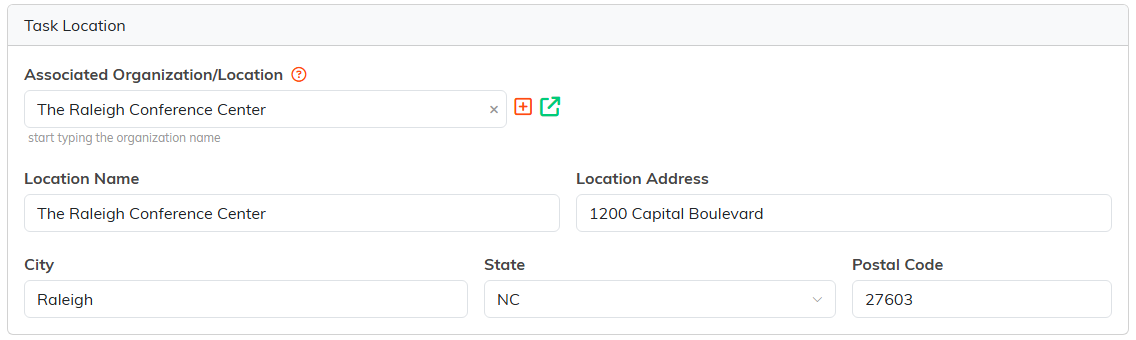
Task Location.
Email the roster to the group organizer
Argenta can email this group's roster to the group's own organizer on a repeating schedule, so they always have an up to date list of who is covering which shift. It is off for every group until you turn it on.
The Roster Email card is on the Details tab, below Task Location.
- Switch on Email This Roster To The Group Organizer.
- In Send Every (Days), set how many days apart the emails go out, from 1 to 90.
- Leave Send The Whole Remaining Group switched on to cover every shift still to come, however far ahead it runs.
- Save the group.

To send a shorter list, switch Send The Whole Remaining Group off. An Only The Next (Days) box appears, and the email then covers only that many days ahead, counting from the day it sends. Shifts further out arrive in a later email as they draw near. Either fill this box in or switch Send The Whole Remaining Group back on, because the group will not save with the switch off and the box empty.
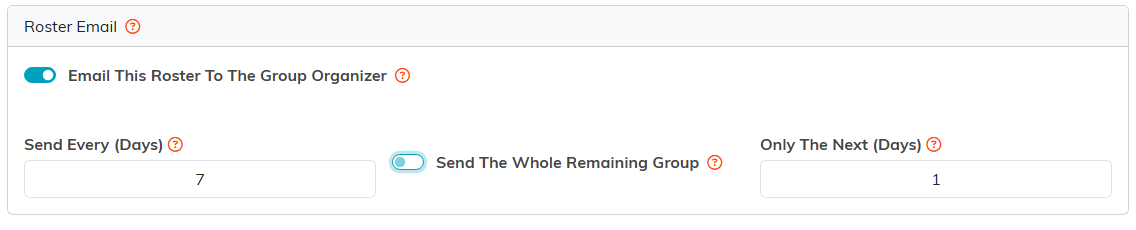
The email goes to the Group Organizer/Contact named at the top of the Details tab, at the email address on that person's record. If no organizer is set, or the one set has no email address, nothing is sent, and a note under the switch tells you so.
Argenta sends these in the early morning, so the first one goes out on the morning after you save. Each group sends on its own schedule, so an organizer who runs three groups gets three emails. The same list is on the Volunteer Task Group Roster report if you would rather send one by hand.
Saving
- Save All & Continue writes your changes and leaves you on the group, which is what you want before you add tasks, files or notes.
- Save All & Exit writes them and returns you to the list.
- Copy & Add New copies these details into a brand new group. Copy with Tasks does the same and brings the tasks across too. The tasks that come across always start Open/Active with nobody assigned and not marked unfulfilled, whatever the originals were, so a group copied from a finished season is ready for volunteers to sign up to. Save your changes before you use either.
- Delete Record removes the group, but only an empty one: while any volunteer tasks are still attached, Argenta refuses the delete and asks you to disassociate the tasks from the group first. Cancel & Exit leaves without saving.

The buttons at the bottom of the group.
Design the public page
Open the Public Form Design tab to control how the group looks to the public. It also holds the group's public sign-up link and a QR code you can download.
Banner Image for Public Task Calendar is where you upload and pick the picture that runs across the top of the group's page.
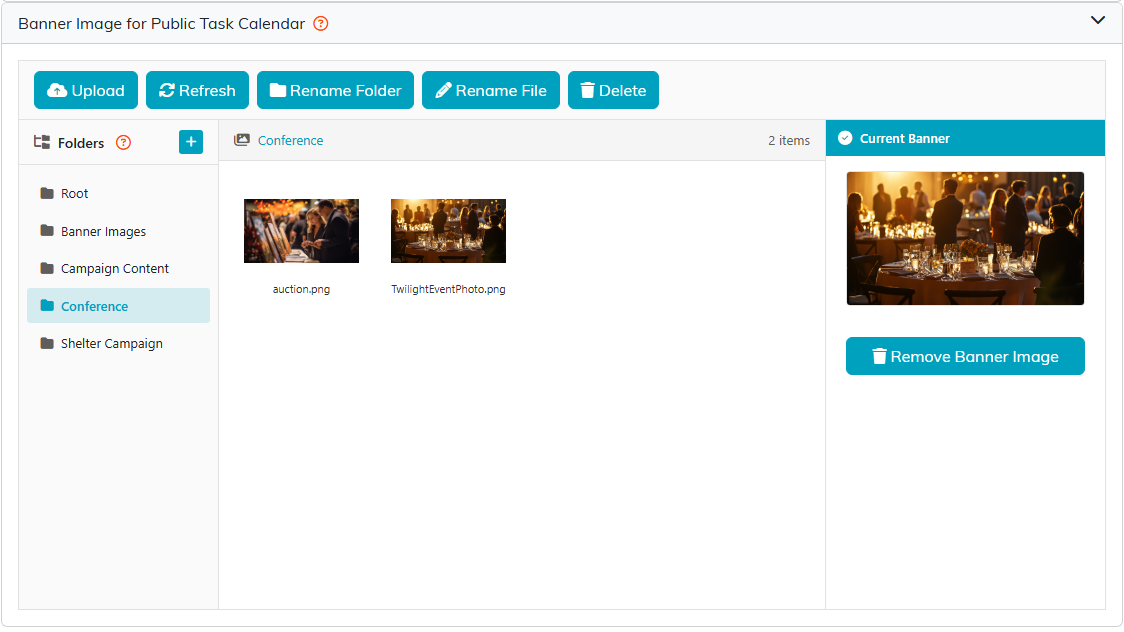
Banner Image for Public Task Calendar.
Public Form Content is a full editor for the wording that sits at the top of the page, so you can write as much of your own introduction as you like.
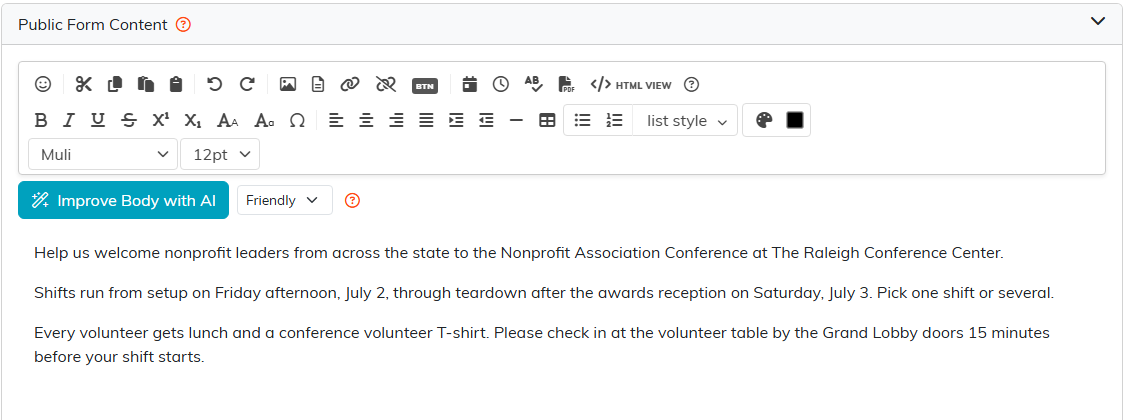
Public Form Content.
For the sign-up link, the QR code and what volunteers see, see How to Design and Share a Task Group's Public Sign-Up Page.
Files and notes
Use the Task Group Files and Task Group Notes tabs to attach as many files and write as many notes as you need against the group.
