Knowledge Base Article
Add Grant We Give
If your organization awards grants to other people or organizations, Grants Payable is where you track them. It holds what you promised, who it went to, when the money moves, and what the recipient owes you back.
The area has two names on screen, and both are correct. The left menu calls it Grants Payable. Once you open a single grant, the page header calls it the Grants We Give Workspace.
You need Grant Manager or Master Admin to use it.
Find your grants
- In the left menu, click Grant Management.
- Under the Grants Payable heading, click Grants Payable.
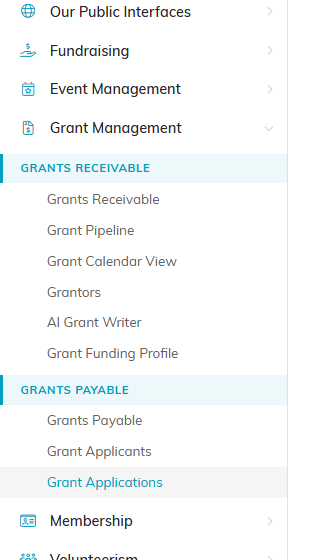
Grants Payable sits under Grant Management, below the Grants Receivable group.
The list shows every grant your organization has given, with a running grand total underneath.
Add a grant
On the Grants Payable list, click Add New.
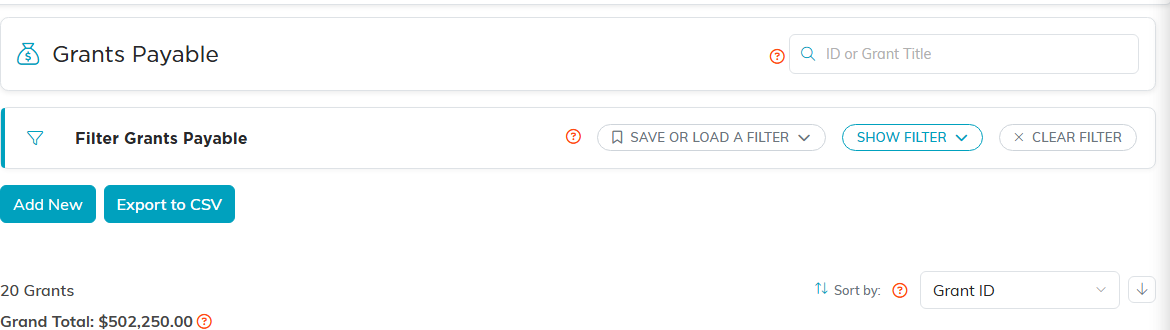
Add New sits under the filter bar, next to Export to CSV.
A short form opens and asks for one thing.
- In Grant Title, enter a name for the grant. This is required.
- Click Add & Enter Details.
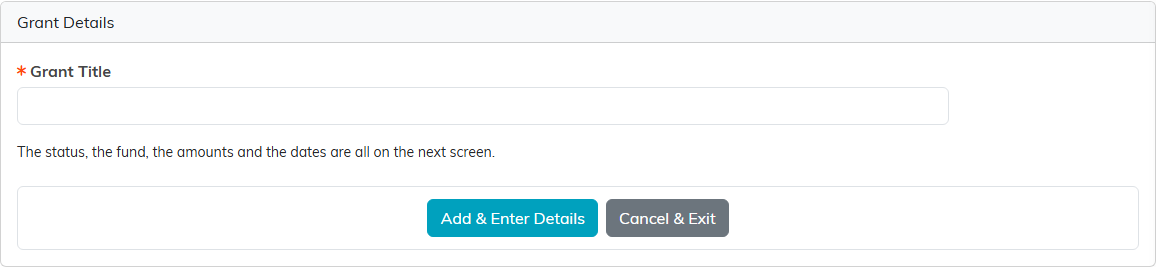
The status, the fund, the amounts and the dates all come on the next screen.
Nothing is saved until you click Add & Enter Details. If you change your mind, click Cancel & Exit and no grant is created.
The Grants We Give workspace
Saving the title opens the workspace for that grant. It has six tabs.

The six tabs of a single grant, with Grant Details open.
- Grant Details holds everything about the grant itself.
- Connections ties the grant to expenses, partners, programs, projects, tasks and withdrawals.
- Grant Applications lists the applications attached to this grant, and lets you attach an existing one.
- Related Files stores documents. See Add Related Files.
- Grant Notes keeps your notes on the grant. See Add A Note to the Notes Section.
- Record Permissions controls who can see and change this one record.
Grant Details tab
Who and what
- Grant's Current Status is where the grant stands. Your team's options come from your own status list, and an administrator can add to it with the orange plus icon beside the field.
- Associated Team Member is the person at your organization who owns this grant. Start typing a name to search. Team members include staff, users, board members and volunteers you have marked as team members.
- Associated Campaign ties the grant to a campaign. Start typing a campaign name to search, or use the orange plus icon to create one.
- Grant Title is the name you entered when you added the grant. This is required and you can change it here.
- Delivery Method is how the money reaches the recipient, such as a check or a wire transfer.
- Fund is the fund the grant is paid from.
- Grant Type and Grant Category are your own classifications. An administrator can add to either list with the orange plus icon.
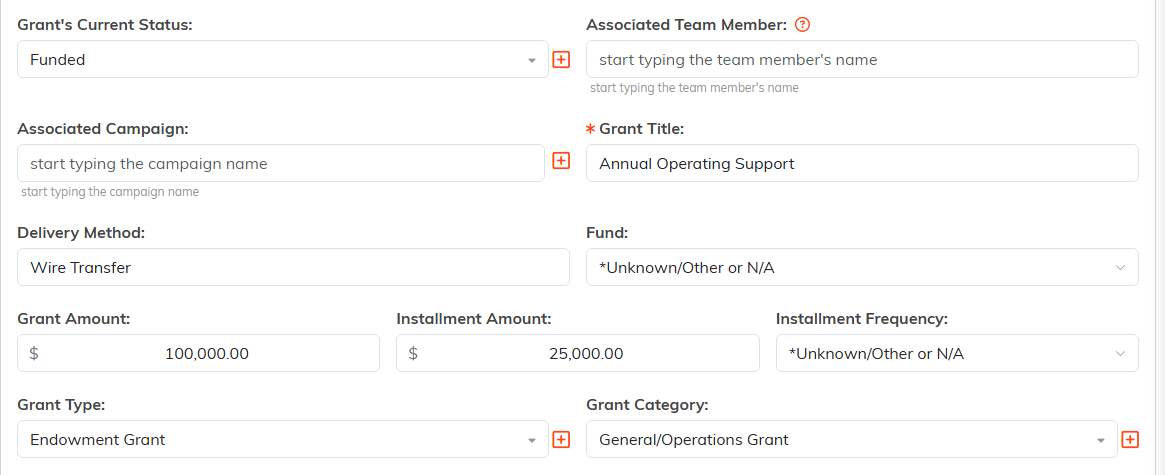
The Who and what fields at the top of Grant Details. The orange plus icon beside a field is how an administrator adds to that list.
Money
- Grant Amount is the full amount you are awarding.
- Installment Amount and Installment Frequency apply when you pay the grant in parts rather than all at once. An Installment Amount bigger than the Grant Amount is refused when you save; a blank or zero Grant Amount skips that check.
Where it belongs in your organization
- Fiscal Year is the year the grant falls in. An administrator can add a year with the orange plus icon.
- Chapter, Division and Department place the grant inside your structure. They also drive who can see it when you restrict records by department, division or chapter.
Dates
Every date field accepts a typed date or a date picked from the calendar.
- Publication Date is when the grant was announced.
- Report Due Date is when the recipient owes you a report.
- Due Date is when the grant itself is due.
- Notification Date is a date you record for your own tracking. It appears as a column on the Grants Payable list and you can sort the list by it.
- Start Date of Funding and End Date of Funding are the period the money covers. The end cannot be earlier than the start.
Renewals, multi-year grants and flags
Two of these switches unlock other fields. When you turn one on, the labels of the fields it applies to change color so you can see they now count.
- Is Grant Renewable? Turn it on if the grant can be renewed, then set the Renewal Date.
- Is Grant Multi-Year? Turn it on for a grant spanning more than one year, then set Grant Start Year and Grant End Year.
- Is Grant Public? Turn it on if the grant can be shown publicly.
- Is This A Challenge Grant Turn it on for a challenge grant.
Current or Future Grant is a separate choice: pick Current or Future from the list.
The long text fields
- Grant Description is what the grant is for.
- Grant Requirements is what the recipient has to do to qualify or to keep the money.
- Executive Summary is the short version for a board or a report.
- Additional Terms or Information is anything else that belongs on the record.
Restrict who can see a grant
Two switches at the top of Grant Details control access to this one record.
- Set As View Only lets other users read the grant but not change it.
- Lock This Record stops other users seeing it at all.
Either way, the record's creator and any master administrator keep full access, and so does anyone you name on the Record Permissions tab.
Record Permissions tab
This tab is where you name the exceptions. It has two cards, and each one shows Disabled until you turn on the matching switch on Grant Details.
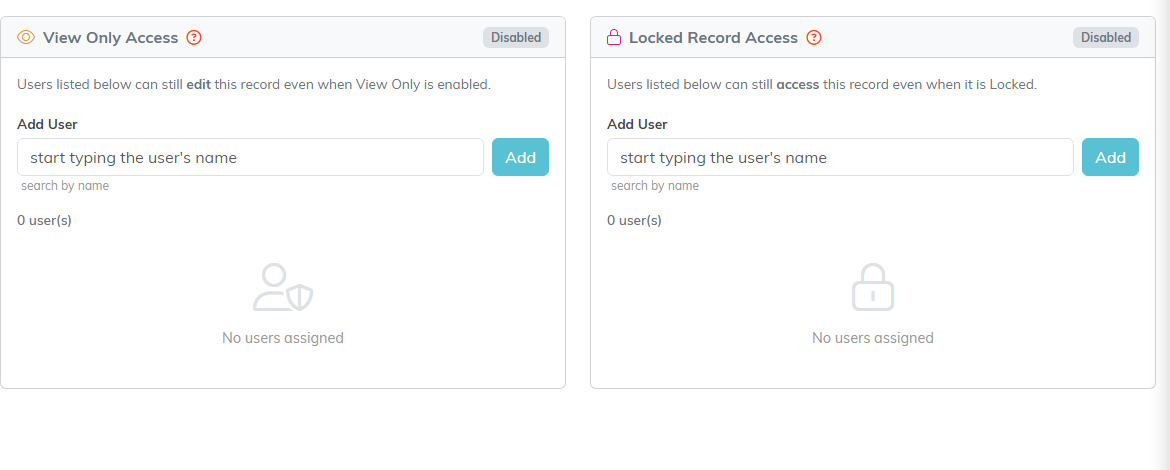
Each card lists the users who keep access despite the switch.
- View Only Access lists the users who can still edit the grant while Set As View Only is on.
- Locked Record Access lists the users who can still open the grant while Lock This Record is on.
To add someone to either list, enter their name in that card's Add User box, pick them from the results, then click Add.
Save your work
The buttons at the bottom of Grant Details do different things.
- Save All Changes & Continue saves and keeps you on the grant.
- Save All Changes & Exit saves and returns you to the list.
- Copy & Add New creates a second grant starting from this one's details.
- Delete This Record removes the grant after you confirm. Any grant applications attached to it are kept, just no longer attached to this grant, and its connections are removed with it.
- Cancel & Exit leaves without saving what you changed.
Clicking another tab saves your changes first.
