Knowledge Base Article
Getting Started with Surveys
Surveys let you hear directly from the people who matter most to your mission: donors, volunteers, members, event guests, anyone. Build a branded survey in minutes, share one link, and watch the answers arrive in one place. There is nothing to install and no separate tool to learn.
Think of it as your own online form. Use it as a feedback form, a check-in form, a sign-up sheet, an application, or anytime you need people to fill out a form and send their answers back. They open a link, fill it in, and the responses come straight into Argenta.
Finding Surveys
In the left sidebar, open Surveys > Survey List. That page lists every survey you have built, newest first. Each row shows the survey's Status, Category, whether it is Active, how many Responses and Questions it has, and when it is Open. A Public badge beside the title means it is published.
The buttons on each row open the survey, jump to its results, copy its public link, or delete it. Search by ID or title, or click Show Filter to narrow the list by status, category or active state.
Surveys are open to admins and to anyone with the Survey Manager permission. If you do not see the menu, ask an admin at your organization.
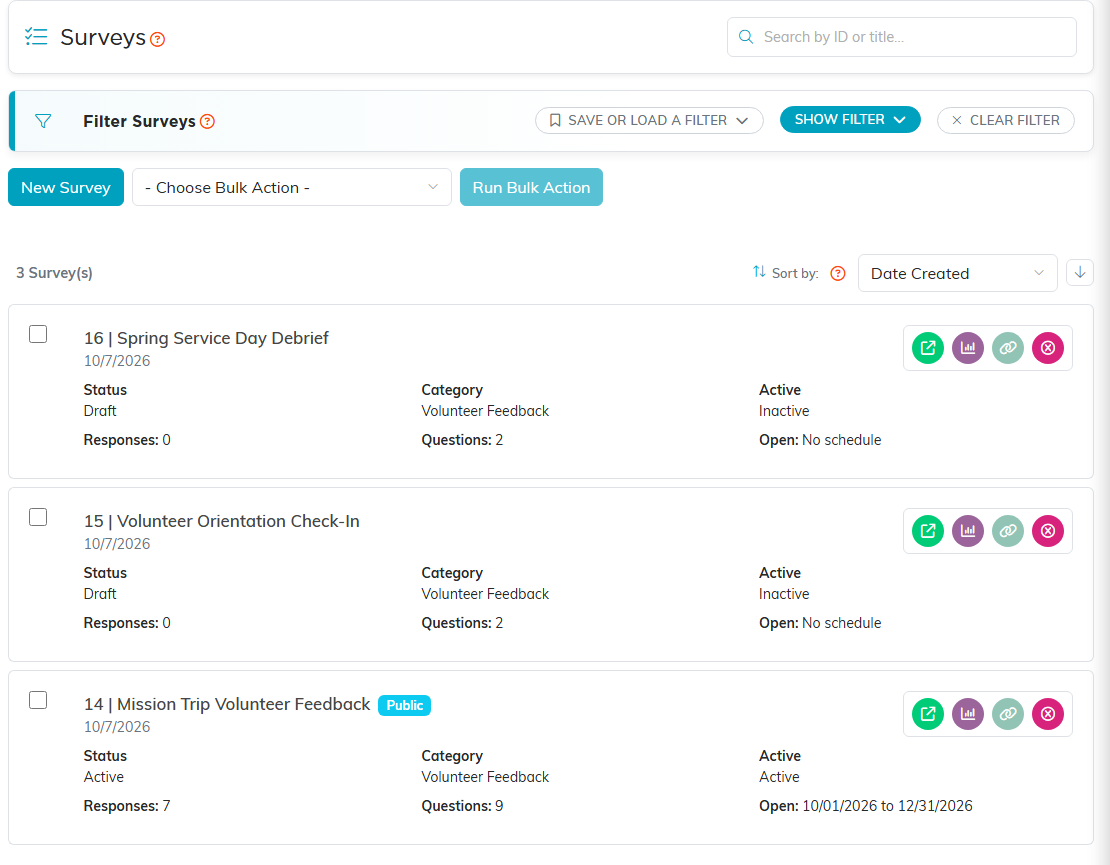
The Survey List, here filtered to one category.
Creating a new survey
- On the Survey List, click New Survey.
- On Add A New Survey, type the Survey Title. It is the only thing this screen asks for.
- Click Add & Enter Details. Argenta creates the survey and opens it in the Survey Workspace.
Nothing is saved until you click Add & Enter Details, so Cancel & Exit leaves nothing behind. Every new survey starts as a hidden Draft, so nobody can find it or take it while you are still building it.
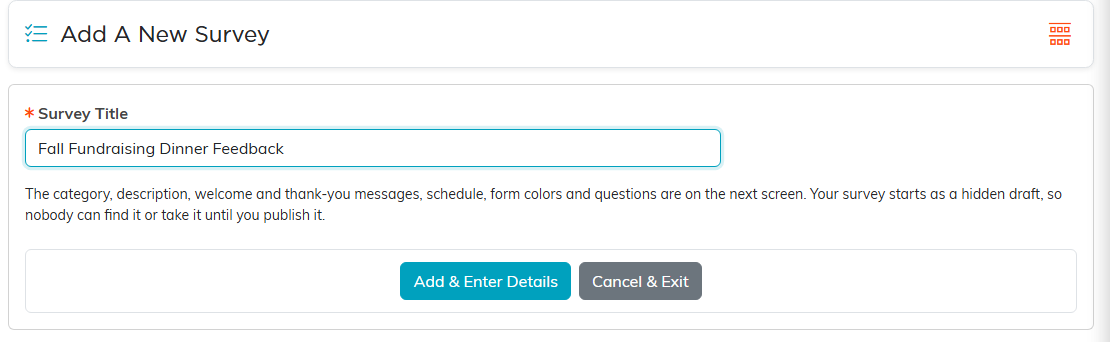
Add A New Survey asks only for the title.
The Survey Workspace and its Details
The Workspace Menu across the top has six sections:
- Details. Publishing, the settings and the theme.
- Description. An introduction shown at the top of the questions.
- Welcome. A message shown before someone begins.
- Thank You. The message shown after they submit.
- Questions. Where you build the survey.
- Results. Where you read the answers.
The Survey Details card on the Details tab holds the settings:
- Anonymous responses. With this on, the form asks nobody who they are, and every response reads as Anonymous. With it off, the form also asks for a first name, last name and email (phone is optional), and Argenta matches the person to a constituent already on file or adds them as a new one, so their name shows on their response.
- Allow multiple responses per person. Leave this off and someone who has already submitted sees a "You've already responded" message when they come back in the same browser. When the survey is not anonymous, a person Argenta recognizes from an earlier response is stopped the same way. Turn it on to let people answer as often as they like.
- Status. Draft, Active, Closed or Archived. It is a label for your own tracking: publishing sets it to Active and Switch to Draft sets it back to Draft. An Active survey switches to Closed by itself the night after its end date.
- Category. Your own labels for keeping a long list organized. Add them under Classification Codes > Survey Categories.
- Open / Close Schedule. The dates a published survey takes answers. Both dates count as whole days. Leave them blank and the survey stays open the whole time it is published.
- Survey Title. Required. You cannot save or publish without one.
Under Form Theme, set the Headline Color, Button Color, Button Hover Color and Button Text Color so the survey matches your brand. Click the save icon in the title bar to keep your changes.
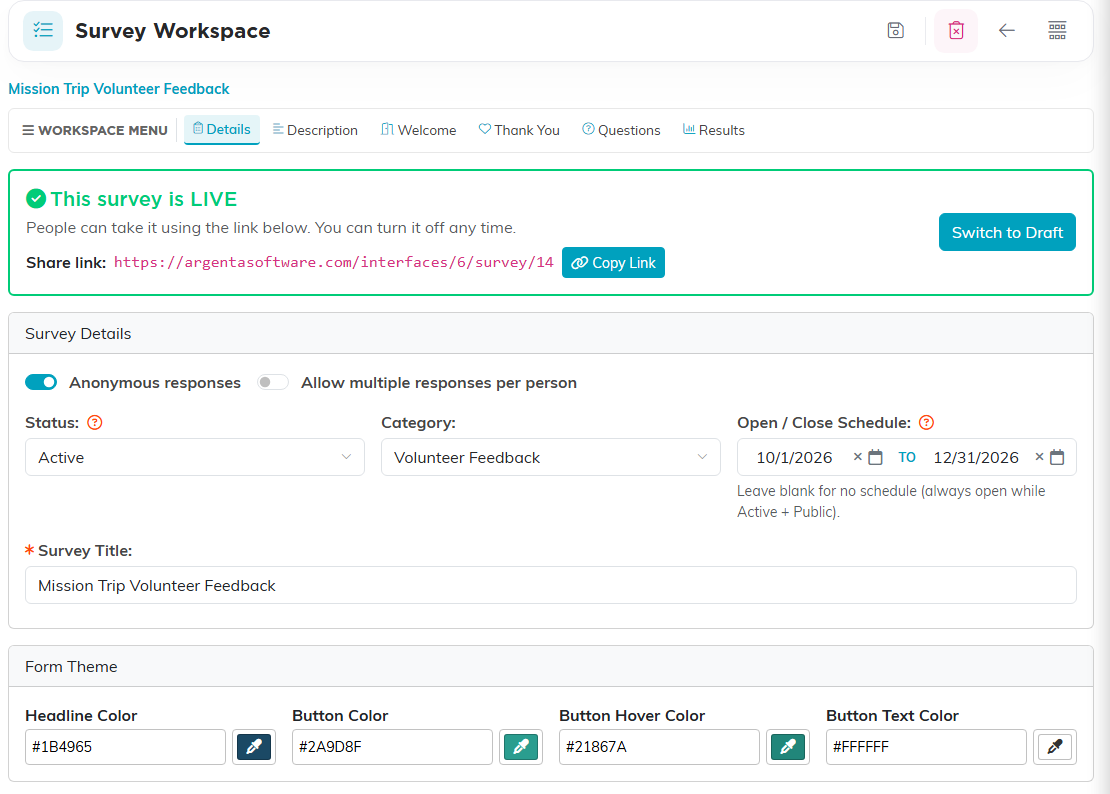
The Details tab of a live survey: the publishing banner, Survey Details and Form Theme.
Description, Welcome and Thank You
Each of these has its own tab and a full editor, so you can format text and add links, buttons and images. If you would like help with the wording, click Improve Body with AI and pick a tone: Friendly, Formal or Brief. Click the save icon in the title bar when you are done.
- Description shows under the survey title, at the top of the questions. Write it for the person filling in the survey.
- Welcome is what people read first, with a Start button below it. Leave it empty and the survey opens straight into the questions.
- Thank You is what they see once they submit. Leave it empty and they see a plain "Thank you! Your response has been recorded."
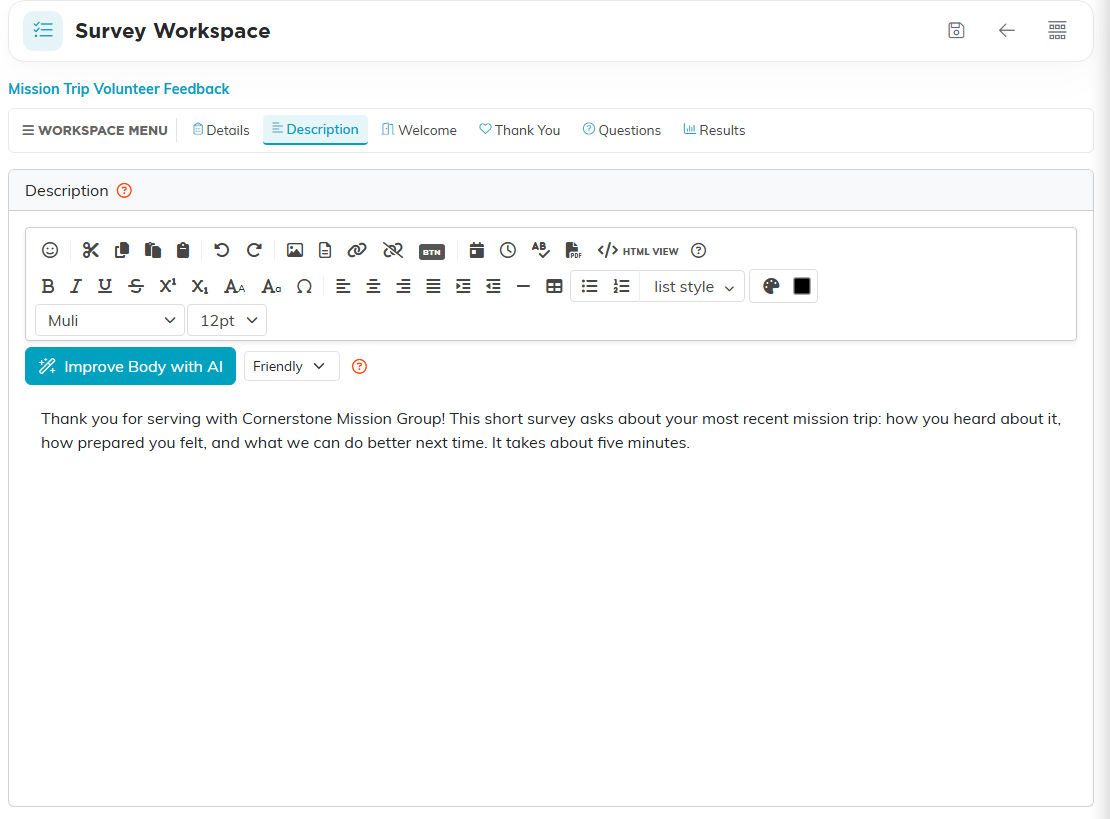
The Description tab.
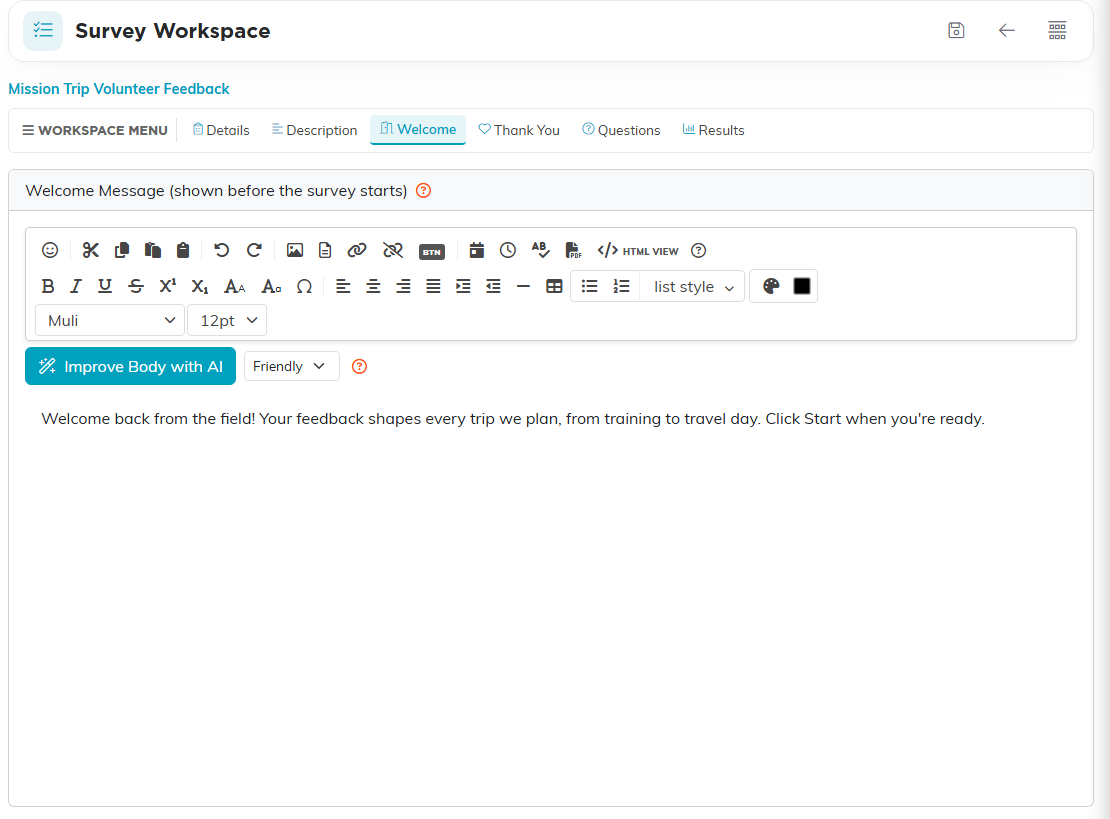
The Welcome tab.
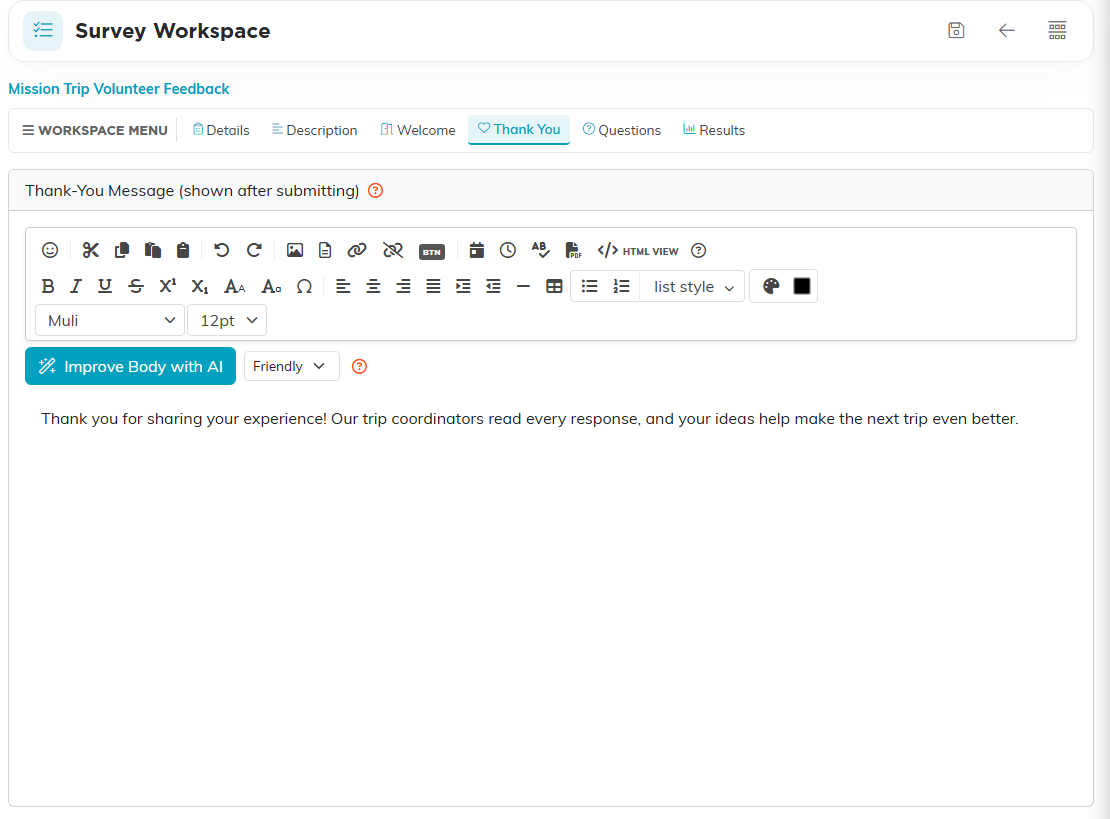
The Thank You tab.
The Questions tab
The Questions tab lists every question in the order people will see it, with its type and a Required badge where an answer is a must. Use the up and down arrows to reorder, the green button to edit a question, and the pink button to delete one. Deleting a question also deletes the answers already given to it, so switch it to inactive instead when you want to keep them.
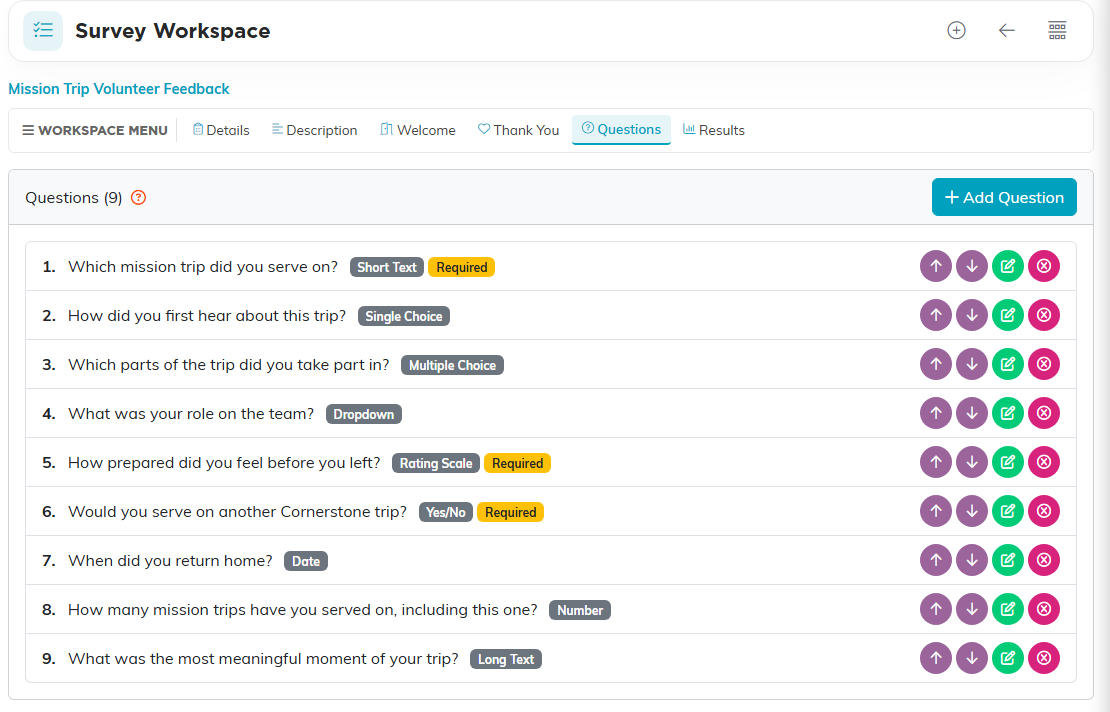
The Questions tab, with one question of each type.
Adding a question
- On the Questions tab, click Add Question.
- Choose a Question Type and type the Question Text.
- Click Add & Enter Details. The question is saved and opens in the Question Builder.
There are nine types:
- Short Text for a quick word or two
- Long Text for open comments and stories
- Single Choice to pick one option
- Multiple Choice to pick as many as apply
- Dropdown to pick one option from a menu
- Rating Scale to measure satisfaction or agreement on a numbered scale
- Yes/No for a simple either-or
- Date to collect a specific day
- Number for amounts and counts
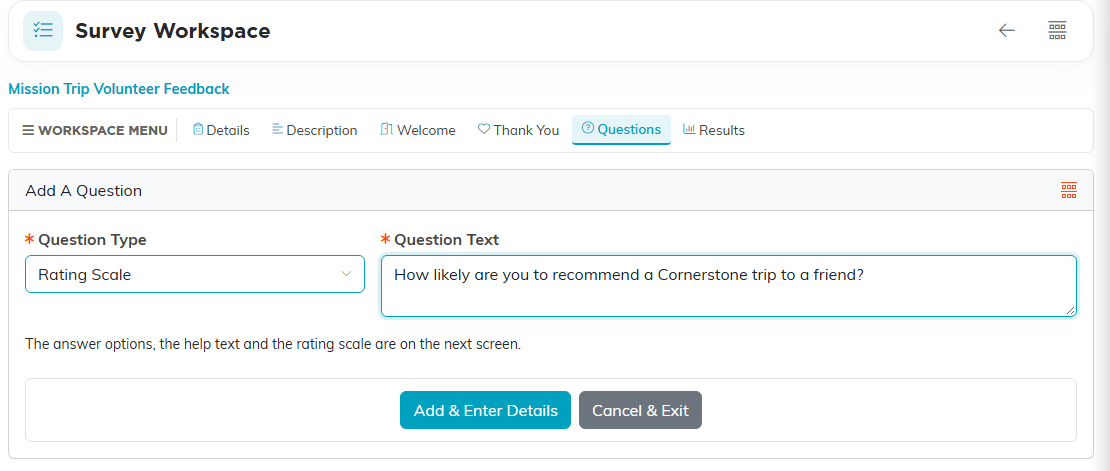
Add A Question asks for the type and the text.
The Question Builder
The Question Builder holds everything else about one question:
- Required. The form will not submit until this question is answered.
- Active. Switch it off to take the question off the form and out of Results without deleting it.
- Help Text. An optional hint shown under the question.
- Answer Options (Single Choice, Multiple Choice and Dropdown). Type a choice and press Enter or click Add Option. Each option has its own Active switch, an Update button for a changed wording, and a delete button. Every option has to be different, even ignoring capitals and spaces.
- Rating Scale (Rating Scale). The Lowest value and Highest value, 1 to 5 to start, plus an optional Low-end label and High-end label shown at each end of the scale.
- Value Range (Number). An optional lowest and highest number the form will accept.
- Length Limits (Short Text and Long Text). The maximum length caps how long an answer can be.
Click Save & Continue to stay on the question or Save & Back to Questions to return to the list.
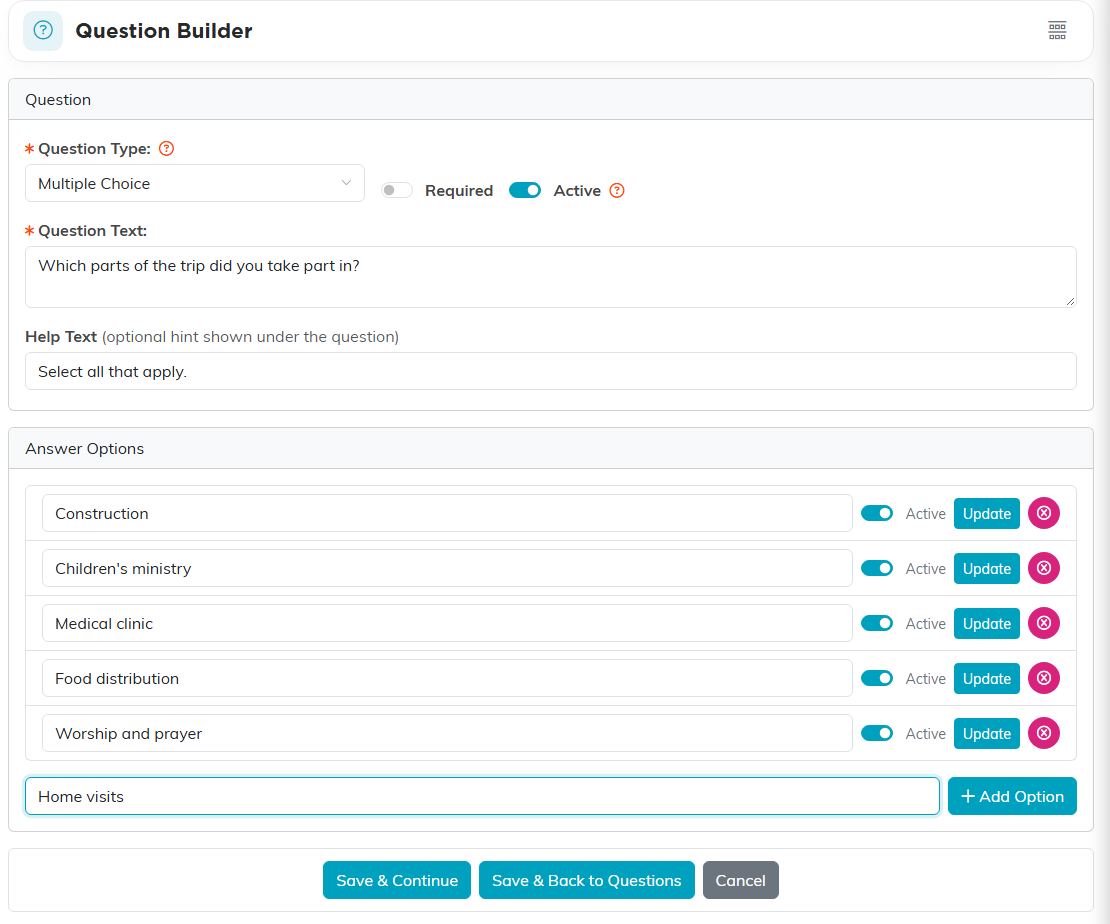
The Question Builder for a Multiple Choice question.
Publishing and sharing
When your questions are ready, go back to Details and click Publish Survey. Three things have to be true first, and the Details tab names whichever one is missing:
- The survey has a title.
- It has at least one active question.
- Every Single Choice, Multiple Choice and Dropdown question has at least one active answer option.
Once it is live, the banner at the top of Details turns green and shows the Share link with a Copy Link button. You can also copy the link from the survey's row on the Survey List. Send it by email, put it on your website, or share it anywhere your community will see it. Nobody needs an Argenta login to answer.
If the survey is published but its schedule has not started yet, or has ended, the banner says so in orange. To take a survey back offline, click Switch to Draft. It is hidden again and stops taking responses until you publish it once more.
The trash can in the title bar deletes the survey, along with its questions and every response.
A live survey: the share link, Copy Link and Switch to Draft.
Reading your results
The Results tab opens with four figures: Completed, In Progress, Questions, and the survey's status with its schedule. Export CSV and Export Excel give you one row per response and one column per question; they need export rights.
Below that, every active question gets its own card with its answer count:
- Single Choice, Multiple Choice and Dropdown show a bar chart and a table of each option's count and percentage.
- Rating Scale shows the average rating. Number shows the average and every answer given.
- Short Text, Long Text, Yes/No and Date list every answer with the date and time it came in.
At the bottom, the Responses card lists every submission, newest first, with the respondent's name (or Anonymous), whether it is complete, and how many answers it holds.
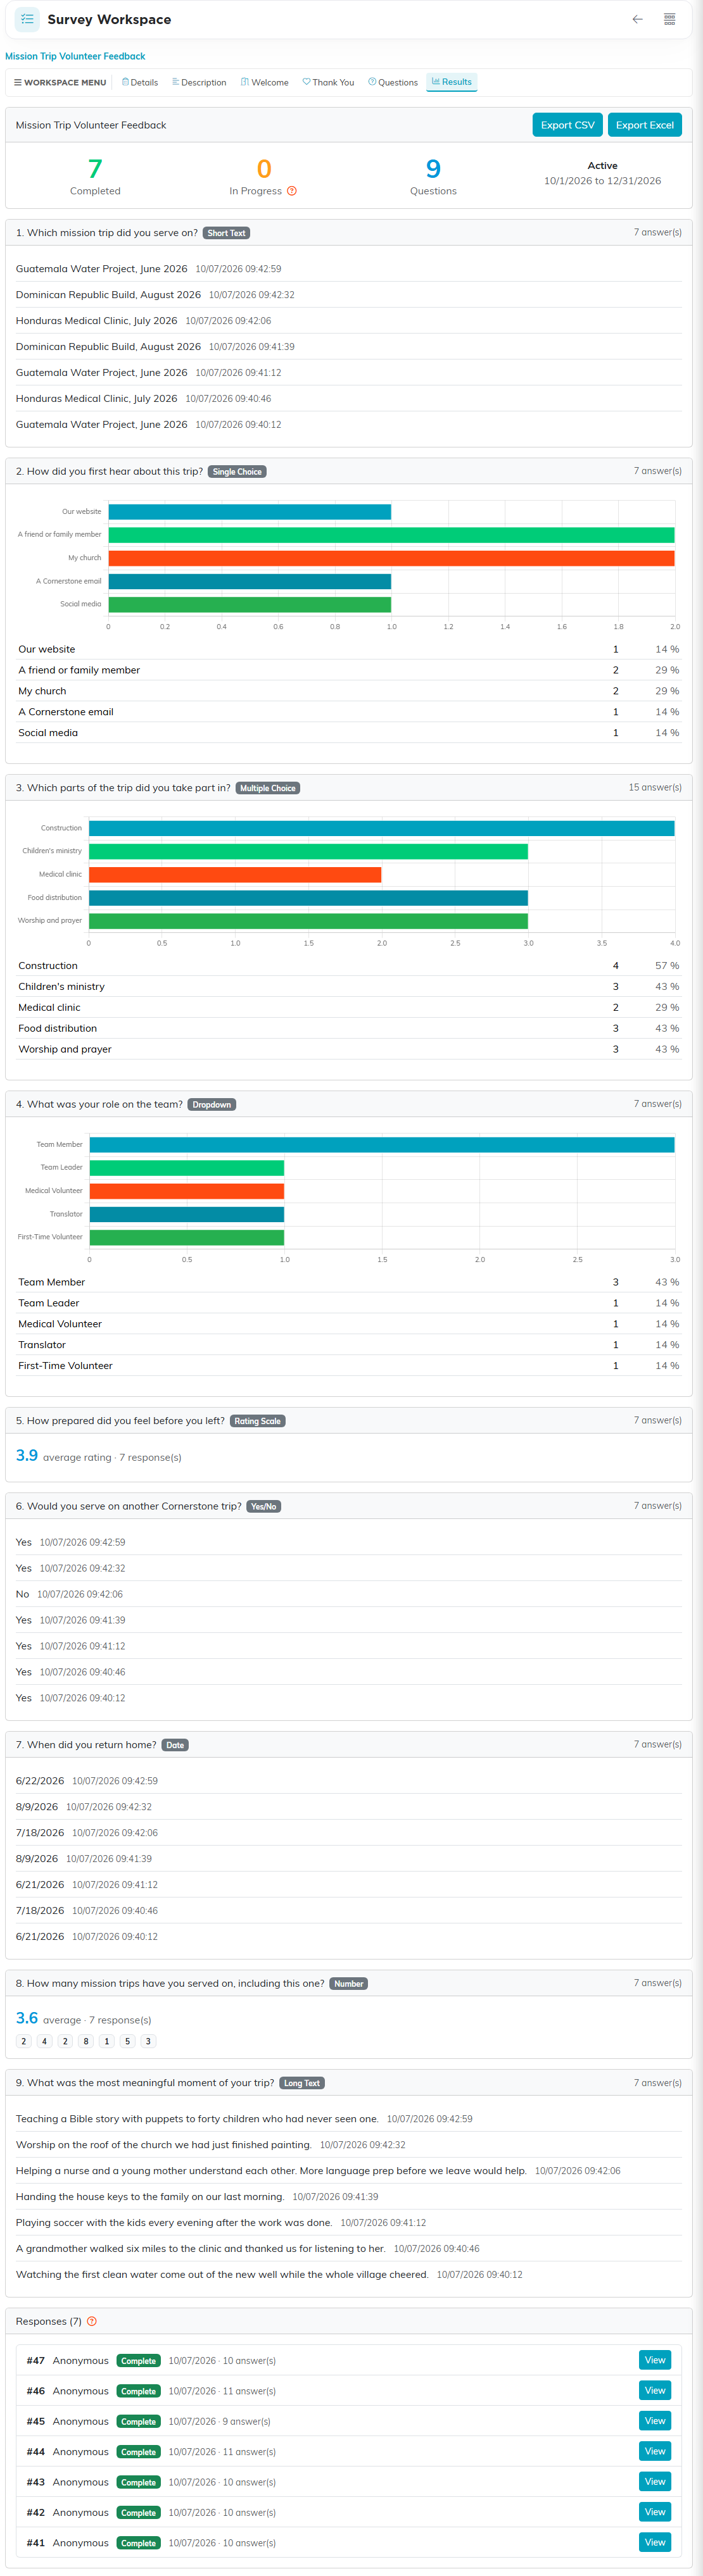
The Results tab: the summary, a card for every question, and the Responses list.
Reading one response
Click View beside any response to read everything that person submitted, question by question. The top of the page shows the Respondent, the Status and when it was Submitted, plus their email when the survey is not anonymous. Answers to a Multiple Choice question are listed together on one line, and a skipped question reads (no answer).
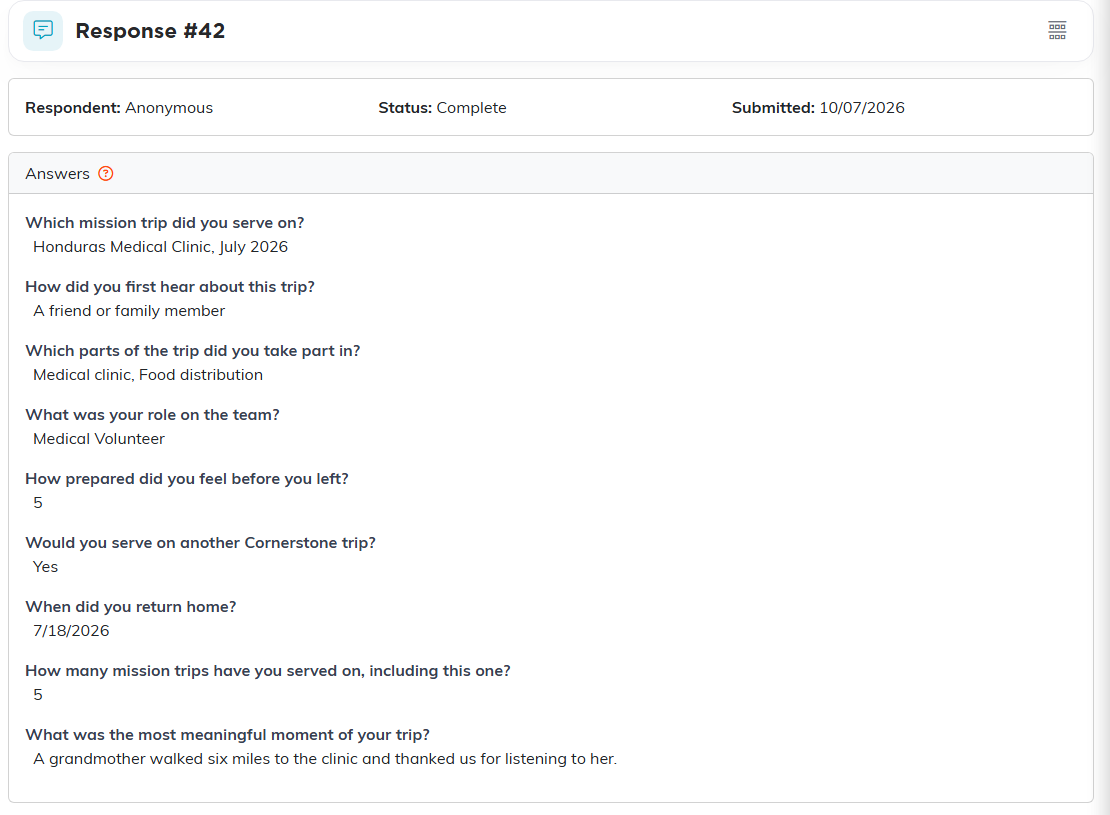
One response, opened from the Responses list.
A few friendly tips
- Build in Draft. Nobody can reach the survey until you publish, so take your time.
- Keep it short. A handful of well-chosen questions gets a far better response rate than a long form.
- Take it yourself first. Open the share link and answer your own survey once. Awkward wording is much easier to spot from the respondent's side.
- Use the schedule. Set the open and close dates and the survey manages its own start and finish.
For every other public link your organization hands out, see Where to Find Public Form URLs in Argenta.
