Knowledge Base Article
Complete Guide to Using Email Merge Tags in Argenta
Overview
Email merge tags are personalization placeholders you can insert into email templates. When an email is sent, each tag is automatically replaced with the real data for that specific recipient. For example, [FirstName] becomes the recipient's actual first name. Merge tags work in both the email body and the subject line, and they work for single-recipient sends as well as batch sends to entire mail room lists.
Where to Find It
- Open Communication in the main menu
- Under Sending Email, click Email Templates
- Click on any template, or create a new one
- You are now in the Email Template Workspace
- The merge tag button (tags icon) is in the editor toolbar
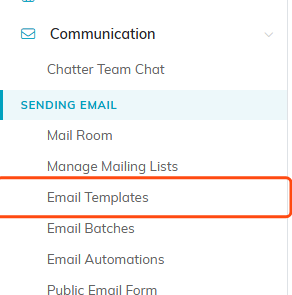
Email Templates sits under Communication, in the Sending Email group.
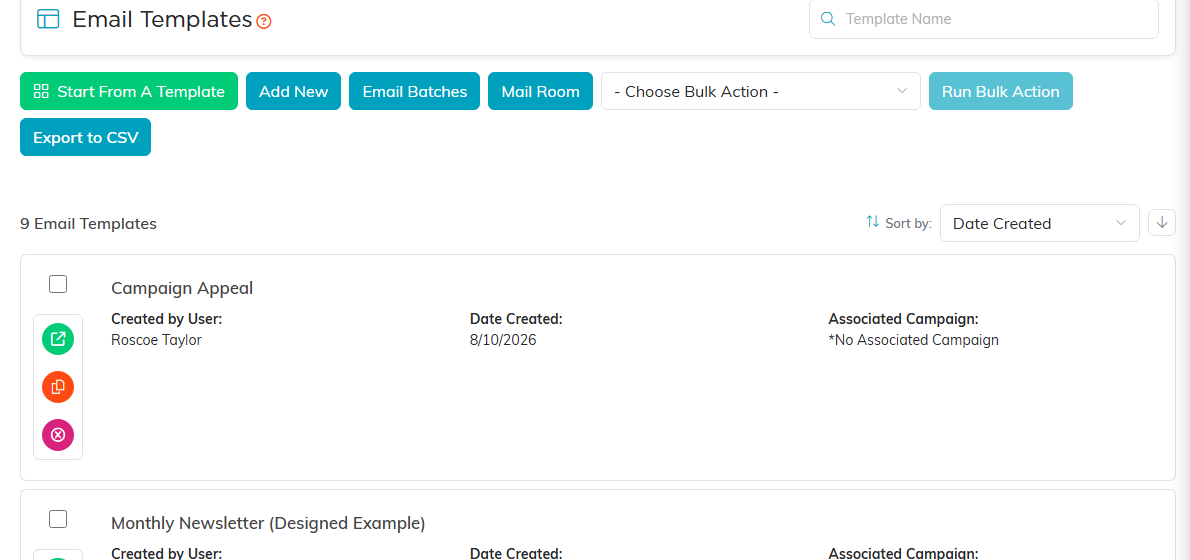
The Email Templates list. Click a template to open it, or start a new one with Add New.
Step 1: Open Your Email Template
From the Email Template Workspace, you will see the editor with your template content. The editor has a toolbar across the top with formatting buttons, image/document upload, and the merge tag button (looks like a tag/label icon).
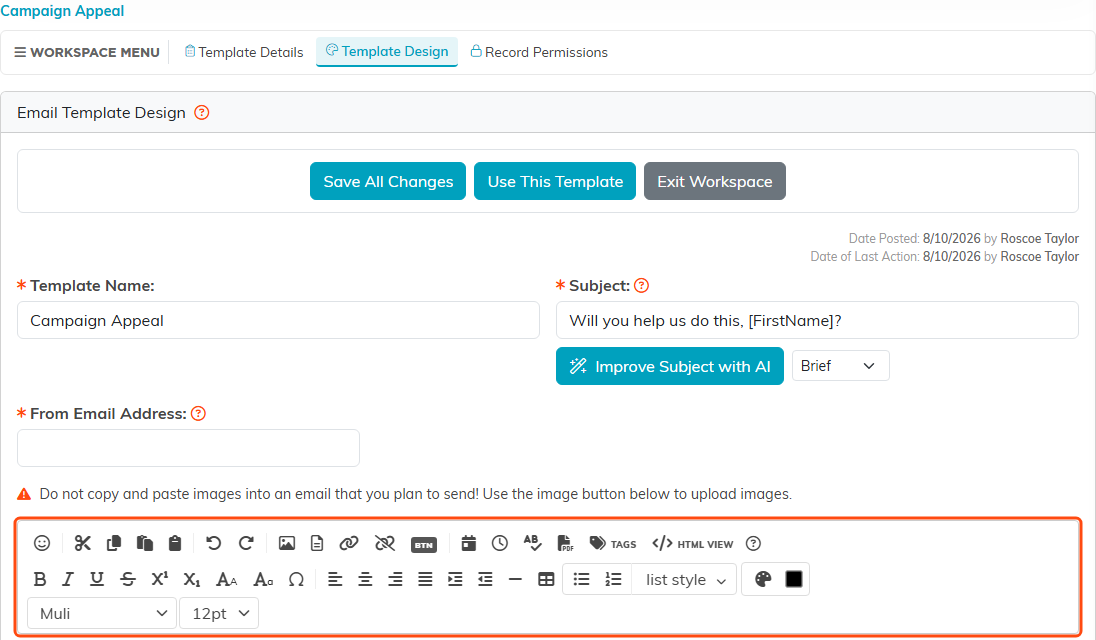
The Email Template Workspace. The editor toolbar is outlined.

The TAGS button in the toolbar is what opens the merge tag picker.
Step 2: Insert Merge Tags in the Body
- Click inside the editor where you want personalized text to appear
- Click the tags icon in the toolbar
- A modal opens showing every available merge tag, organized into categories:
- Contact Info: [FirstName], [LastName], [ConstituentName], [Nickname], [Salutation], [Email], [Phone], [Birthday], [OrganizationName]
- Mailing Address: [MailingAddress], [MailingCity], [MailingState], [MailingZip]
- Organizational Segments: [Chapter], [Division], [Department]
- Donations: [TotalDonated], [LastDonationDate], [LastDonationAmount], [FirstDonationDate], [NumberOfDonations], [DonationYearTotal]
- Membership: [MembershipNumber], [MembershipLevel], [RenewalDate], [MemberSinceDate]
- Volunteerism: [VolunteerTaskHours], [YearsOfService], [VolunteerSinceDate], [NumberOfVolunteerTasks], [LastVolunteerTaskDate]
- Event / Program: [EventName]
- Click the tag you want. It is inserted at your cursor position and the modal closes.
- Repeat for additional tags as needed.
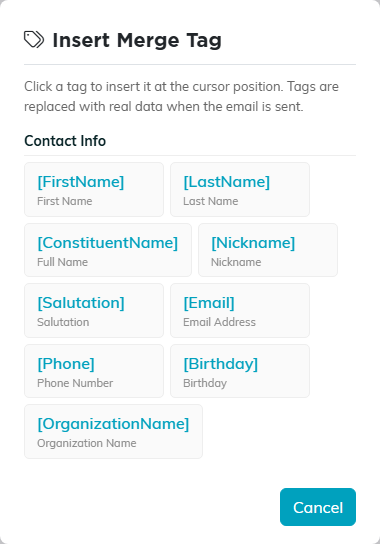
The picker opens on Contact Info. Click a tag and it drops in at your cursor.
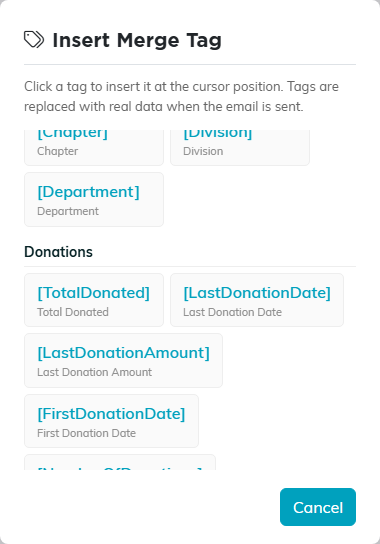
Scroll down the picker for the Donations tags.
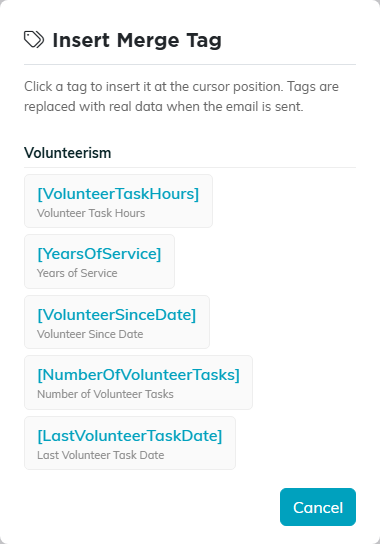
Volunteerism sits near the bottom of the list, with Event / Program below it.
Step 3: Insert Merge Tags in the Subject Line
The merge tag picker is only in the editor toolbar, so for the subject line you type the tag manually. Just enter the exact tag name with square brackets into the Subject field. Examples:
- [FirstName], your membership renewal is approaching
- Thank you for your support, [FirstName]!
- An update from [OrganizationName]

The Subject field takes a tag you type yourself, brackets and all.
Step 4: Save Your Template
Click Save All Changes. Your tags are stored as literal text in the template. They are not replaced until the email is actually sent.

Save All Changes stores the tags as plain text until the email is sent.
Step 5: Preview Your Tags
- Click Use This Template. Argenta saves the template and opens it on the New Campaign page.
- Under Send To, choose who gets it: a Mail Room list, everyone who chose a topic, or one person.
- Look at Preview As. It shows the email as the first person in your audience will get it, with every tag filled in from their record. Pick someone else from its list, or search for anyone you can see, to check another person.
- The Checks card tells you whether every tag has a value, or a fallback, for the person you are previewing.
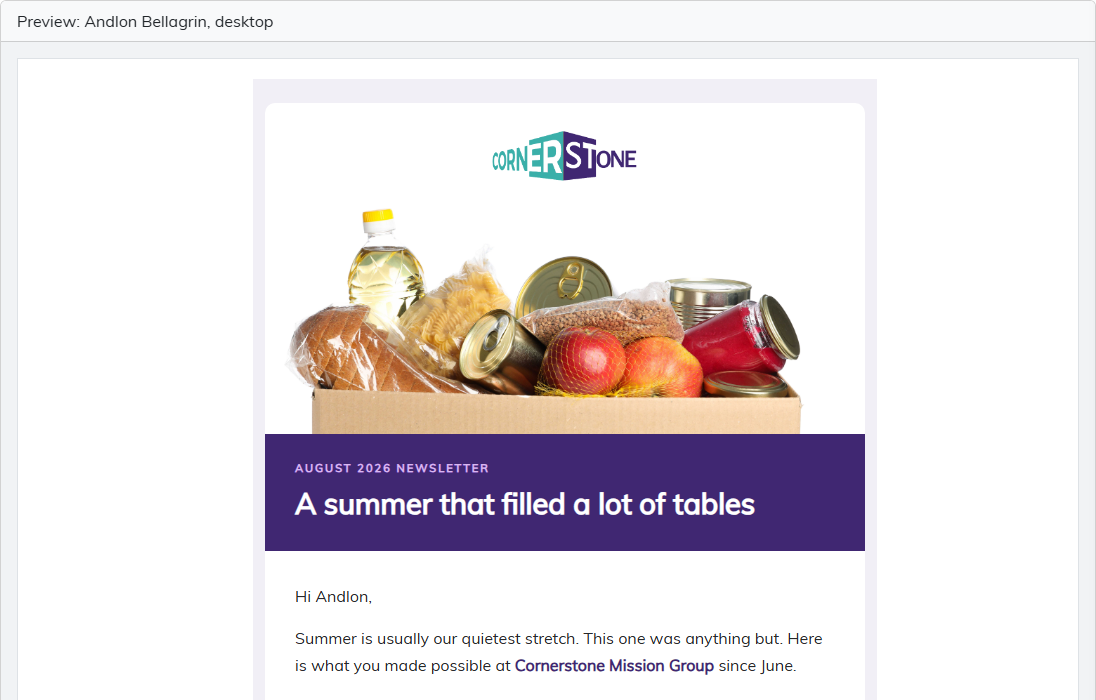
Preview As fills in the tags for one real person, so the greeting uses their name.
Step 6: Send It
- Optional: under Send A Test, enter up to five addresses and click Send Test. The test is merged as the person you are previewing, with [TEST] before the subject.
- Finish the From and Send Time steps.
- Click Send in the Review panel, and confirm.
- Argenta goes through every recipient, replaces the merge tags separately for each person, and queues each personalized email.
- People who cannot or should not get it, such as anyone who has unsubscribed or has no email address, are left out. The Audience step lists them, with the reason, before you send.
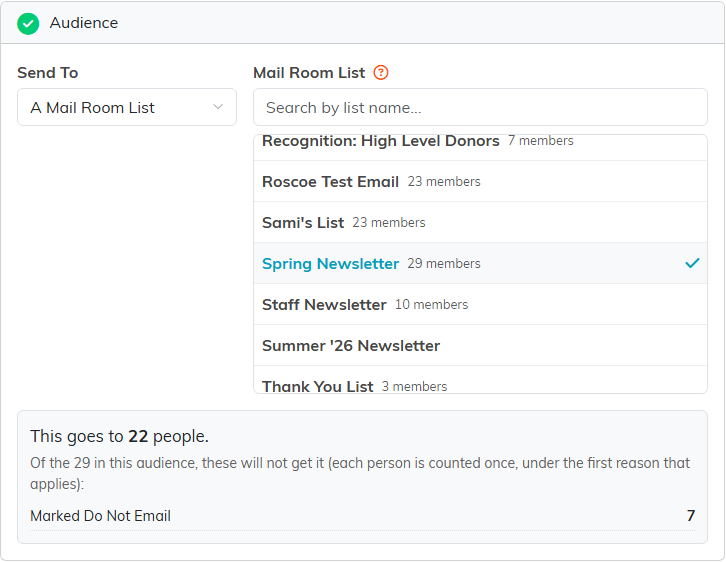
The count, and who is left out, appear before you send.
The full walkthrough is in How to Send an Email From the Mail Room.
Available Merge Tags Complete Reference
Contact Info:
- [FirstName] First name (e.g., Sarah)
- [LastName] Last name (e.g., Johnson)
- [ConstituentName] Full display name (e.g., Sarah Johnson)
- [Nickname] Nickname if entered on their record
- [Salutation] The Salutation on their record, usually the name you greet them by (e.g., Sarah)
- [Email] Email address on file
- [Phone] Formatted phone number (e.g., (555) 123-4567)
- [Birthday] Birthday on file
- [OrganizationName] Your organization's name from your account settings
Mailing Address:
- [MailingAddress] Street address line
- [MailingCity] City name
- [MailingState] State abbreviation (e.g., TX)
- [MailingZip] Zip code
Organizational Segments:
- [Chapter] Chapter the constituent belongs to
- [Division] Division the constituent belongs to
- [Department] Department the constituent belongs to
Donations:
- [TotalDonated] Lifetime total donations, formatted as currency (e.g., $1,234.56)
- [LastDonationDate] Date of most recent donation (e.g., 01/15/2026)
- [LastDonationAmount] Most recent donation amount as currency
- [FirstDonationDate] Date of the first donation on record
- [NumberOfDonations] Total count of donations made
- [DonationYearTotal] Total donated in the current year, as currency
Membership:
- [MembershipNumber] Membership ID number
- [MembershipLevel] Membership tier name (e.g., Gold, Silver)
- [RenewalDate] Next renewal date (e.g., 06/30/2026)
- [MemberSinceDate] Date they first became a member
Volunteerism:
- [VolunteerTaskHours] Total volunteer task hours logged
- [YearsOfService] Years of volunteer service
- [VolunteerSinceDate] Date they began volunteering
- [NumberOfVolunteerTasks] Total count of volunteer tasks
- [LastVolunteerTaskDate] Date of most recent volunteer task
Event / Program:
- [EventName] The name of the event or program the email is being sent from. This is the one tag that depends on how you send rather than on who you send to: it fills in only when the email goes out from an event's guest or participant list, and comes out blank on every other send. The picker labels the group Event / Program (fills only on a send from an event) so the condition is in front of you as you pick it.
Tips and Best Practices
- Always check first. Before sending to a large list, look at Preview As for a few different people, and use Send A Test to see it in a real inbox.
- Write for blank tags. If a recipient is missing data, the tag becomes blank, so write sentences that still make sense when a value is empty. Or give a tag fallback text after a bar, used whenever that person has no value: [MailingCity|your area] reads your area for anyone with no city on file. Greetings are already handled: [FirstName] never goes blank, falling back to the nickname and then to the word Friend, so "Dear [FirstName]," reads "Dear Friend," at worst. Do not replace it with a literal "Dear Friend," of your own, which would give up personalization for everybody. The tags that need the care are the donation, membership and volunteer ones.
- [FirstName] is the most reliable tag because almost every constituent has a first name on file. Donation and membership tags should only be used when you know the recipients are donors or members.
- [OrganizationName] always has a value because it comes from your account settings, not individual recipient data. Use it freely in signatures and footers.
- CC'd team members get a copy that is not personalized, even when you send to one person: recipient tags use their fallback text or come out blank, [FirstName] reads Friend, and [OrganizationName] and [EventName] still fill in.
- Tags work everywhere. You can place tags in headings, paragraphs, bullet points, table cells, button text, or any other part of your email content.
Frequently Asked Questions
Q: What happens if I misspell a tag?
A: If you type [Firstname] instead of [FirstName], the system will not recognize it and the misspelled text will appear as-is in the sent email. Always use the merge tag picker to ensure correct spelling, or refer to the tag list above.
Q: Can I use the same tag multiple times?
A: Yes. You can use [FirstName] or any other tag as many times as you want throughout your email. Each instance is replaced independently.
Q: Are merge tags case-sensitive?
A: Yes. [FirstName] works, but [firstname] or [FIRSTNAME] will not be replaced. Always match the exact casing shown in the tag picker.
