Knowledge Base Article
How to Create a Material Distribution
A distribution is the record of goods going back out the door: a food box handed to a family, clothing provided to a household, school supplies given to students, emergency supplies after a storm. It captures who received what, and it takes the items out of your inventory as you go.
Start the distribution
- Choose Materials Management > Material Distributions and click Add New. That opens the Add A New Material Distribution page.
- Fill in all three fields. Every one of them is required:
- Distribution Date, which starts on today's date.
- Recipient. Start typing the name to find them, or use the add icon to designate a new recipient without leaving the page.
- Distributed By, the team member handing the goods out. Only active team members appear in this list.
- Click Add & Enter Items. Argenta creates the distribution and opens it in the Material Distribution Workspace.
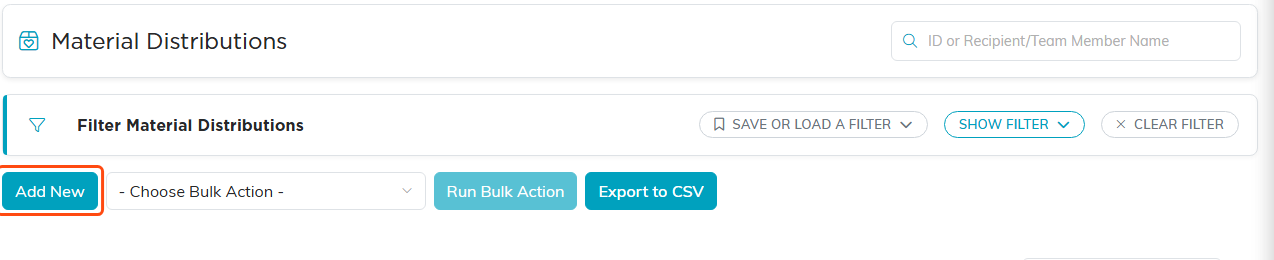
Add New opens the Add A New Material Distribution page.
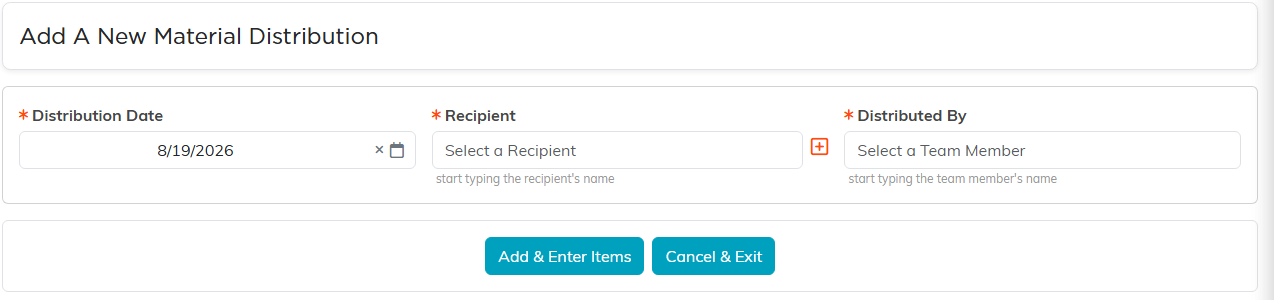
All three fields are required.
Only people who have been designated as recipients can be chosen here. If the person you need is not in the list, see Add Material Recipients.
Record what you handed out
Open the Distribution Items page. As the page itself says, to add an item to this distribution you just enter a quantity and save. The page lists your material items with an Available column showing what is on hand right now, and you type the number handed out under QTY Distributed. Save one line with its save icon, or use Save All Changes for the whole list.
Saving takes the goods out of inventory automatically. You do not adjust the item's on-hand count separately.
- If you enter more than you have, Argenta refuses that line with a Not Enough Inventory message and asks you to check the quantity on hand. Other lines still save, and the save summary tells you how many were updated, removed, or skipped.
- If you clear a quantity back to zero, the line comes off the distribution and the stock returns to inventory.
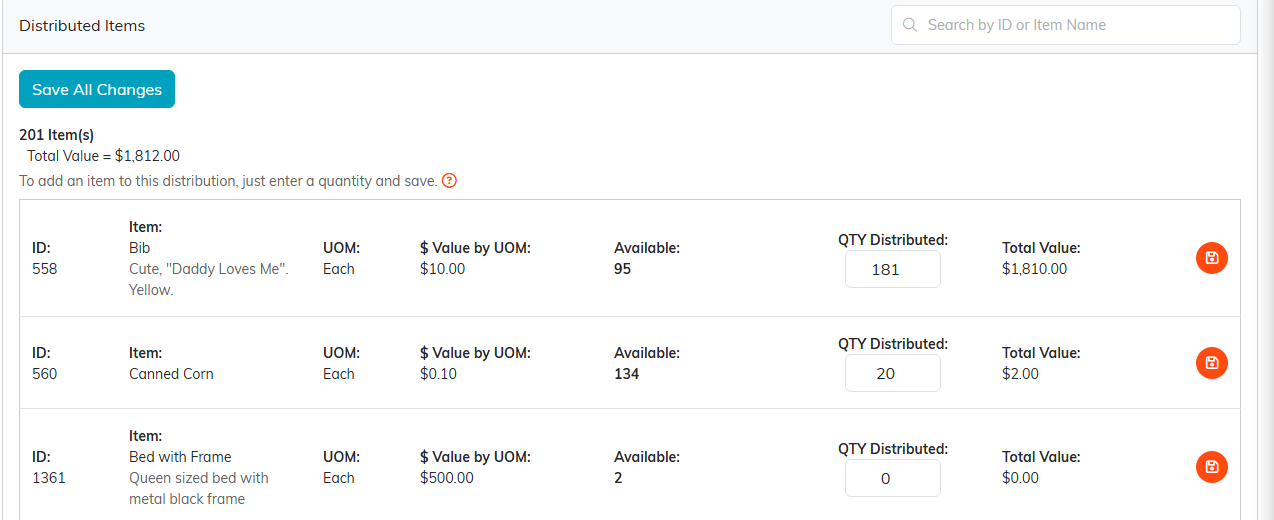
Available shows what is on hand as you type.
Fill in the rest of the record
On Distribution Details you can revisit the date, recipient, and team member, and add your own Distribution Status, Distribution Type, and Distribution Category. Those three are classification codes, so the choices are the ones your team has set up. Chapter, division, and department are here too. Save with Save All Changes & Continue or Save All Changes & Exit.
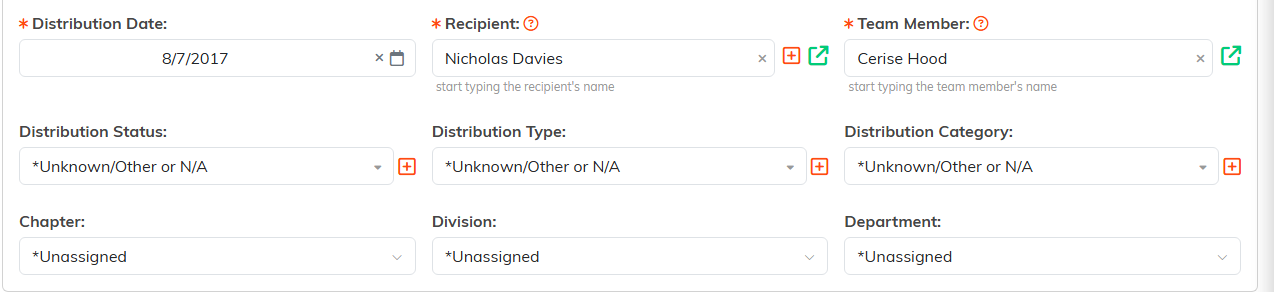
Distribution Details carries the rest of the record.
The rest of the workspace holds Payments, Distribution Files, Distribution Notes, and Record Permissions.

The rest of the workspace sits on this menu.
If the recipient pays something
For a sliding-scale fee, a copay, or any amount a recipient contributes, open the Payments page in the workspace and click Add A New Payment. The page keeps a running count and total of everything connected to that distribution.
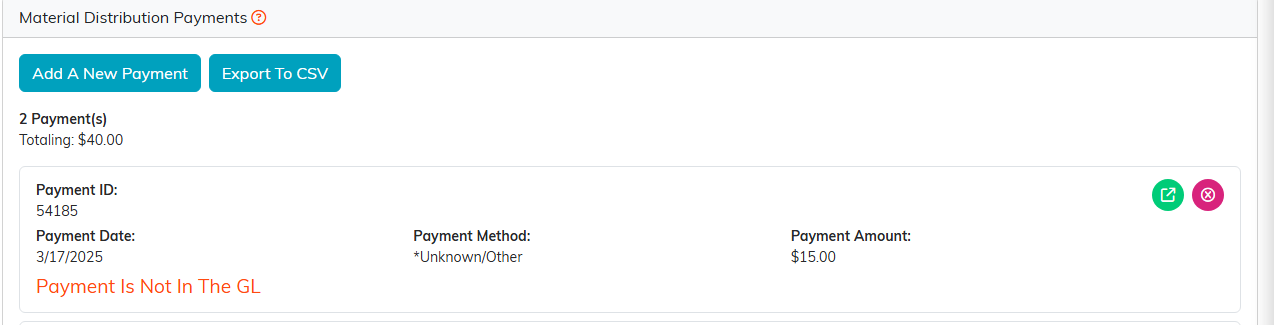
Payments keeps a count and total for the distribution.
Report on what you distributed
Five reports read this data:
- Material Distribution Report for overall activity.
- Materials Distribution Detail Report for the line-by-line view.
- Material Distributions Monthly Report for a period at a time.
- Material Distributions Demographics Report for who you served.
- Material Distribution Types Report for a breakdown by type.
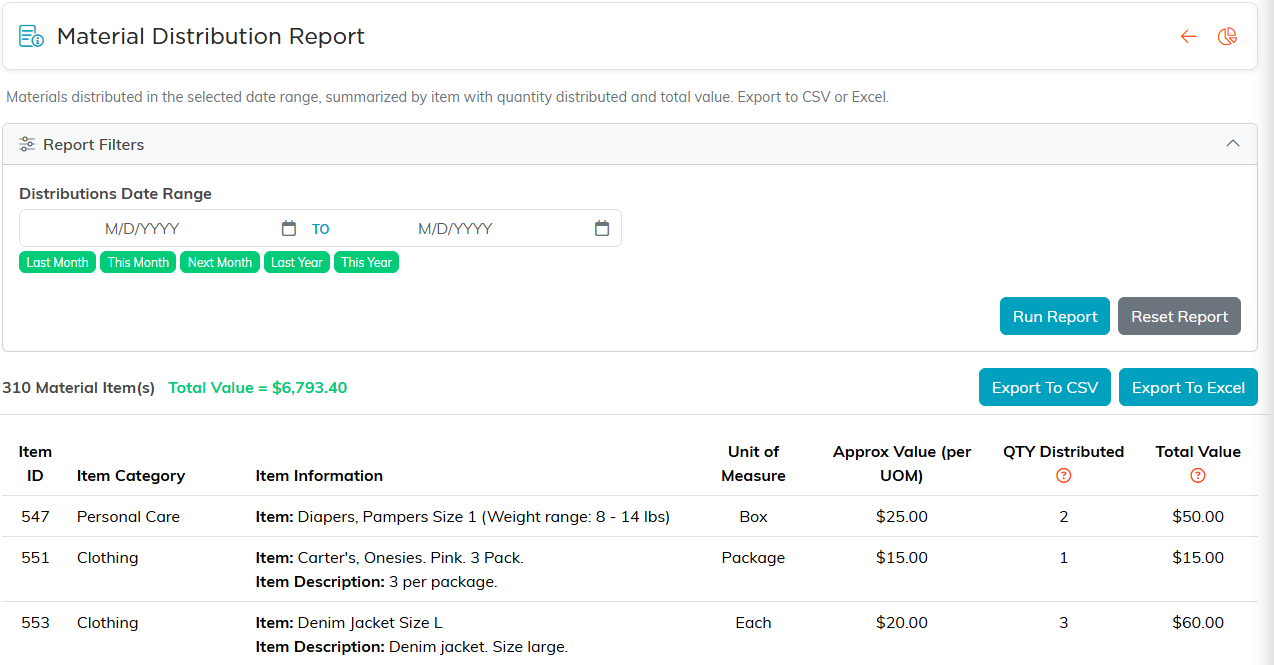
The Material Distribution Report totals what went out by item.
To bring goods in rather than send them out, see How to Record a Material Donation.
