Knowledge Base Article
Using the Lending Library
Once your items are set up as products with stock behind them, the Lending Library handles the loans. If you have not done that part yet, start with Add Lend Out Inventory.
A lending list is one loan: the items that went out together, to one person, coming back on one date. It works just as well for a single item as for a pile of them.
Lend items out
- Choose Products & Inventory > Lend Out Inventory to open your Inventory Lending Lists.
- Click Add New. You get a screen of your available inventory items.
- Enter the QTY for each item going out. An item with no inventory behind it is dropped when the list is compiled, so a quantity you type against an empty product quietly will not appear.
- Click Add Designated Items To A Lending List. That opens the new lending list on its List Details page.

Add New opens your available inventory items.
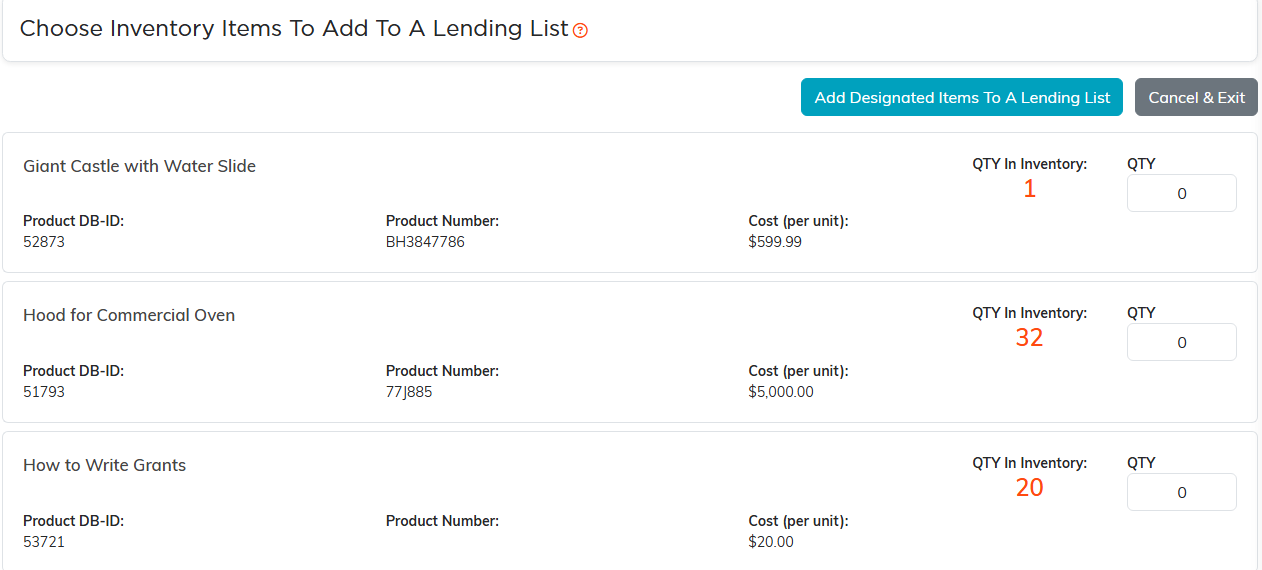
An item with nothing in inventory behind it is dropped when the list is compiled.
Fill in the loan
- Lending Status starts at In Process. Change it to Lended Out when the items actually leave.
- Date Lended Out is required when you move the list to Lended Out. Type it or use the date picker.
- Planned Return Date is when you expect the items back.
- Actual Return Date stays blank until they come back. It only becomes editable once the status has moved past In Process.
- Lent By (Team Member) is who on your side handed the items over.
- Lent To Constituent is the borrower, and it is required when you move the list to Lended Out. Start typing their name and pick them from the list.
- Description is free text for anything worth noting about the loan.
While the status is still In Process, the page reminds you what is outstanding: change the status to Lended Out and fill in Date Lended Out and Planned Return Date to complete the loan.
Below the details, Inventory Items in this Lending List recaps what is going out. Adjust quantities here if you need to, because this is the last convenient place to do it.
Save with Save All Changes to stay on the record or Save All & Exit Record to go back to your lending lists.
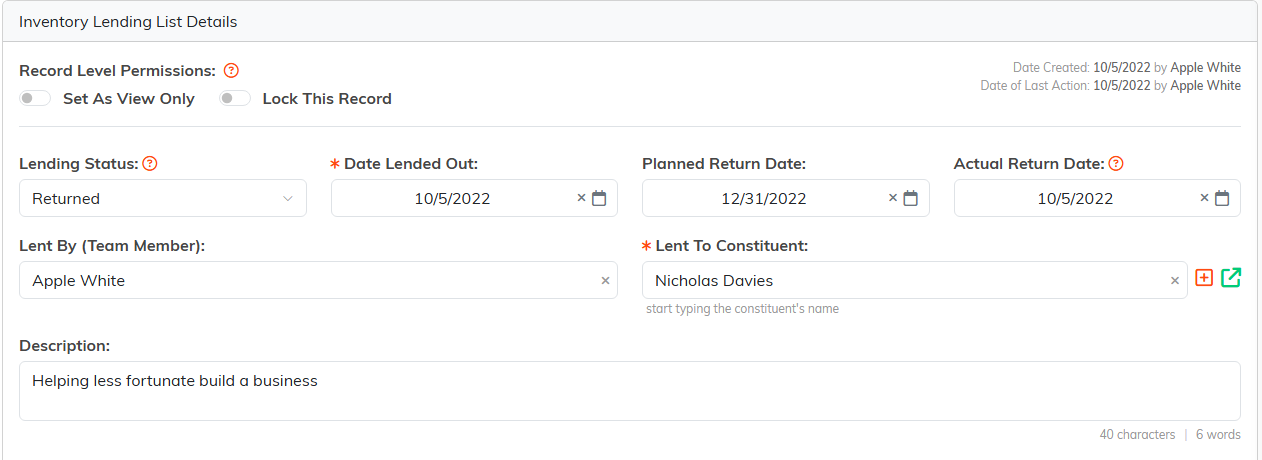
Date Lended Out and Lent To Constituent both carry the orange asterisk.
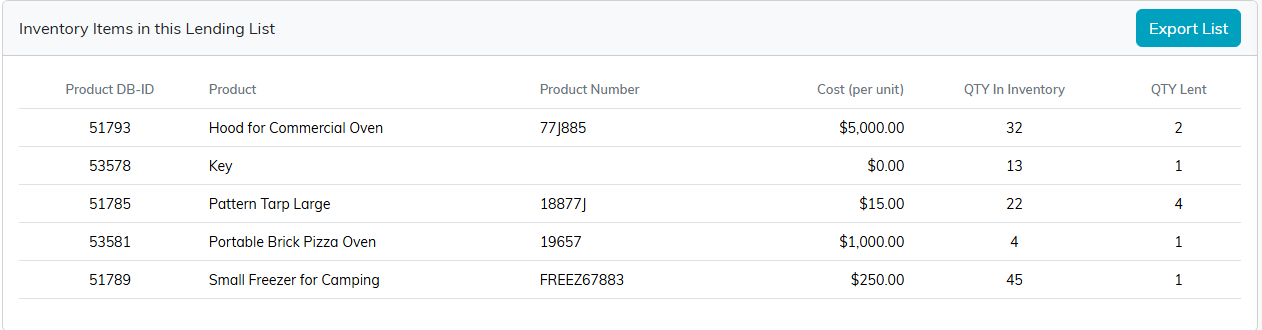
This is the last convenient place to adjust a quantity.
Take the items back
- From the Inventory Lending Lists, click the open icon on the loan you are closing.
- Enter the Actual Return Date.
- Set Lending Status to Returned.
- Click Save All & Exit Record.

Actual Return Date only becomes editable once the status has moved past In Process.
How the statuses work
The three statuses run in order and you cannot skip one: In Process to Lended Out to Returned. A list that is In Process offers only In Process or Lended Out, one that is Lended Out offers only Lended Out or Returned, and once it is Returned the loan is closed. That is deliberate, so a loan cannot be marked returned before it was ever recorded as going out.
The Inventory Lending Lists screen shows the status of every loan, so you can see at a glance what is still out, what is being prepared, and what has come back.
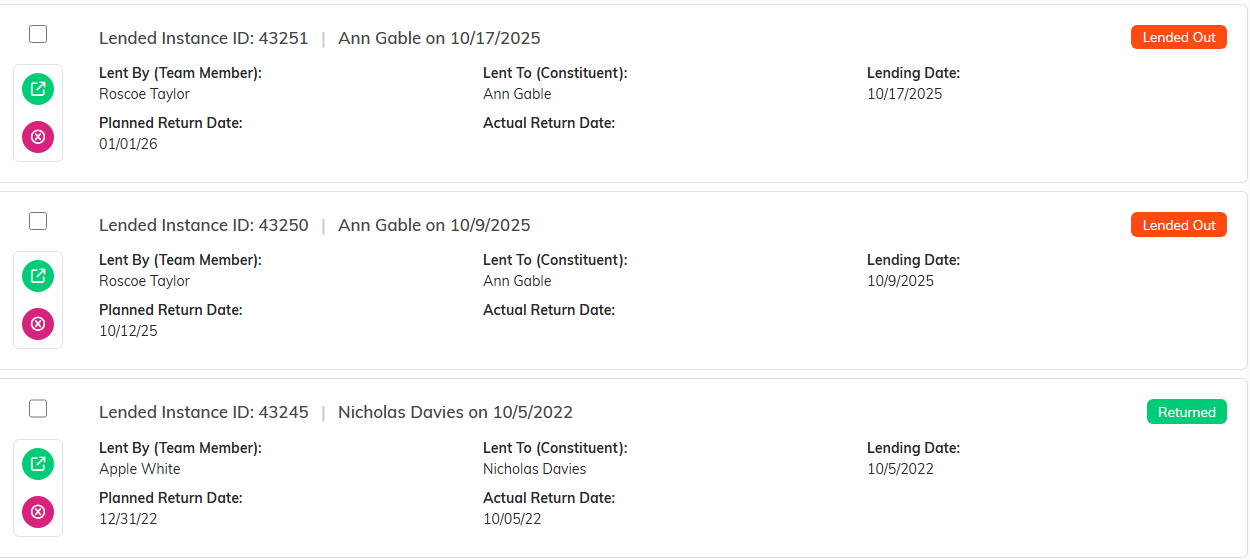
The badge on the right of each row is the status.
