Knowledge Base Article
How to Insert a Table in the Content Editor
To add a table to your content:
- Place your cursor where you want the table
- Click the table icon in the toolbar
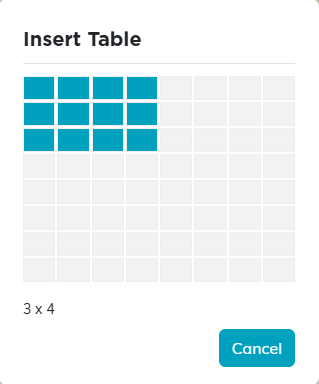
- A grid picker appears - hover over the grid to select your table size
- The grid shows rows × columns as you hover (e.g., "3 x 4")
- Click to insert a table with that number of rows and columns
Working with your table:
- Click in any cell to type content
- Click in a cell to move to it; Tab and Shift+Tab indent and outdent the text inside the cell rather than moving between cells
- The table will expand as you add content
- Drag the handle at the bottom right corner to make the table narrower or wider. The readout shows the width as you drag. A table can be anywhere from 10% to 100% as wide as the space it sits in, including a table inside another table's cell.
- On a phone the table goes back to full width whatever you set here, and each cell drops below the one before it, so two columns read as one stacked column on a small screen.
Changing a table: right-click any cell to open Cell Options. From there you can align the text in the cell left, center or right and top, middle or bottom, set the cell's padding, insert or delete a cell, row or column, clear the cell, merge it with the next cell or split a merged one, resize the cell, or Delete Table.
Tips:
- Keep tables simple for email compatibility
- Tables are great for organizing data in columns
- You can nest formatting (bold, colors, etc.) within table cells