Knowledge Base Article
How to Insert an Email-Friendly Button in the Content Editor
The content editor lets you create styled buttons that work reliably across email clients. To insert a button:
- Place your cursor where you want the button
- Click the Insert Button icon (the small dark box reading BTN) in the toolbar
- Configure the button:
- Text - The button label (e.g., "DONATE TODAY")
- URL - Where the button links to
- Width/Height - Button dimensions in pixels
- Font Size - Text size on the button
- Align - Left, center, or right alignment
- BG Color - Button background color
- Text Color - Button text color
- Border Color - Button border color
- Radius - Corner roundness (0 = square, higher = rounder)
- Target - New window or same window
- Click Save to insert the button
A new button starts as DONATE TODAY, 220 by 44 pixels, 14 px text, centered, purple (#351C75) with white text, a 24 px radius, opening in a new window. Change whatever you need before you save.
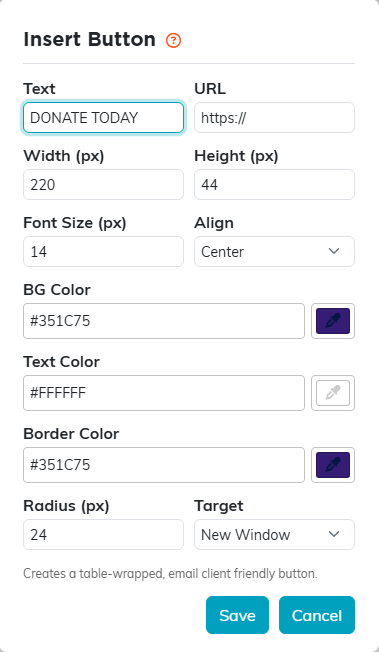
To change a button you already inserted, click it in the writing box so it is selected, then click Insert Button again. The box opens with that button's settings. The bold, italic, font and size buttons do not work on a button; change its look here instead.
Tip: These buttons use table-based HTML that renders correctly in Outlook and other email clients that don't support modern CSS.