Knowledge Base Article
How to Track Restricted Grant Funds
A restricted grant comes with rules about how the money may be used. Record those rules on the grant so anyone who touches it later knows what the funder actually agreed to.
Mark The Grant As Restricted
- Open the grant under Grant Management > Grants Receivable.
- On Grant Details, scroll to the conditions area.
- Turn on Restricted Grant.
- Fill in Restricted Grant Description and/or Requirements.
- Click Save All Changes & Continue.
There is a matching Challenge Grant switch with its own description box, for grants conditional on hitting a fundraising target.
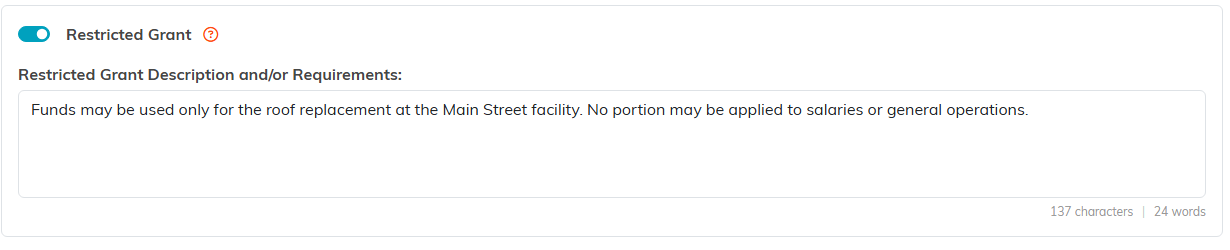
The description box is where the funder's rules go, in their words.

Challenge Grant sits in the block below, built the same way.
Write The Description Properly
This field is the one people actually read a year later, so be specific rather than tidy. Cover:
- What the funds may be spent on, in the funder's own words where you can.
- What is explicitly excluded. Overhead and staff salaries are the usual sticking points.
- Any deadline for spending the money.
- Reporting the restriction creates, and when it is due.
Quote the award letter rather than paraphrasing it. A paraphrase is where the meaning quietly drifts.
Common Kinds Of Restriction
- Program specific: only for one named program.
- Purpose specific: only for certain costs, like equipment or training.
- Time limited: must be spent inside a set window.
- Geographic: only for services in a particular area.
Show That You Complied
The switch records the restriction. Use the grant's own tools to show you honored it:
- Connections: link the programs, expenses and time sheet tasks the money actually paid for. This is your evidence. A project is set on Grant Details itself: turn on Project Grant and pick the Corresponding Project.
- Files: keep the award letter and any written clarification from the funder.
- Notes: record decisions, especially any time you asked the funder whether something qualified and what they said.
If you are unsure whether a cost is allowed, ask the funder before you spend it and note the answer. That question is far cheaper to ask now than to answer in an audit.

Connections, Grant Files and Grant Notes carry the evidence.
