Knowledge Base Article
How to Upload Documents to the Document Library
Store the documents your whole organization needs in the Document Library, so people can find them instead of asking who has the latest copy.
Upload a document
- Go to Workflow & Productivity > Document Library.
- Click Add A New Document. Argenta asks for the Document Title first, which is the only required field, then you click Add & Enter Details. The document record is created and the Document Workspace opens on Document Details, where the category, the description and the file itself are added.
- Fill in the details:
- Document Title. Required, and the thing people search on, so use a name a colleague would actually type.
- Document Category. One of your own classification codes. Use the add icon on the field to create a new one.
- Document Description. What the document contains, and when someone would want it.
- Attach the file under Upload The Document Here. Drag it onto the box marked Drag & Drop Your File Here, or click the box to browse your computer.
- Click Save Changes & Exit.
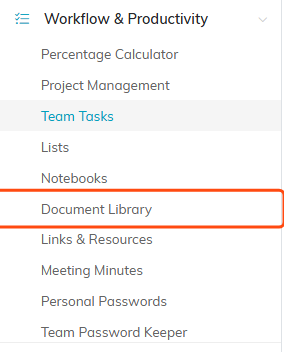
Document Library sits under Workflow & Productivity in the main menu.

Add A New Document asks for the document title first.
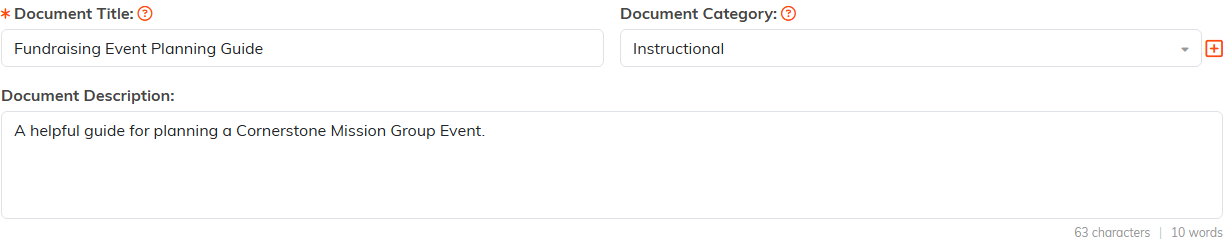
Title, category and description. The plus icon beside Category adds a new code.

Drop the file on the box, or click it to browse your computer.

Save Changes & Exit stores the document and closes the workspace.
What you can upload
Images (png, jpg, jpeg, gif), PDFs, Word documents, Excel spreadsheets, text and CSV files, RTF, and zip archives.
Replacing the file later
Open the document and look at the upload box. With a file already attached it invites you to click or drag to replace, so you can put a new version in place without creating a second record and leaving people unsure which is current. There is also a Download Document button for grabbing a copy.

The attached file is named under the box. The pink icon takes it off the record.
Who can see it
Use Chapter, Division, and Department to tie a document to one part of your organization. For a document that should not be edited or opened by everyone, use Set As View Only or Lock This Record at the top of the details page, and name your exceptions on Record Permissions.

These tie the document to one part of your organization.

Both switches sit at the top of the details page.

Record Permissions is where you name your exceptions.
For the fuller walkthrough see Add Documents in the Document Library.
