Knowledge Base Article
How to Create Project Checklists
Project checklists work in two levels. You create a named checklist, then add the items that go inside it. A project can carry several checklists, so onboarding, launch, and close-out can each have their own.
Create a checklist
- Open the project and go to Project Checklists.
- In the checklist panel, click Add New.
- Type the checklist name in the row that appears.
- Click the save icon on that row, or Save All.

The checklist panel. The green icon on a row opens that checklist.
Add the items
- Select the checklist you just made.
- In the items panel, click Add New and type the item.
- Repeat for each step, then click the save icon on each row, or Save All.
Tick items off as the work gets done. Toggle All ticks or clears every item at once, which is useful when you have finished a stage in one go.
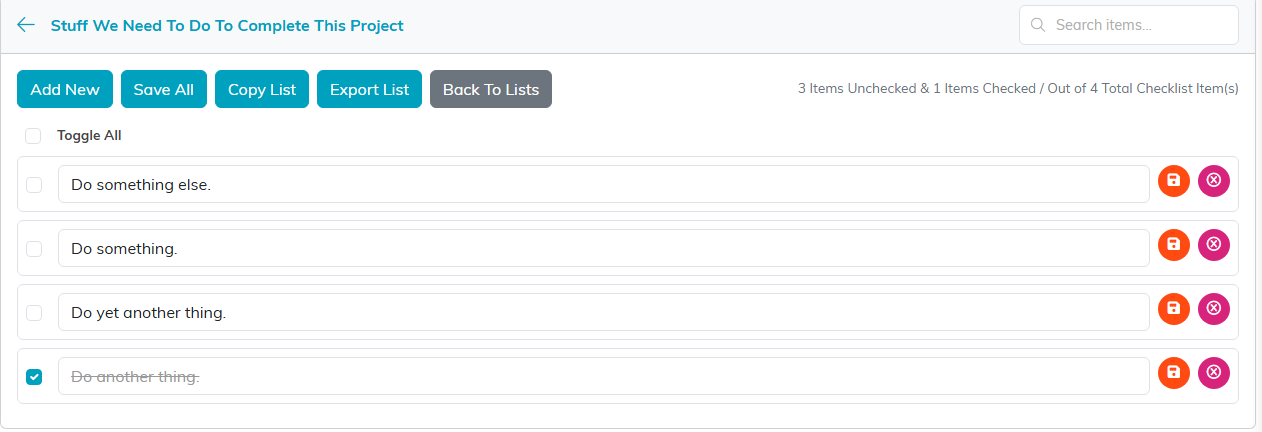
The items panel. Toggle All ticks or clears every item at once.
Reusing a checklist
Copy List duplicates a checklist and its items. If your organization runs the same kind of project repeatedly, build the checklist once and copy it each time rather than retyping it.

Copy List sits with the other buttons on the items panel.
Finding things
Both panels have their own search box, one for checklists and one for items, which matters once a long-running project has built up several lists.

Each panel keeps its own search box in the header.
Checklists or tasks?
- Checklists are for steps you want to confirm were done. They do not have an assignee or a due date, and they do not affect the project's progress meter.
- Project Tasks are assignable work with due dates and hours, and they are what the progress percentage is calculated from.
Use a checklist for quality control before you call a project finished, and tasks for the work itself.
