Knowledge Base Article
How to Add Program Projected Expenses
Projected expenses help you plan your program budget by estimating costs before they occur.
Accessing Projected Expenses
- Open the program
- Click Budget & Financials in the workspace navigation
- Click the Projected Expenses card at the top of the page

Setting the Target Budget
At the top of the Projected Expenses page is the Target Budget. Type the amount and it saves on its own, with a green Saved confirmation. This is the same number as the Budget field on Program Details, so changing it in either place changes both.

Target Budget saves on its own as soon as you leave the field.
Adding a Projected Expense
- Click Add New Projected Expense
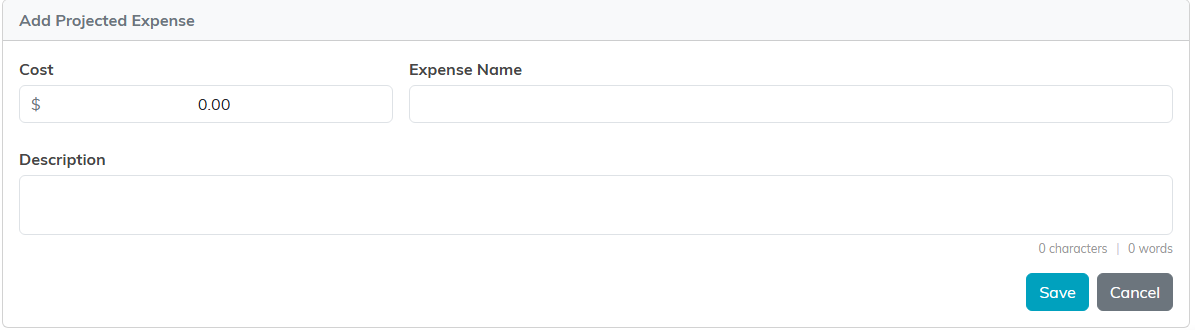
- An Add Projected Expense form opens with three fields: Cost, Expense Name (up to 150 characters; a longer name is refused rather than cut), and Description
- Click Save to add it, or Cancel to back out
Managing Expenses
Above the list, Argenta shows how many projected expenses you have and what they total. Each expense in the list stays editable:
- Edit: Change Expense Name, Description, or Cost right in the row, then click the round save icon on that row
- Delete: Click the round X icon on the row and confirm
Each row saves on its own, so save a row before moving to the next one.
On a program that is view-only for you, the page still opens and lists the projected expenses, but the Add New Projected Expense button and the row icons are not shown, and the Target Budget field cannot be edited. If it is locked to you, the page shows only a message saying the record is locked.

Each row saves on its own with the round save icon.
Projected vs Actual
Use projected expenses for planning. Actual spending is entered on the Expenses page and linked to the program, then it appears under Actual Expenses. The Financial Summary shows both side by side.
