Knowledge Base Article
How to Create and Manage Programs
Programs in Argenta organize the ongoing work your organization runs, the people involved in it, and the money behind it. Each program is a record with its own participants, budget, sponsorships, files and notes.
Creating a Program
- Go to Programs > Program List
- Click Add A New Program
- Enter the Program Name and click Add & Enter Details. The name is all this step asks for, and nothing is saved until you click it. Cancel & Exit takes you back to the list.
- Fill in the rest on the Program Details page, then save
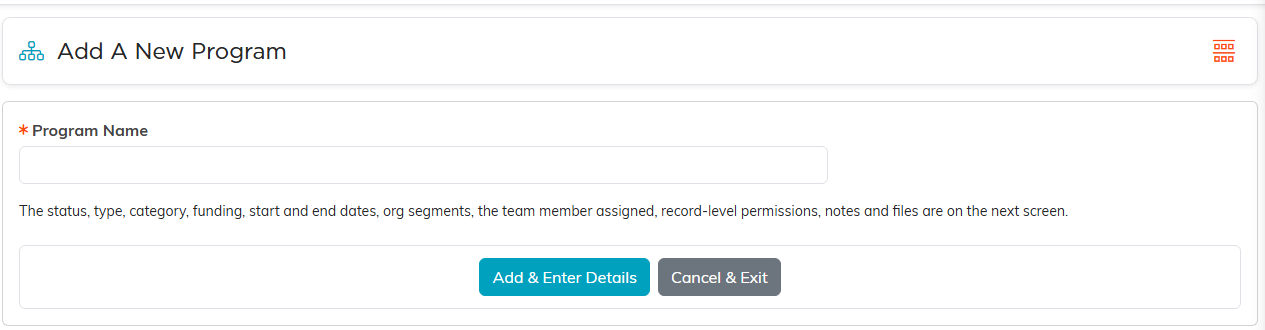
The name is all this first step asks for.
What You Can Record on a Program
- Program Name: required
- Program Status
- Program Type and Program Category
- Assigned To (Team Member): the staff member responsible
- Program Start Date and Program End Date
- Budget
- Is Program Currently Funded?
- Program Description
- Chapter, Division and Department
Organizations that use districts and precincts also see those two fields, with the precinct list narrowing once a district is chosen.
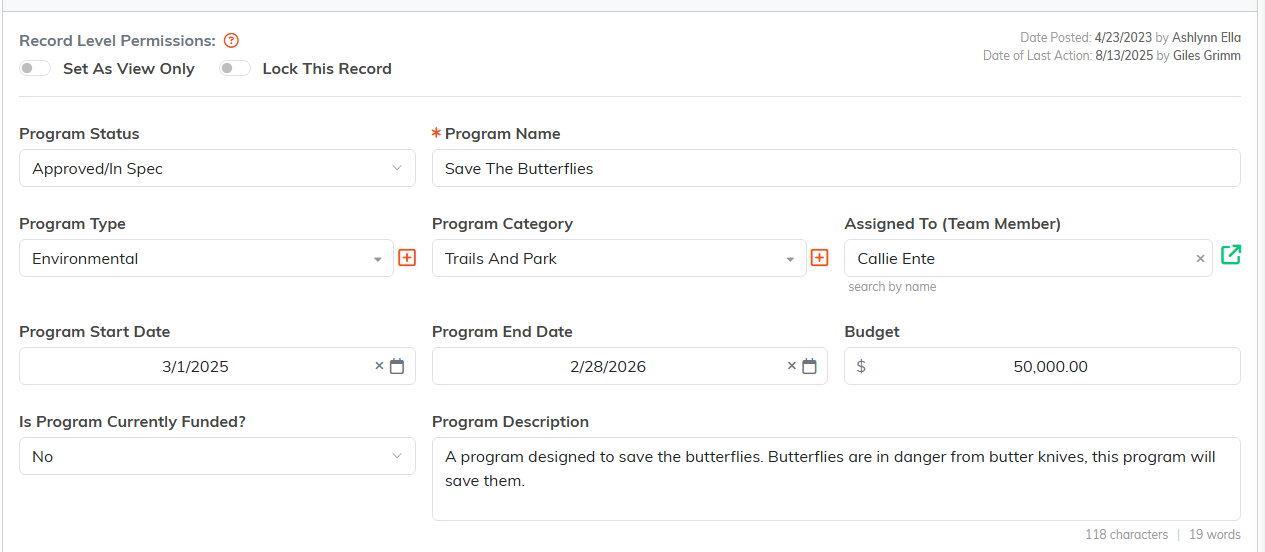
Program Details, with the required Program Name marked by the orange asterisk.
Program Status
Program Status draws on the same status list Argenta uses across the system, so the choices are New, Approved/In Spec, Assigned, In Process, Waiting On Client/Customer, In Testing/QA, Needs Final Approval, As Time Allows, On Hold, Completed and Cancelled/Void. Pick the one that fits how your organization tracks progress and use it consistently.
The Program Workspace
Once a program is saved, these tabs are available on the record:
- Program Details
- Connections: what the program is linked to
- Participants: the people in the program
- Budget & Financials: projected and actual income and expenses
- Program Sponsorships
- Program Files
- Program Notes
- Record Permissions

The workspace menu, with Program Details open.
Record Level Permissions
Each program can be set to View Only or Locked from the top of the Program Details page, which stops the record being changed by anyone without the right permission.
Best Practices
- Use clear, consistent program names, since the list is searched by name
- Set Assigned To so every program has an owner
- Keep the status current, because it is what other people read first
- Use Program Type and Program Category consistently so filtering and reporting stay useful
