Knowledge Base Article
How to Set Up Payment Schedules
Mission trips can be paid for in installments. You set the payment plan once on the trip, and every enrollment gets its own copy of it to work against.
You need Mission Trip Manager or Master Admin.
Building the Payment Plan
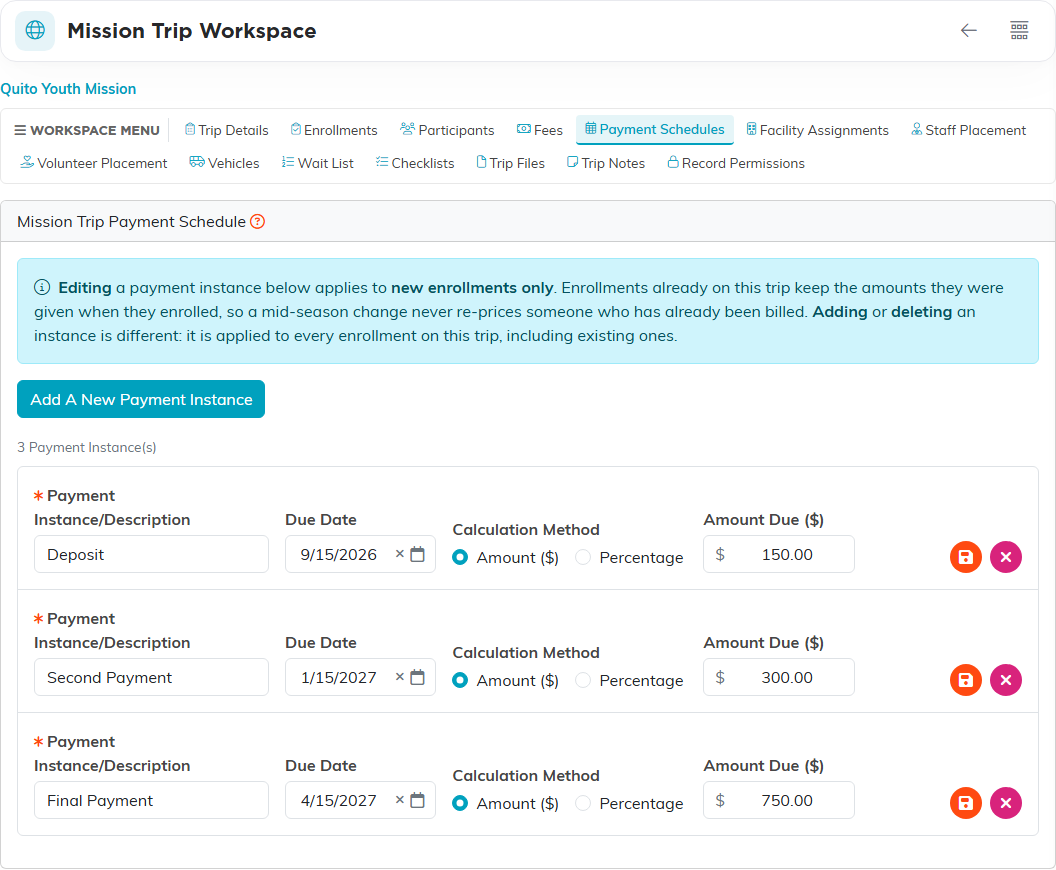
- Open the mission trip and click the Payment Schedules tab.
- Click Add A New Payment Instance.
- Enter a Payment Instance/Description and a Due Date. Both are required.
- Choose a Calculation Method, either Amount ($) or Percentage.
- Enter the Amount Due ($) or the Percent Due (%) to match.
- Click Add This Payment Instance, then repeat for each installment.
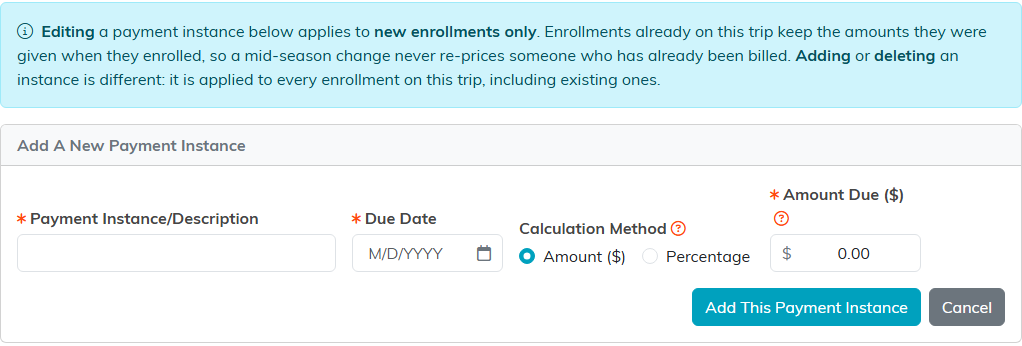
You add installments one at a time. Argenta does not generate a run of due dates for you, so there is no number of payments to enter and no monthly or biweekly frequency to pick. A deposit, a second payment and a final balance is three passes through that form.
How the Two Calculation Methods Work
This is the part worth reading twice, because the two behave differently.
- Amount ($) is a per person figure. It is multiplied by the enrollment's headcount, so $200 becomes $800 due on an enrollment of four. It is capped at the enrollment's total cost, so an installment can never ask for more than the trip is worth.
- Percentage is a share of what is left after the fixed amounts due before it, not a share of the whole trip price. "Before" means by Due Date, not by where the row sits in the list.
Percentage rows do not reduce the base for the percentage rows due after them. Percentage rows with no Amount row due between them all measure against the same figure, so three rows of 50% ask for 150% between them. Check your installments add up to the whole before you rely on the plan.
Percentage is what lets one plan serve enrollments of different sizes, which is why it is worth using for anything after the deposit.
What Each Participant Sees Owing
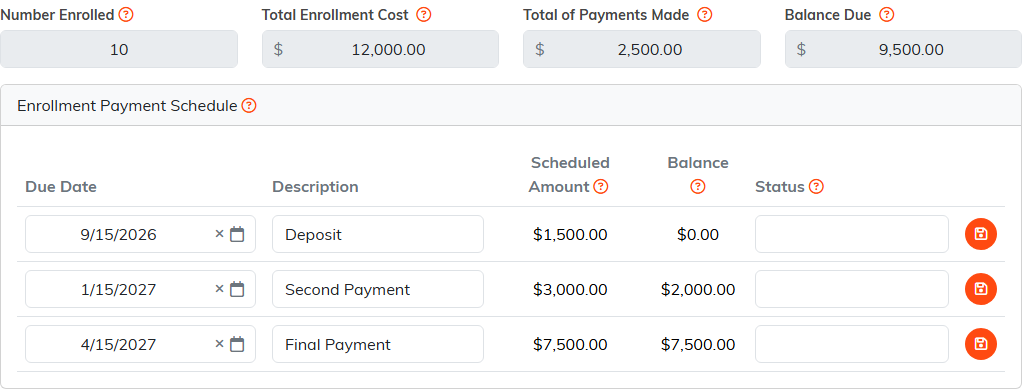
Open the enrollment and click Billing. The Enrollment Payment Schedule card lists that enrollment's copy of the plan, with Due Date, Description, Scheduled Amount, Balance and Status, plus the overall Balance Due.
Each row was copied across when the enrollment was created, or when you later added a new instance to the trip. On the enrollment you can edit the Due Date, Description and Status, and that affects only that one enrollment. This is how you give somebody an extension without changing anybody else's plan.
Scheduled Amount and Balance cannot be edited. Argenta rebuilds them from the enrollment's cost and payments every time the screen loads.
How Balances Fill Up
Payments are applied top down. Everything paid on the enrollment pours into the first row until it is covered, then into the next, and so on.
Two consequences catch people out:
- One large payment can clear several rows at once, so a row can read zero even though nobody ever paid that exact amount.
- Balances count payments minus refunds, so issuing a refund pushes these balances back up.
Finding Out Who Owes What
Argenta does not send payment reminders. Nothing emails a participant when an installment falls due or goes past its date, and there is no reminder timing to configure. Chasing payment is something you do, and these reports are how you know who to chase:
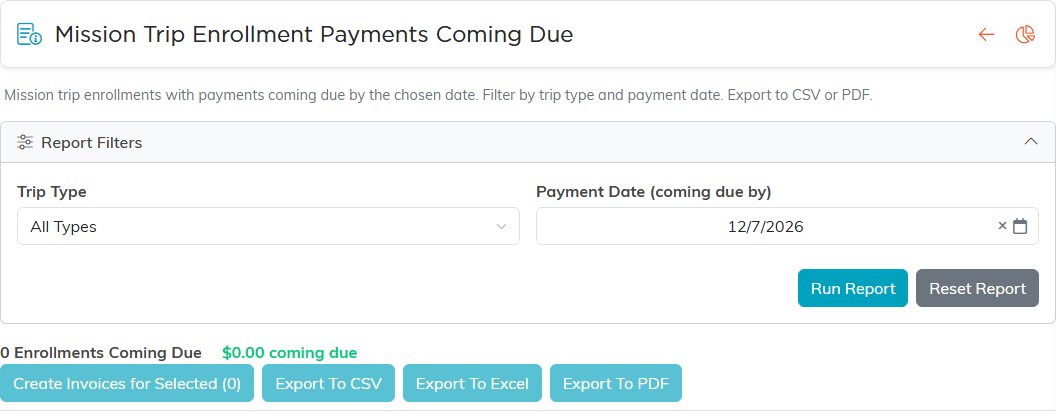
- Mission Trip Enrollment Payments Coming Due: enrollments with payments due by a date you choose. Filter by trip type and payment date, and export to CSV, Excel or PDF. This is the one to run before a deadline.
- Month End: Enrollments with an Outstanding Balance: who is still behind.
- Mission Trip Payments Monthly Report and Mission Trip Revenue Summary Report for the money coming in.
Changing a Plan Already in Use
Switching a row between Amount and Percentage does not reach enrollments already on the trip. They keep the method that was copied to them, and only enrollments added afterwards get the new one. To change an existing participant's plan, edit it on their enrollment's Billing tab.
Deleting a row from the trip's Payment Schedules tab also deletes the copy made from it on each enrollment. A copy that is not linked back to its row, which can happen on enrollments copied by older versions of Argenta, is not matched and stays on the enrollment.
Getting the Most Out of It
- Settle each row's figures before you open the trip for enrollment. A row you add later is copied onto every enrollment already on the trip, but a change to an existing row is not, so those enrollments keep the old figures until you edit them by hand.
- Make the deposit a fixed Amount and the later installments a Percentage, so one plan works whatever the group size.
- Add your percentages up. Argenta will not stop you writing a plan that asks for more than the trip costs.
- Put the deadline in the Payment Instance/Description, since that is the text a participant sees on their billing screen.
- Run Mission Trip Enrollment Payments Coming Due on a regular day each month, because nothing will prompt you.