Knowledge Base Article
How to Use the Inventory Lending System
What is Inventory Lending?
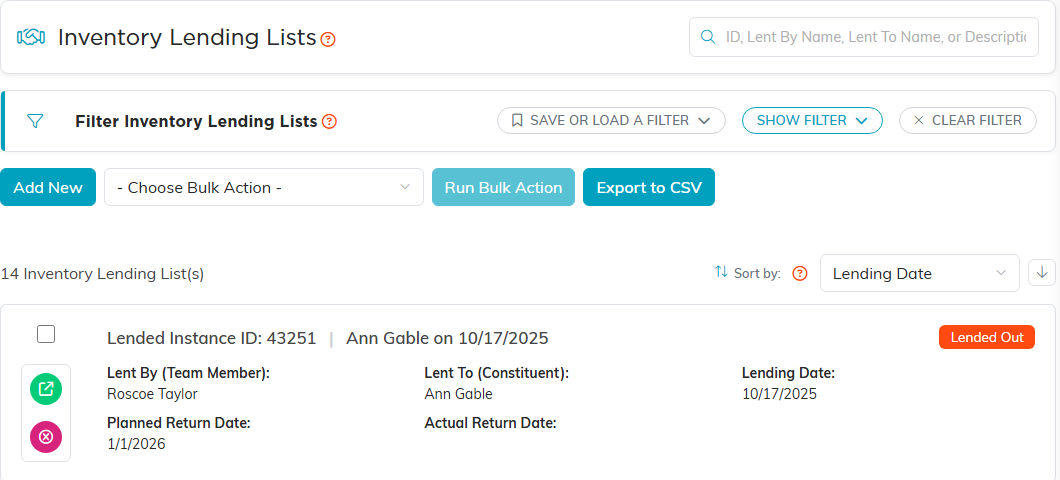
Lending is for items you hand out expecting them back, rather than sell. Loaning equipment to a volunteer, sending educational materials home with a program participant, checking out tools for a community project.
Lending lives at Products & Inventory > Lend Out Inventory. You need Products Manager or Admin rights to open it.
Making a Product Lendable
Open the product under Products & Inventory > Products and switch on Product Can Be Lent Out. Only products carrying that switch appear when you build a lending list. Switch on Track In Inventory as well, so the product has a quantity on hand for lending to draw from.
Creating a Lending List
- Go to Lend Out Inventory and click Add New.
- You get Choose Inventory Items To Add To A Lending List, showing every lendable product with its quantity on hand, product number and unit cost.
- Type a QTY against each item you are lending.
- Click Add Designated Items To A Lending List.
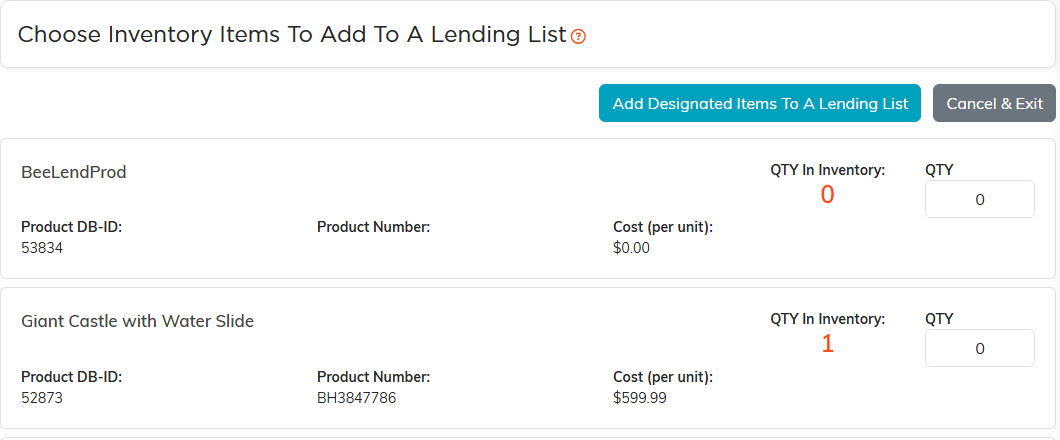
You have to enter a quantity against at least one item. Clicking with everything left at zero is refused rather than creating an empty list. Each quantity is re-checked against what is actually on hand at that moment and capped at it, and an item with nothing on hand is left off.
The list is created at status In Process and you land on its workspace.
The Lending List Workspace
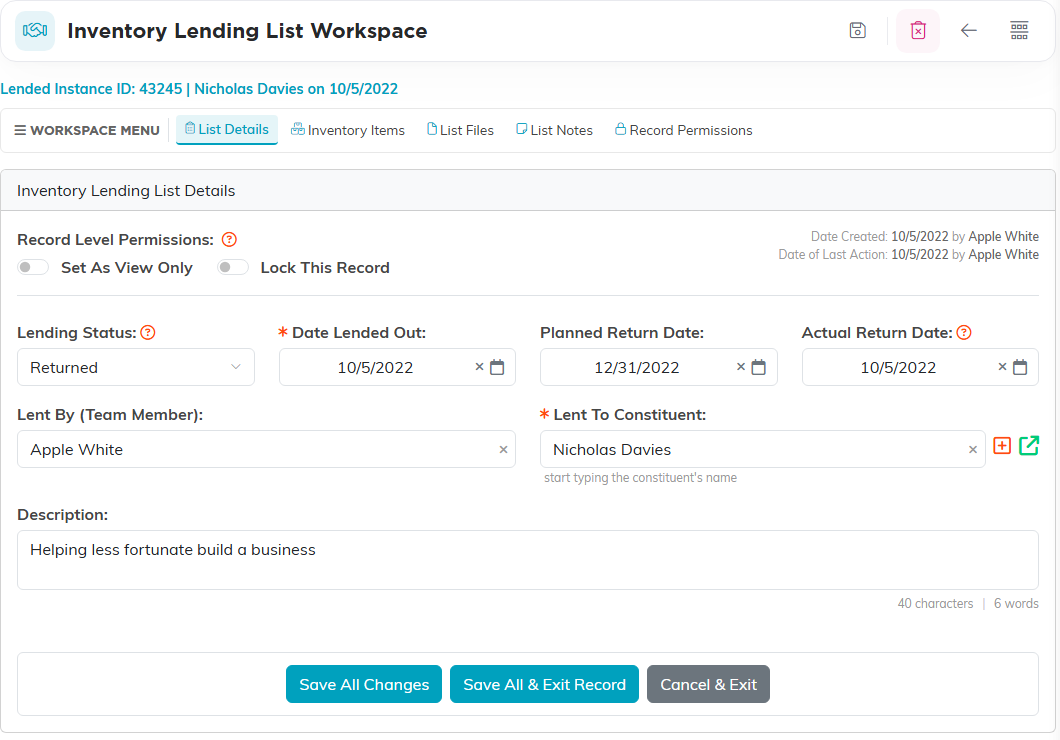
Five tabs: List Details, Inventory Items, List Files, List Notes and Record Permissions.
On List Details you set:
- Lending Status
- Date Lended Out (required once the status moves to Lended Out)
- Planned Return Date and Actual Return Date. The actual date stays locked while the list is In Process. Neither return date can be earlier than the Date Lended Out; the same day is fine, for something lent and brought back in one day.
- Lent By (Team Member) and Lent To Constituent. The constituent is required once the status moves to Lended Out, and not before, so a list you are still assembling saves without one.
- Description, plus Set As View Only and Lock This Record.
Status Runs One Way, and It Moves Your Stock
The status ladder is In Process, then Lended Out, then Returned. The dropdown only offers the status you are on and the next one, so you cannot skip a step and you cannot go back.
Changing the status is what moves inventory:
- Moving to Lended Out subtracts each item's QTY Lent from its quantity on hand.
- Moving to Returned adds those quantities back.
Both write a row on the Product Inventory Change Log, so lending shows up in the same audit trail as a manual inventory change.
Filling in the Actual Return Date on a list that is still Lended Out also finishes the return. Argenta moves the status to Returned for you, puts the stock back and logs the change, so you do not have to set the status separately. Changing a return date that was already recorded is treated as a correction and moves no stock.
If a product no longer has enough on hand, the save is refused whole. The status does not change, no stock moves, and the message tells you to lower the quantity and try again.
Seeing What Is Out
The Inventory Items tab lists the products on the list with their DB-ID, product number, unit cost, current quantity on hand and QTY Lent, and exports to CSV.
The tab is read-only. Items and quantities are fixed when the list is created, so if you got a quantity wrong, delete the list and build it again rather than editing it. That also means returns are all-or-nothing: moving to Returned puts back everything the list took out. For a partial return, build separate lists for the items that come back at different times.
Finding Lists
The grid filters on Status, Lent By, Lent To, and three separate date ranges: Lending Date, Planned Return Date and Actual Returned Date. Columns cover List ID, status, both names and all three dates, and the whole filtered set exports to CSV.
There is no overdue flag. To find late items, filter Status to Lended Out and set the Planned Return Date Range to end yesterday. Anything still showing is out past its date.
Deleting
A list at Lended Out cannot be deleted, per record or in bulk, because its stock is still deducted. Move it to Returned first, which puts the inventory back, then delete it. Deleting a list also deletes the files and notes attached to it.
Best Practices
- Fill in the Planned Return Date. It is the only thing that makes a late item findable.
- Use List Notes and List Files for the lending agreement or a condition note, since there is nowhere on the items themselves to record damage.
- Set the status to Returned as soon as items come back, so your on-hand figures stay honest.
- Count physical stock against the Product Inventory Change Log now and then; lending and manual adjustments both land there.