Knowledge Base Article
Apply A Mission Trip Reserve Credit To A Mission Trip Enrollment
A Mission Trip Reserved Credit is issued to an account first, then applied to an enrollment when you are ready to use it. Here is how to apply one, and how to release one you have already applied.
Open the credit
- In the left sidebar, choose Mission Trips > Mission Trip Reserved Credits.
- Find the credit you want and click its open icon to open the Reserved Credit Details page.
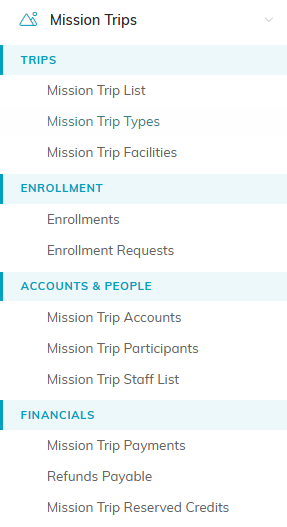
Mission Trip Reserved Credits sits under Financials in the left menu.

The open icon takes you to Reserved Credit Details.
Apply it to an enrollment
- Turn on Credit Has Been Applied.
- Set the Date Applied.
- Choose the enrollment in the Applied To Enrollment list.
- Click Save All Changes to save and keep working, or Save All & Exit Record.

The three fields that apply a credit.

Save All Changes keeps you on the credit.
Once a credit has been applied, those three fields lock on this screen so it cannot be applied twice. Applying does not immediately rewrite the enrollment's Total Enrollment Cost or Balance Due, so open the enrollment's Billing screen afterwards to confirm the credit has come off.
You can still change an applied credit's Credit Amount. When you do, the enrollment's Reserved Credit discount changes by the same amount, so the two stay in step. The same check applies as on un-apply: if the enrollment's reserved-credit discount no longer matches this credit's amount, the save is refused and nothing changes.
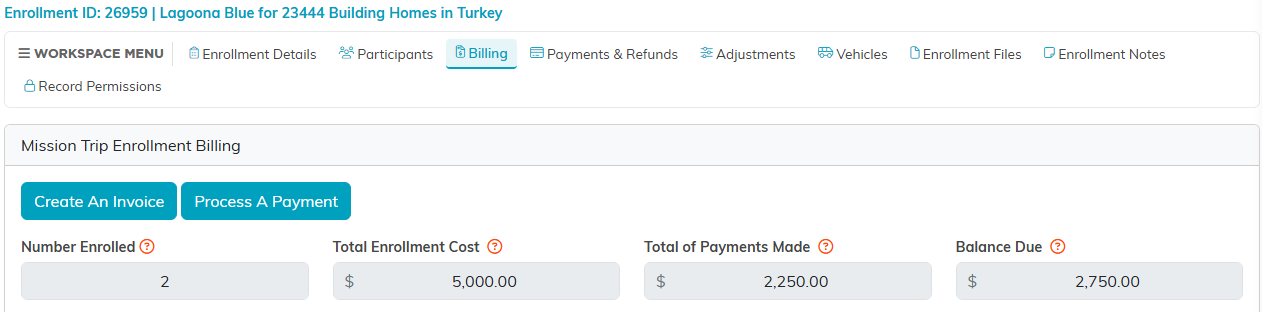
The enrollment's Billing tab is where you check the credit came off.
Release a credit you have applied
- Open the credit's Reserved Credit Details page.
- Click Un-Apply This Reserved Credit in the title bar.
- Confirm. The credit becomes available to use again, and its discount comes off the enrollment at the same time.
Three things stop an un-apply. If the record is locked, unlock it under Record Permissions first. If the enrollment it is applied to is locked, only a Master Admin can apply, change or remove a credit on it, so unlock the enrollment first. And if the enrollment's reserved-credit discount no longer matches this credit's amount, we cannot tell which discount line belongs to this credit, so sort the enrollment's credit lines out first and then un-apply.
