Knowledge Base Article
Overview, Working With Volunteer List
Volunteers are the people who give their time to support your organization. Argenta gives you a dedicated Volunteers screen where you can view, update, and manage all of your volunteer records. This article explains how Volunteers are Added, Viewed/Opened, Edited/Updated, and Deleted. In addition, Bulk Action updates are also covered.
To get to the Volunteers screen, select either Constituents (CRM) > Volunteers or Volunteerism > Volunteers from the main menu on the left side of the screen.
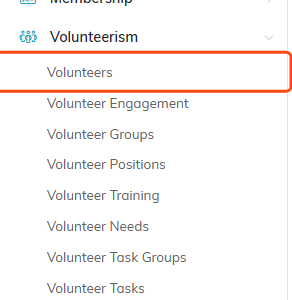
Volunteers sits under Volunteerism, and under Constituents (CRM) as well.
The Volunteers List
The Volunteers screen displays the complete listing of your organization's volunteers. You can search the list by ID, name, or email address, or use the filter options to narrow the list by criteria such as Volunteer Category, Team Member, Department/Chapter, Acquisition Source, Associated Campaign, and date range. You can also filter on Seasons Served as a from-and-to range. You can sort the list by columns such as Active Date, Volunteer Name, Volunteer ID, Volunteer Category, Seasons Served, or Department/Chapter, in ascending or descending order. Use the Add New button to add a new volunteer, and the Export to CSV button to download the list.

Search, filter, Add New and the export button.
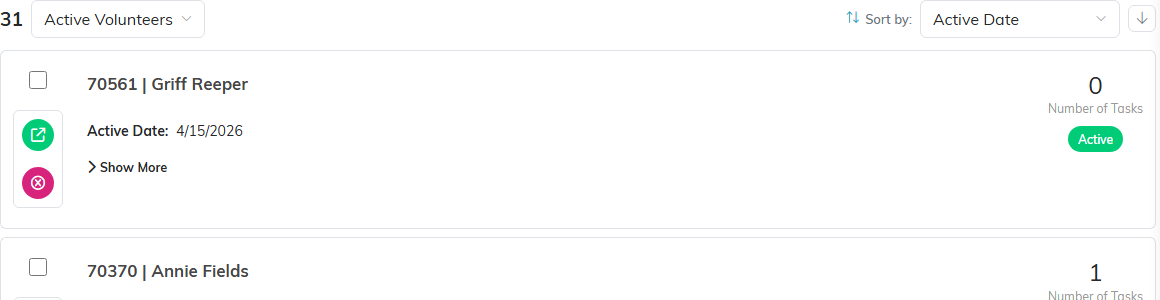
One volunteer card. The green icon opens the record, the pink one deletes it.
Adding a Volunteer
Click Add New to open the Add A New Volunteer page, where you designate an existing constituent as a volunteer. Start typing the constituent's name, select them, and click Add Volunteer & Enter Details. If the person is not yet a constituent, use the add icon in the search box to create them first. For the full walkthrough, see Add Volunteers.
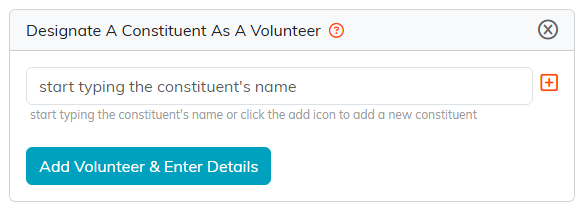
You designate an existing constituent as a volunteer here.
View/Open
To view or open a volunteer, find the record you wish to open by searching or filtering the list, then click the corresponding open button beside the record. This opens the Volunteer Workspace, where the volunteer's details are displayed.
At the top of the Volunteer Details screen you will see the record's audit information along with the volunteer's constituent card. The card displays the volunteer's photo, name, email address, and other key contact information. You can add or change the photo by clicking it. To see or update the volunteer's full constituent information, such as contact details and addresses, click the Constituent ID link on the card. This opens the full constituent record in a new browser tab.
In addition to the Volunteer Details screen, the Volunteer Workspace includes these sections: Volunteer Groups, Training, Volunteerism Interest, Availability, Skills & Experience, Volunteer Positions, Background Checks, Evaluations, References, Status Logs, Follow-Up, Notifications, Contact Log, Email Log, Volunteer Files, Volunteer Notes, and Record Permissions. Depending on your organization's setup, you may see one or two additional sections.

Every section of the Volunteer Workspace.

The two record permission switches at the top.
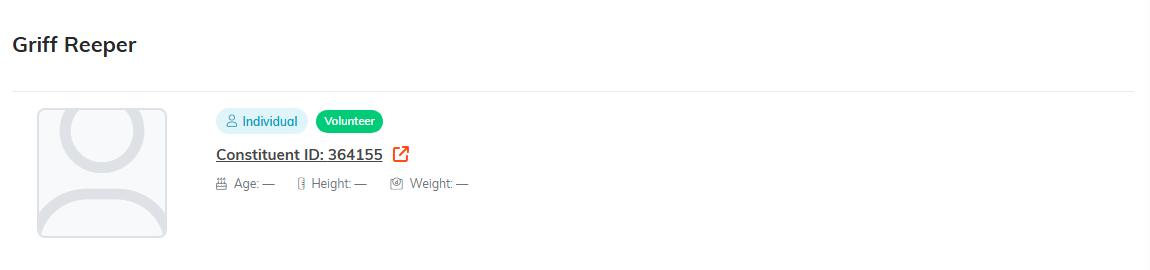
The constituent card. The Constituent ID link opens the full record.
Edit/Update
Below the constituent card you can update the volunteer's details, such as the active date, whether they act as a team member, whether they are a student volunteer, their department or chapter, volunteer category, acquisition source, any associated campaign, and Seasons Served, the number of seasons this person has volunteered with you. Leaving Seasons Served blank means you do not know, which is not the same as entering zero. To update any of these fields, click the drop-downs or click into a field and start typing your new field values. When you've finished, click the Save All Changes button to save and continue working in the record, or the Save All & Exit Record button to save and return to the volunteer list. The Exit Record button returns you to the list without saving.

Active Date, and whether the volunteer also acts as a team member.

Status, category, and whether they are a student volunteer.

Where the volunteer sits in your organization.

How you came to know them, and any campaign they belong to.

The buttons at the bottom of the record.
Deleting Records
You can delete a volunteer either from the Volunteers list, using the delete button beside the record, or from inside the record. A pop-up window will ask if you are sure you want to delete the record. Be very careful, deletion is a final action and can not be undone. Deleting a volunteer removes them from the volunteer list only; it does NOT remove the constituent from your system. Anything recorded against the person rather than the volunteer role stays with them, including the availability they gave you. That availability is removed only if you delete the constituent themselves.
Often you will not be able to delete one at all. Argenta blocks the delete when the volunteer has volunteer tasks, a volunteer position, training records, associated mission projects, an event session, or a mission trip placement, and tells you to make the volunteer inactive instead. When the volunteer fills a volunteer position, it tells you to unassign them from the position (or delete the position) first, because a volunteer in a current position cannot be made inactive either. A locked volunteer is also refused until the record is unlocked, unless you are a Master Admin.
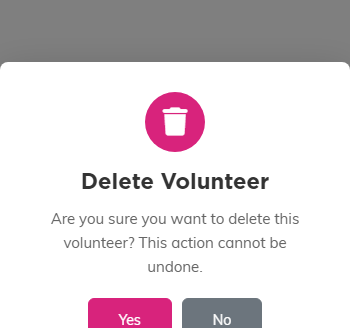
The confirmation. Deleting a volunteer leaves the constituent in place.
Bulk Action
In addition to the regular viewing and editing, you can also do bulk updates. When you are in the Volunteers screen, you can search for or filter the list to find the records you wish to bulk update, then place a check-mark in the corresponding box to mark each record. The "- Choose Bulk Action -" drop-down menu also includes selection helpers: "Select All Records That Meet The Current Filter Criteria", "Unselect All Records", "Select Records Only on This Page", and "Unselect Records Only on This Page".
These are the available actions:
Add A Note for Selected Records - Opens the "Add A Note to Selected Records" window where you can type a note that will be added to every selected record. Locked records, and records set to View Only for you, are skipped unless you are a Master Admin, and Argenta tells you how many were skipped.
Change Classification Code for Selected Records - Opens the "Change Classification Code" window where you choose the code type and the new value to apply to the selected records.
Assign A Team Member for Selected Records - Opens the "Assign A Team Member" window where you choose the team member to assign to the selected records.
Add Engagements To Selected Records - Opens the "Add Engagements" window where you record an engagement for all the selected records.
Add To Constituent Group - Opens the "Add To Constituent Group" window where you search for and select the group you wish to add the selected records to.
Create A New Mailroom List With Selected Records - Opens the "Create A New Mail Room List" window where you set up a new mail room list containing the selected records.
Add Selected Records To An Existing Mailroom List - Opens the "Add To Existing Mailroom List" window where you search for and select the list you wish to add the records to. These Mail Room actions only appear for users with the Mail Room Manager permission, and for Master Admins.
Delete All Selected & Unlocked Records - Deletes the selected records. A confirmation window will ask if you are sure before anything is deleted. Be very careful with bulk delete, this action cannot be undone. Locked records are skipped, and so is any volunteer Argenta will not delete for the reasons above.
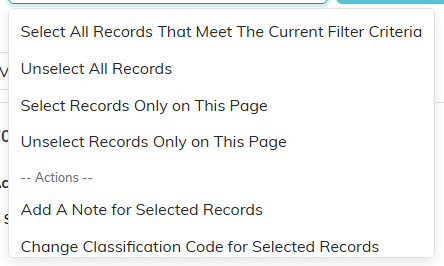
The bulk action dropdown, with the selection helpers above the actions.
Once you make a selection from the drop-down menu, you must click the "Run Bulk Action" button to perform the action.
