Knowledge Base Article
Add A Mission Trip Enrollment
A Mission Trip Enrollment is how a Mission Trip Account joins a mission trip, a lot like buying a ticket. Each enrollment belongs to one specific trip and has a Number Enrolled that drives the account's billing and the trip's available slots. There are two ways to add one.
Add an enrollment from the Enrollments list
- From the left menu, go to Mission Trips > Enrollments.
- Click Add New to open the Add A New Mission Trip Enrollment pop-up.
- Choose the Mission Trip, the Mission Trip Account That Is Enrolling, and the Account Contact Who Enrolled (all required).
- Click Add Enrollment & Enter Details to create the enrollment and open it.
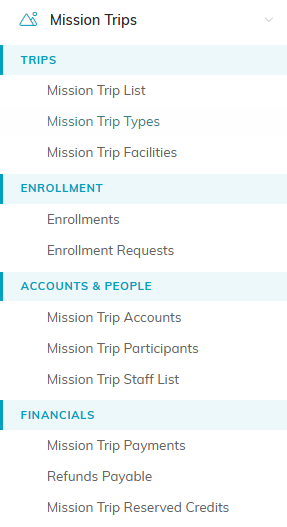
Enrollments sits under Enrollment in the left menu.

Add New on the Mission Trip Enrollments list.
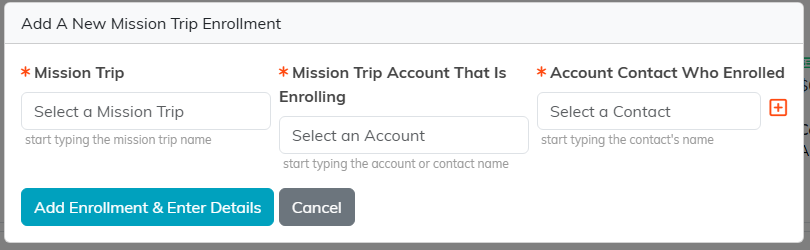
Three pickers, then Add Enrollment and Enter Details.
On the Enrollment Details page, fill in the rest:
- Contact Who Enrolled, Team Member, and On Site Coordinator. None of the three is required, so leave any you do not know yet.
- Enrollment Date (required) and Number Enrolled (required).
- Enrollment Status, Acquisition Source, and an Enrollment Description or Information.
- Record Level Permissions and an Enrollment Approved switch at the top.
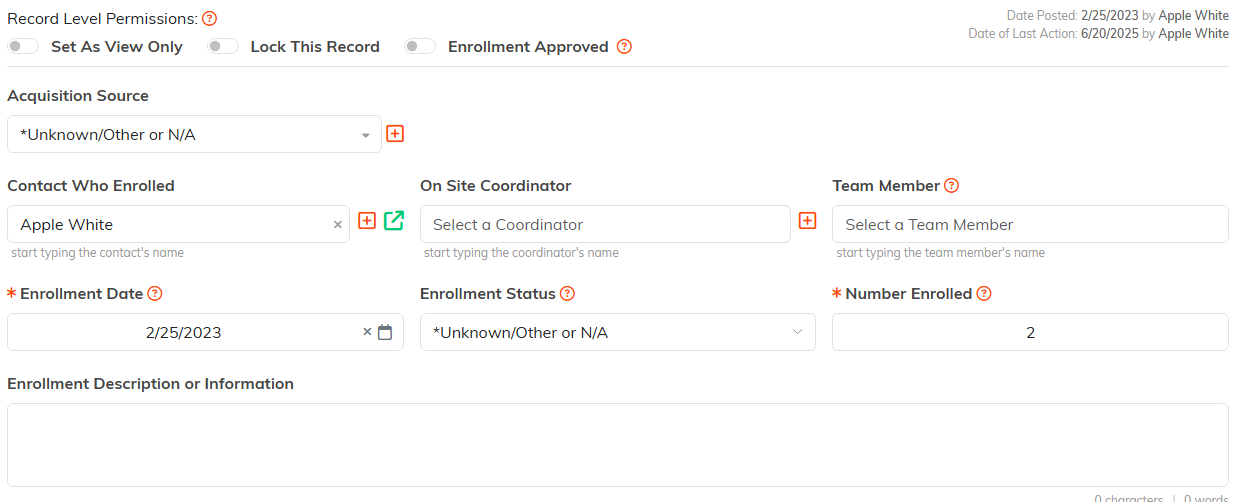
The Enrollment Approved switch sits with the record permissions at the top.
Click Save All Changes & Continue or Save All Changes & Exit. You can add files and notes from the enrollment's Files and Notes tabs.

Save when you are done.
Add an enrollment from the Mission Trip
- From the left menu, go to Mission Trips > Mission Trip List and open the trip with its open icon.
- Choose the Enrollments tab, then click Add A New Enrollment.
- In the panel that opens, pick the Mission Trip Account and Account Contact (both required), then click Add Enrollment.
- Set the enrollment's Status and Number Enrolled right in the list, then click the save icon on that row.

The green icon opens the trip.

Add A New Enrollment sits at the top of the trip's Enrollments tab.

The panel opens in place, above the list of accounts already enrolled.

Set the status and the count on the row, then click the save icon.
