Knowledge Base Article
Add A Mission Trip Payment
A Mission Trip Payment is how you receipt the money you collect for your mission trips. Payments are added, processed, and applied by enrollment, so you start from the enrollment you're applying the payment to.
Open the enrollment
- From the left menu, go to Mission Trips > Enrollments.
- Search or filter for the enrollment, then open it with its green open icon.
- Choose the Payments & Refunds tab.
From here you can process a credit card payment or record a payment from another source like cash or a check.
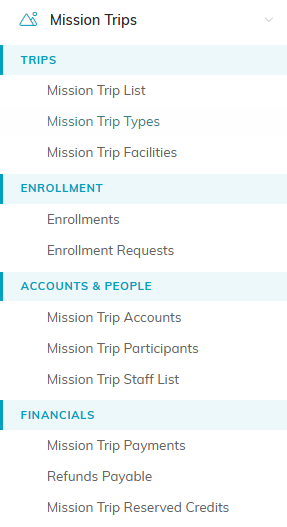
Enrollments sits under Enrollment in the left menu.
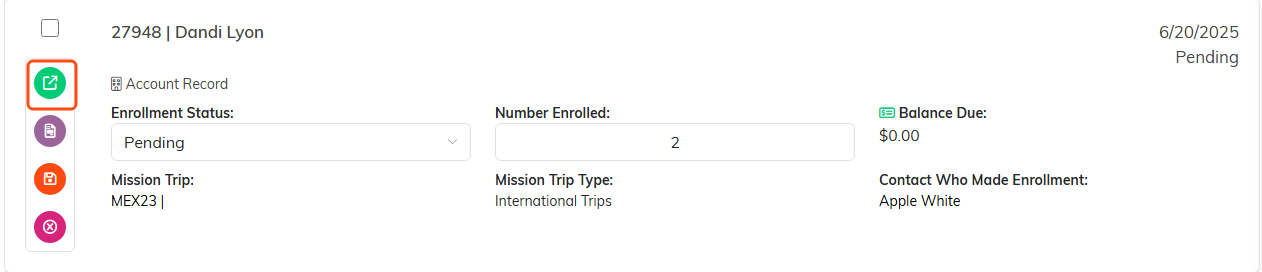
The green icon opens the enrollment.

Payments and Refunds is the fourth tab in the enrollment workspace.

The top of the tab carries the payment buttons and the running totals.
Process a credit card payment
Click Process A Payment to open the Process A Mission Trip Payment Through Stripe pop-up. Fill in the Mission Trip Account, Account Contact, Payment Amount, Name As It Appears On The Card, and Email Address (all required), plus an optional description, then click Enter & Process Payment.
A secure Stripe payment form opens in a new tab where you enter the card number, expiration, and CVC and submit the charge. Argenta never stores card information; Stripe handles the card securely, and a receipt is emailed to the address you entered.
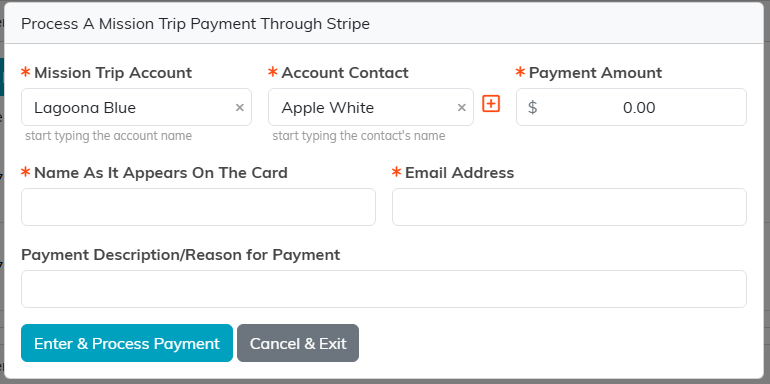
Everything Stripe needs before the card form opens.
Record a cash, check, or other payment
Click Add A New Payment, then fill in the Contact Who Made Payment, Payment Date, and Amount Paid (all required). Click Add Payment & Enter Details to open the full payment.
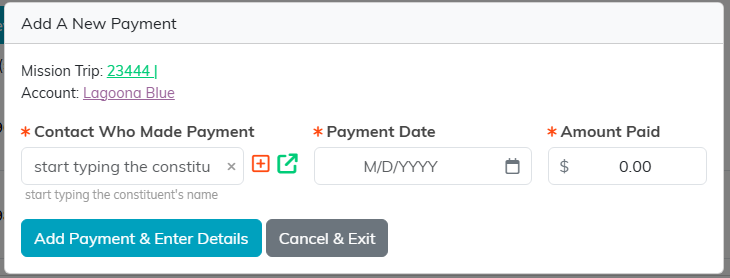
Three fields, then Add Payment and Enter Details.
On the Payment Details page you can set:
- Mission Trip Enrollment (required) - filled in for you; change it to move the payment to another enrollment.
- Contact Who Made Payment, Payment Date, and Amount Paid (all required).
- Was A Receipt Given, Payment Category, Payment Method, and Payment Point of Entry.
- A Payment Description/Reason and a Check/PO/Reference Number.
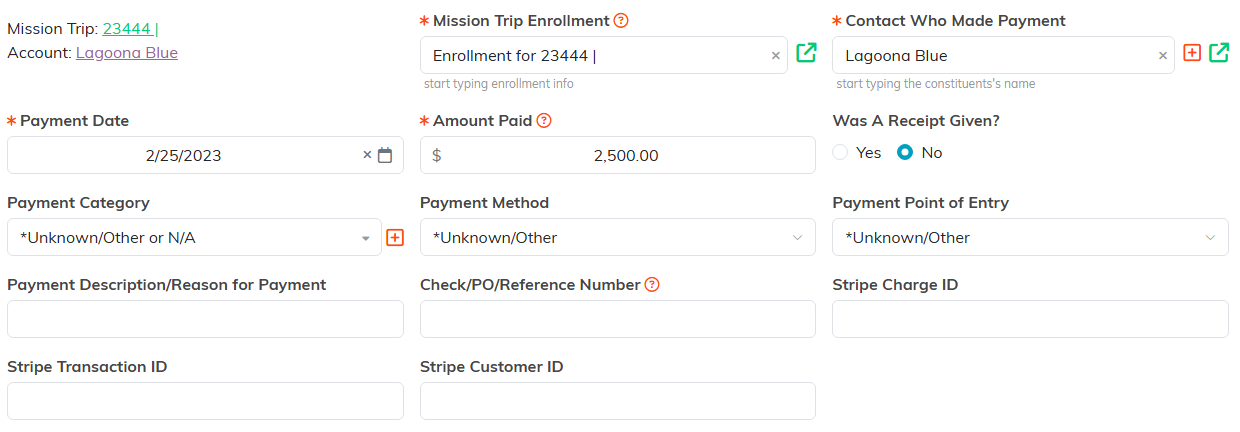
The Payment Details page carries the rest of the payment.
To post the payment to your books, turn on the General Journal option and choose a Fund, a Deposit or Checking account, and a Chart of Accounts account to record it against.
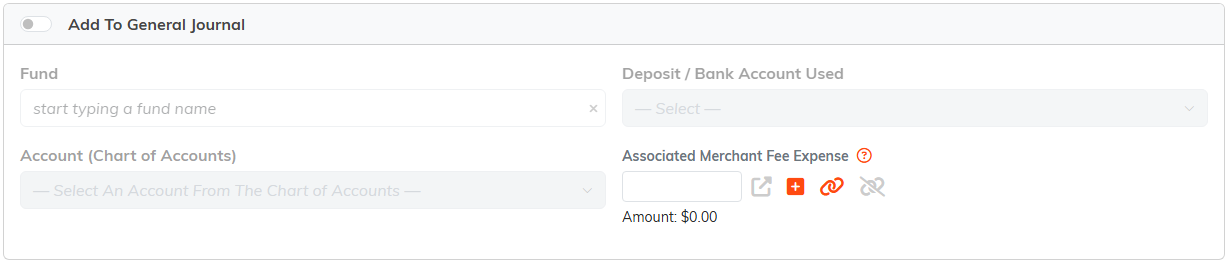
The accounting pickers wake up once the switch is on.
Click Save All Changes & Continue or Save All Changes & Exit. You can also add files and notes from the payment's Files and Notes tabs.

Save when you are done.
