Knowledge Base Article
Add Lists/List Groups
In Argenta, a List is a simple set of entries about one subject, and lists are organized into List Groups. Use them however your team needs, for example a list group for each department, each holding lists of resources or reference information. There's no limit to how many groups, lists, or items you can create, and everything sorts alphabetically.
Finding List Groups
Open Lists from the left menu, under Workflow & Productivity. The page it opens is titled List Groups. Everyone can open the page and work with their own personal groups. The page has two columns:
- Team / Shared, groups everyone on your team can see. This column appears only if you have Admin or Workflow Manager permission.
- Personal / Private, groups only you can see.
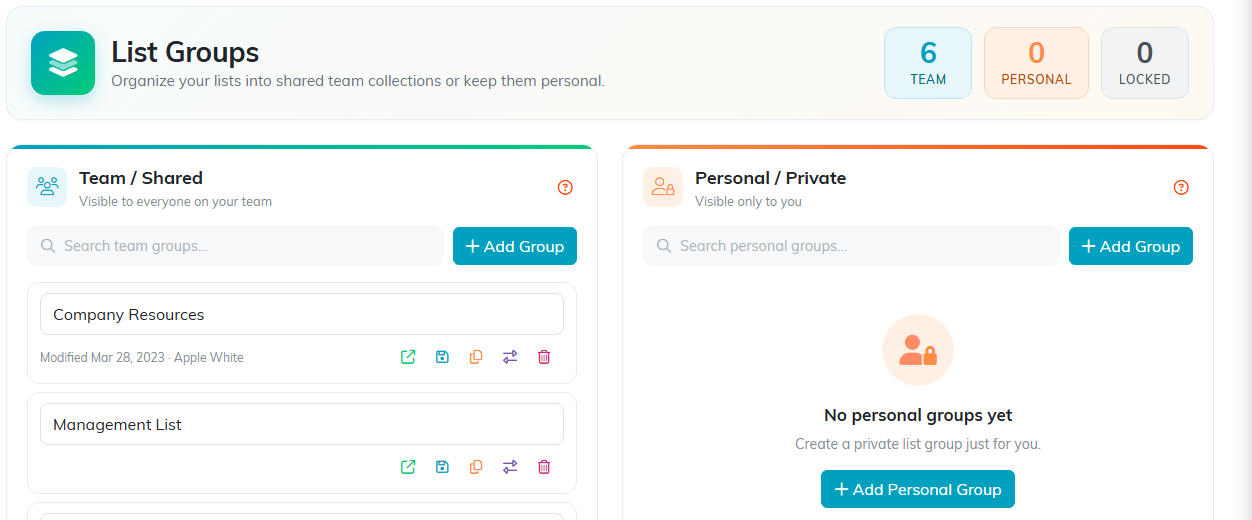
List Groups, split into team and personal columns.
Adding a List Group
- Under Team / Shared or Personal / Private, click Add Group.
- Type a name for the group and save it.
You can move a group between Team and Personal later with the convert button on the group. A team group moved to Personal goes to the Personal / Private column of the person who created it. A group that is locked or set to view only for you cannot be renamed or moved, and neither can a list inside it that is locked or view only for you. A team group can be viewed and updated by everyone with access; you can also restrict it to a chapter, division, department, district, or precinct so only users with those permissions can see it.
Working with a List Group
Open a group to reach the List Group Workspace. A Team / Shared group has three tabs. A Personal / Private group shows only the middle one, because the other two are yours alone and nobody else can be given access to them:
- List Group Details: The group's name, the org-hierarchy fields (chapter, division, department, district, precinct) that control who can see it, and the record-level permissions. Clicking another tab saves your changes first.
- Lists in This List Group: All the lists in this group. Click Add List to create a list, give it a name, and save. Open a list to add and manage its items.
- Record Permissions: Control who can view or edit this group. Add a user so they can still edit it when it is view only, or open it when it is locked.
Adding items to a list
Open a list to reach its items, then click + Add New. A draft row badged NEW appears at the top of the list, reading Type your new list item...
- Type the item.
- Press Enter. Argenta saves that one item and closes the draft row. To add another, click + Add New again.
To put a line break inside one item instead of saving it, press Shift+Enter. To throw a half-typed item away, press Esc.
An item already on the list is edited in place. Change its text, then press Enter to save that row, or Esc to put it back as it was. Each row also carries its own Save icon at the end, and Save All saves every changed row at once.
Select a row's checkbox to mark that item completed, or use Toggle all to mark them all completed or all incomplete. The Unsaved changes note in the title bar clears once nothing is waiting to be saved. Searching the list and marking items completed do not count as unsaved work. If you open a list or a group, or go back to the group, while a name or an item is still unsaved, Argenta asks Unsaved Changes before it throws your change away.
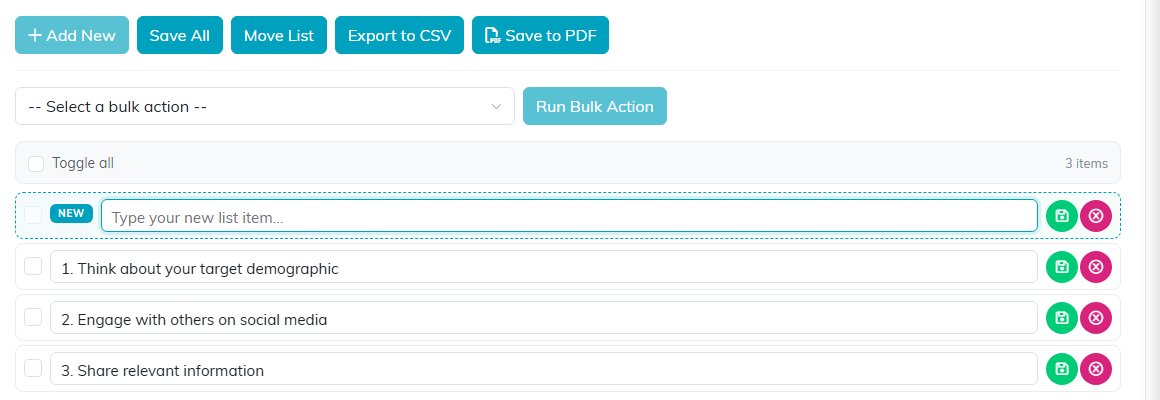
The draft row opened by Add New. Press Enter to save the item.
Moving a list to another group
Put a list in the wrong group, or reorganizing your groups? You do not have to rebuild it.
- Open the list so you are looking at its items.
- Click Move List at the top.
- Pick the new group from the dropdown and click Move List again.
The list and every item on it move together. If the window tells you there are no other list groups to move into, create the group you want first, then come back. The button does not appear on a list you only have view-only access to, or on a locked one.
