Knowledge Base Article
How To Sell Tickets to an Event in Argenta
Argenta lets you sell tickets to an event through a public ticket sales form, take payment by credit card (through Stripe) or by mailed check, and track every sale, purchaser, and guest in your Event Workspace. This guide walks you through the whole process, from turning on ticket sales to what happens after someone buys.
Before you start
- You need an event created in Argenta, with its date, time, and location set.
- To take credit card payments, your organization needs Stripe connected. You can still sell tickets with a check-by-mail option if you prefer.
- Decide whether this event sells tickets (paid, with ticket types) or simply collects free registrations. This guide covers selling tickets.
Step 1: Turn on ticket sales
Open your event in the Event Workspace and turn on the "We're Selling Tickets!" toggle in the workspace title bar. This switches the event into ticket-sales mode and adds a Tickets & Sessions area to the workspace, where you set up your ticket types.
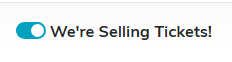
The toggle that puts the event into ticket sales mode.
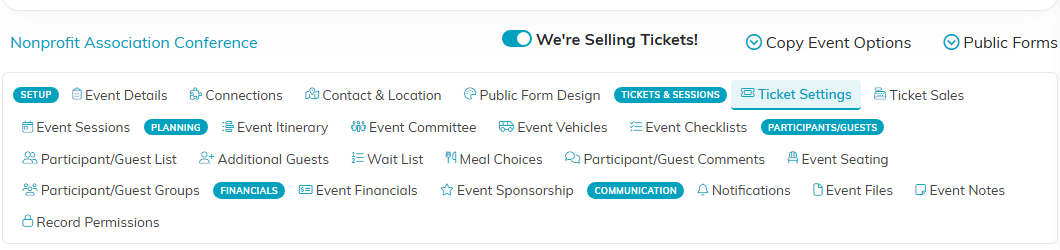
Turning it on adds the Tickets & Sessions group to the workspace.
Step 2: Set up your ticket types
Go to the Ticket Settings page (under Tickets & Sessions in the workspace). You must have at least one ticket type to sell tickets. You can offer a single General Admission ticket, or add several types at different prices, such as General Admission, VIP, Student, or a Couples ticket.
Click Add A New Ticket Type and fill in the following for each one:
- Ticket Type Name. What the buyer sees on the form, for example "General Admission" or "VIP Table."
- Ticket Price. The price for this ticket.
- Tax Deductible Amount. The part of the price that is tax-deductible for the buyer, recorded as a donation. By law, a buyer can only deduct the amount above the fair market value of what they receive at the event, so enter only that tax-deductible amount here (enter 0 if none). If the ticket is later refunded, the donation recorded for it is lowered to match, down to $0 on a full refund, and deleting or editing the refund puts it back. It cannot be more than the Ticket Price, because it is a part of it.
- Total Individuals Per Ticket. How many people one ticket admits. Enter 1 for a single admission, or a higher number for a couples ticket (2) or a table (for example, 8). This sets how many guest names the buyer is asked for.
- Start Sales Date and End Sales Date. The window this ticket type is on sale. The type only appears on the form during this range, and sales close at 11:59 PM on the end date. If every ticket type is outside its date range, the whole form closes.
You can also turn on optional limits for a ticket type:
- Check To Lock QTY & Limit Choice To 1 Ticket Per Registration. Check this and the quantity box for that type on the form only goes from 0 to 1, with a note reading limit 1 per registration beside it, so a buyer can take only one of that ticket per order.
- Limit the amount available. Check "Limit The Amount of Tickets Available for This Ticket Type" and set Max. Tickets Available. Once that type sells out, buyers can no longer purchase it.
- Initial Deposit. Check this to make the ticket type an up-front deposit that secures a spot, charged immediately, with the balance paid later. Use only one deposit ticket per event.
- Sponsorship Package. Check Check To Sell This As A Sponsorship Package to sell this type on the event's public sponsorship page instead of the ticket form. Total Individuals Per Ticket becomes the number of admissions the package includes, and its revenue is totalled apart from ticket revenue on Ticket Sales.
- Admission Window. Optional. Set an Admit Start Date and Admit End Date to limit which days of a multi-day event this ticket admits at the door. Leave both blank to admit any day the event runs.
Two more per-type fields help you organize:
- Internal Description (not shown to buyers). For your own internal notes only. It is not shown on the public form.
- Display Order on Form. Number your types to control the order they appear to buyers.
Click Save All Changes (or the save icon on a single ticket) when you are done. Save All Changes checks every ticket type before it writes any of them, so either all of your changes are saved or none of them are. If one type is missing something or has a figure Argenta will not take, nothing is saved and the message names the ticket type that stopped it, so you can go straight to it. As sales come in, each type shows its Current Total Sold so you can see how it is selling.
Two event-wide options live at the top of the Ticket Settings page:
- Max Number of Guests. An optional cap on total guests for the whole event. Leave it at 0 for no cap. If you set it, the public form stops selling once that many guests hold a place. Every guest counts until they have RSVP'd (Has This Guest RSVP'd? is Yes) and are marked No on Will This Guest Attend?; a guest marked No who has not RSVP'd still counts. To take names once it is full, switch on Public Wait List Sign-Ups on the event's Wait List page.
- Total Designated Ticket Guests. Filled in by Argenta, not by you: the guests your limited ticket types can admit in total. Keep it at or under Max Number of Guests.
- Allow Purchasers To Skip Payment & Mail In A Check. Turn this on to give buyers the option to pay by mailing a check instead of paying online. With it off, online card payment is required. When it is on, enter the address checks go to in Mail Checks To and click Save Address. Buyers see that address on the form, their confirmation and their receipt email, so it cannot be left empty.
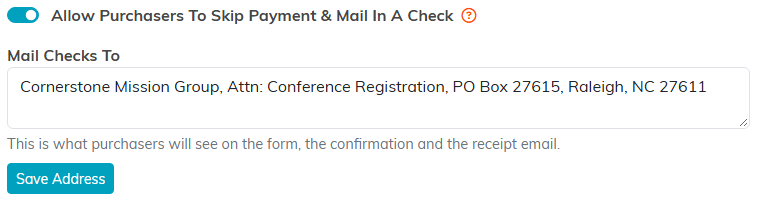
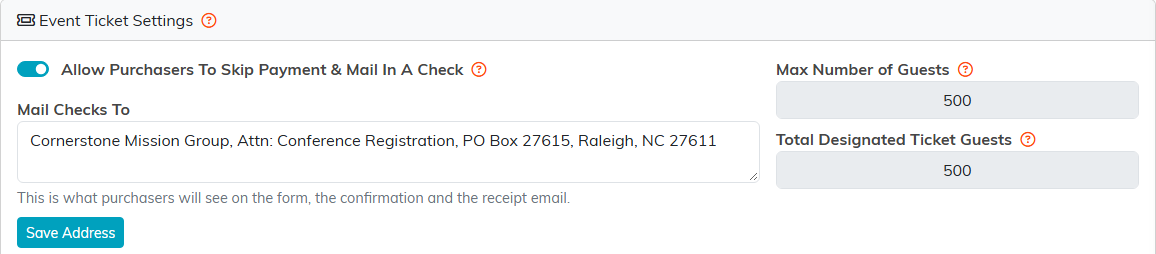
The two event-wide options sit above your ticket types.

Add A New Ticket Type starts another one.
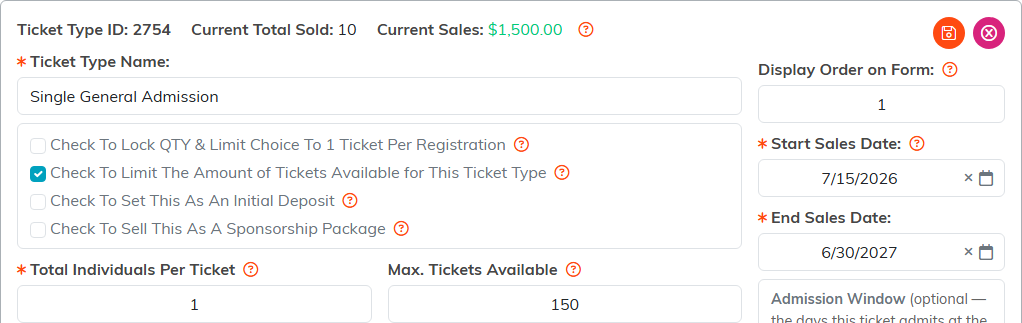
One ticket type. The counter at the top shows how many have sold.
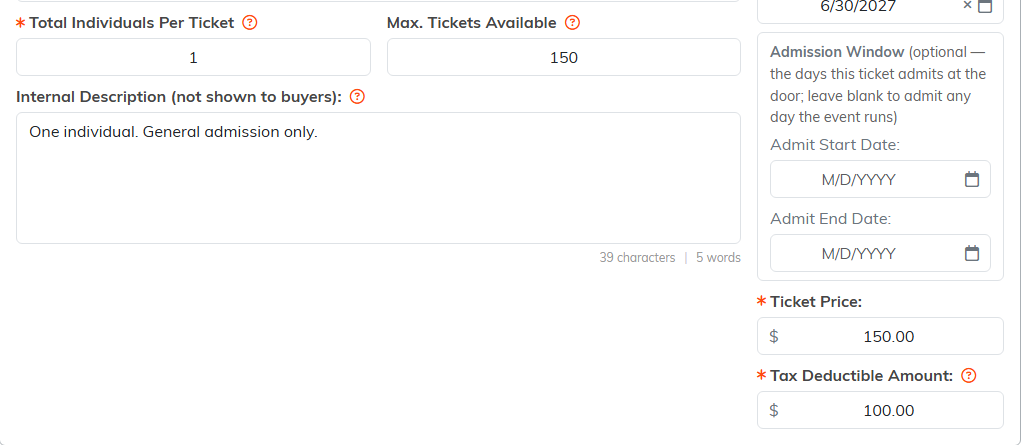
Ticket Price and Tax Deductible Amount. Enter zero if none of it is deductible.
Step 3: Share your ticket sales form
When your ticket types are ready, share the form link with your guests. Anywhere in the event's workspace, open Public Forms beside the event's name, just below the title bar, and click Copy Ticket Sales Form Link to copy it, then paste it into an email, a social post, or your website. You can also click Open Public Ticket Sales Form to preview exactly what buyers will see.
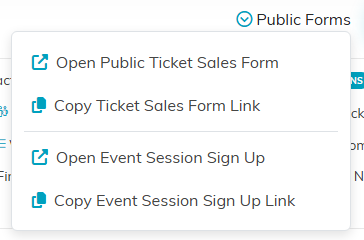
Both links live under Public Forms, just below the title bar.
What your buyers experience
Your public ticket sales form works like a simple cart. Every ticket type that is currently on sale appears together, each with its own quantity selector.
A buyer can:
- Choose a quantity for each ticket type with the plus and minus buttons, or by typing a number. Each type shows its own running line total.
- Buy more than one type in a single order. For example, two General Admission and one VIP, instead of placing a separate order for each type.
- See a combined total that updates as they change quantities.
- Pay once for the whole order, by credit card or by check (if you allow check payments).
If you locked a type to one per registration, the buyer sees "limit 1 per registration" and cannot go above one. If a type has limited availability and the buyer asks for more than you have left, the form tells them how many remain so they can adjust. Buyers are also offered the chance to cover the processing fee as a small extra donation, and that box starts already ticked, so a buyer who changes nothing is covering it. The Total Price shown on this first step includes that fee, plus any donation the buyer adds, so it matches what the payment step asks for.
After choosing tickets, the buyer enters their information as the purchaser, then adds any additional guest names on the next step. The form asks for the right number of guest names automatically, based on how many tickets they bought and how many individuals each ticket covers. If you set up meal choices, each guest picks a meal here. The buyer then reviews the order and pays, and a confirmation and receipt are emailed to them.
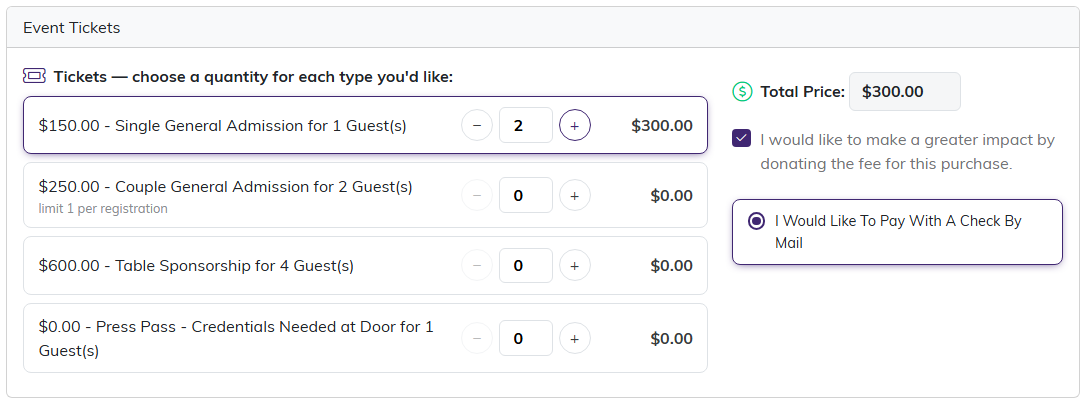
What buyers see. Every type on sale appears together with its own quantity.
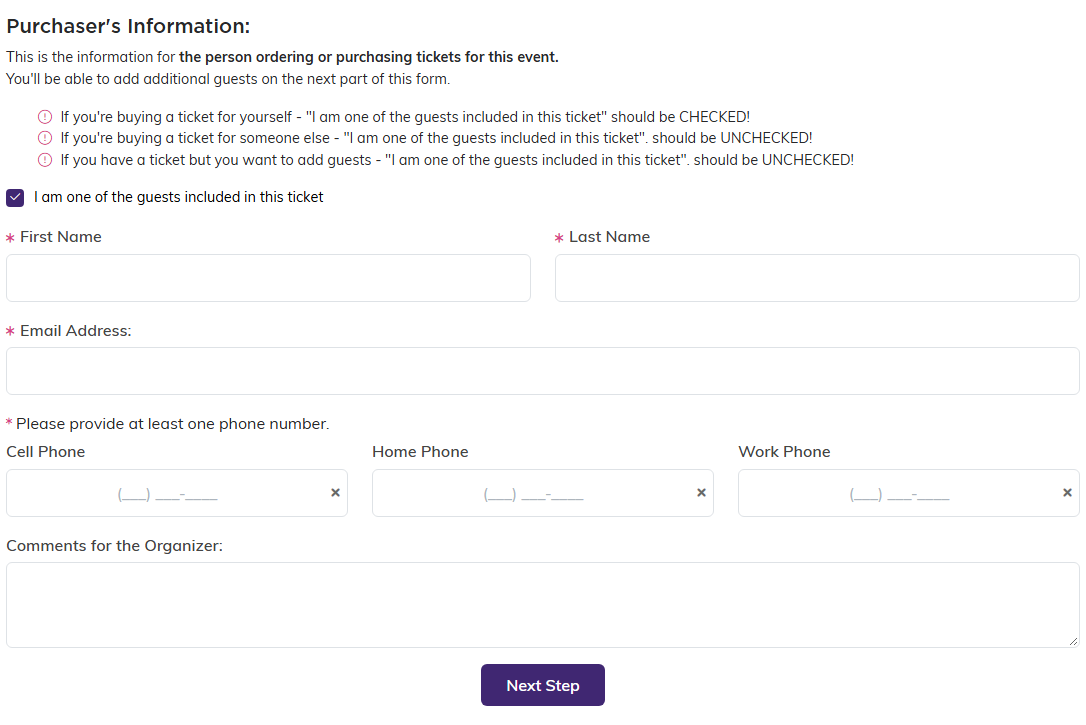
The purchaser step, before they add any additional guest names.
What happens after a sale
Once a ticket is purchased, you will find the details in a few places in your Event Workspace:
- Participant/Guest List. The purchaser is added here and saved as a constituent in Argenta.
- Ticket Sales. Every sale is listed here. Click the green Open icon on a row to edit the sale, apply a payment (for example, when a check arrives), issue a refund, or attach files and notes.
- Additional Guests. The extra guests named on a multi-person ticket appear here. They are not constituents until you promote them, which you can do from this page.
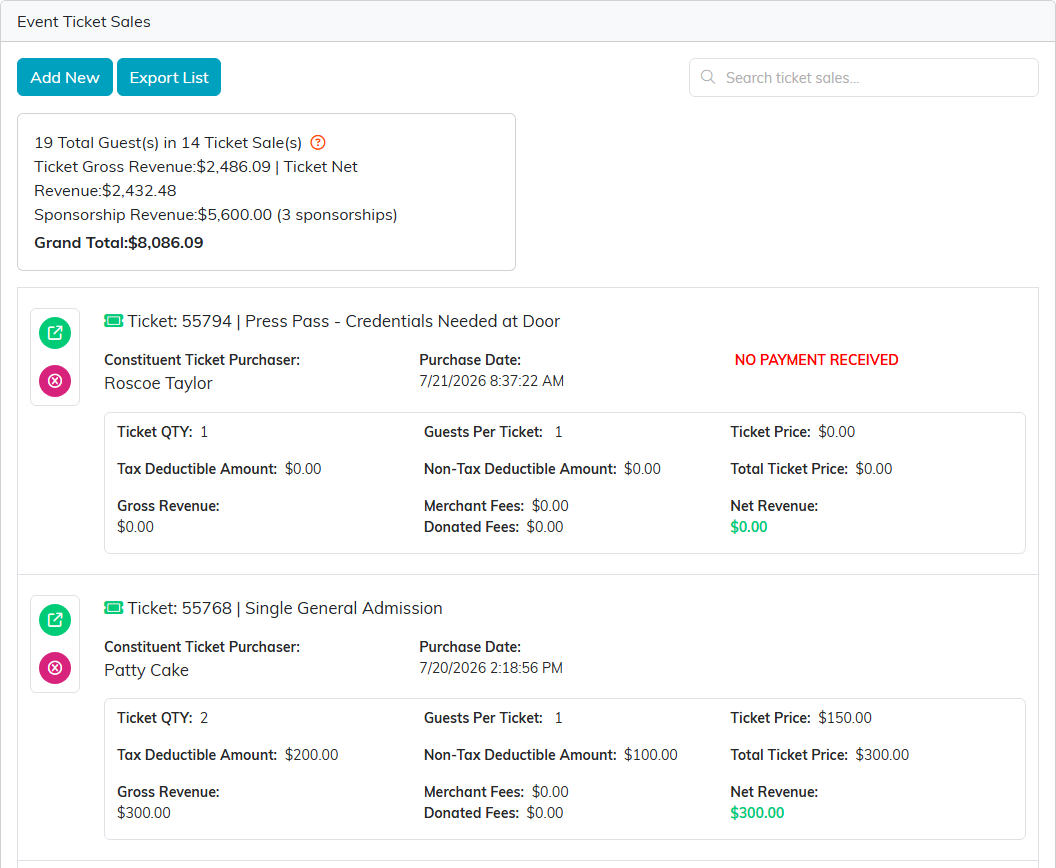
Ticket Sales, with the running revenue totals above the list.
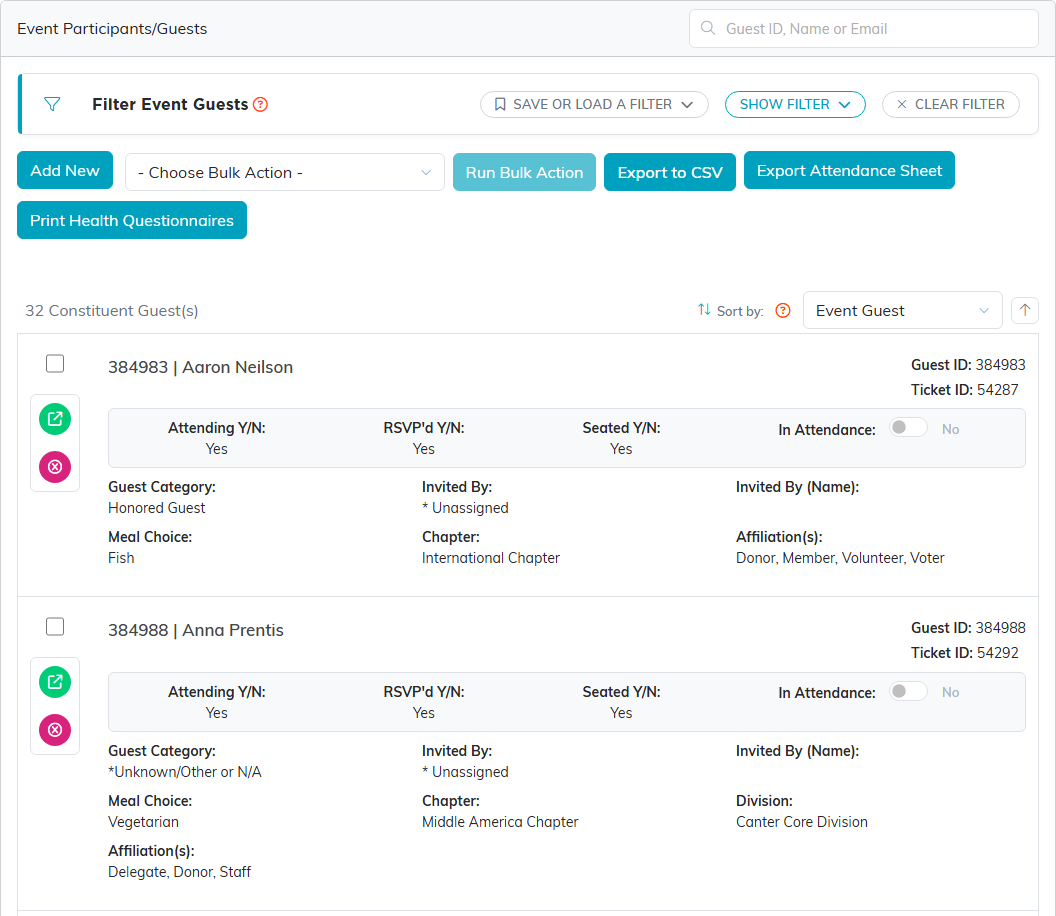
The Participant/Guest List. Purchasers are saved as constituents here.
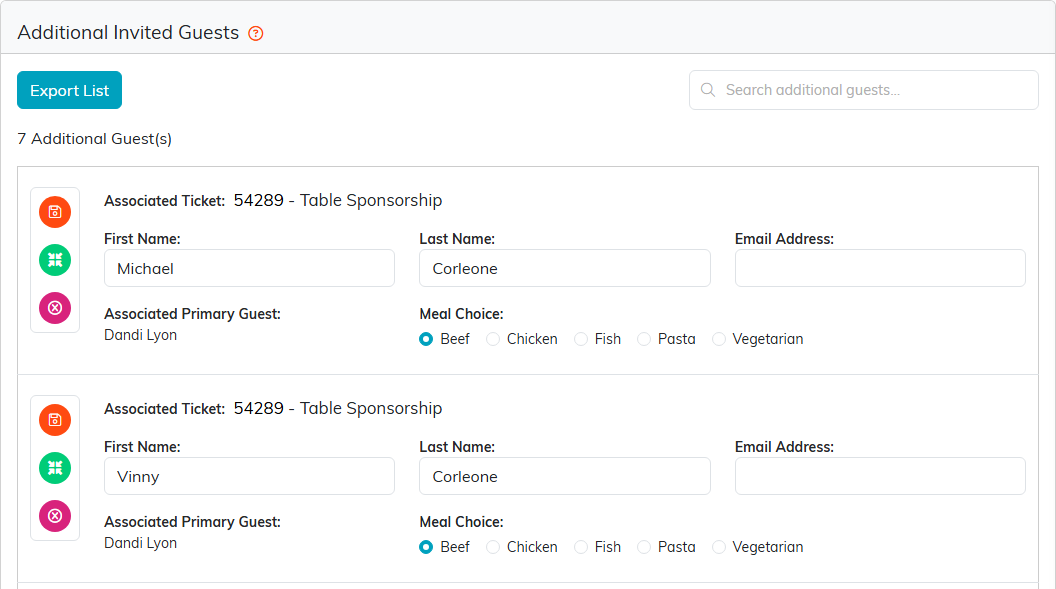
Additional Guests, the extra names on a multi-person ticket.
For more on managing your guest list, see Event Additional Guests. To stop selling at any time, see How To Close an Event for Public Registration and Ticket Sales.
