Knowledge Base Article
How To Log External Email by Sending It Into Argenta from Any Email App
Argenta External Email Logging: Step-by-Step Guide
This guide will walk you through using Argenta's External Email Logging feature to seamlessly save important email communications from your external email client (like Gmail, Outlook, Apple Mail) directly into Argenta.
Purpose: To automatically log emails into Argenta, associating them with the relevant constituent records (both sender and recipient) without manual copy-pasting.
Part 1: Setting Up and Understanding the Basics
1. Obtain Your Designated Archiver Email Address:
- This is a unique email address specific to your Argenta instance (e.g.,
[email protected]). - How to get it: Contact your Argenta Account Manager or submit a Help & Support ticket to the Argenta Support Team.
- Important: You must use this specific email address for the logging to work.
2. How it Works:
- When you forward an email to, or CC/BCC this archiver email address, Argenta's system will:
- Receive the email.
- Attempt to identify the sender and recipient(s) based on their email addresses.
- Match these email addresses to existing constituent records in Argenta.
- Log the email in the External Email Log, and record the people it matched on that logged email as its assigned sender and assigned recipient.
Part 2: Logging Emails into Argenta
There are two main scenarios for logging emails:
Scenario A: Logging a Received Email (e.g., from a supporter)
- Open the Email: In your external email client (Gmail, Outlook, etc.), open the email you wish to log.
- Forward the Email:
- Click the "Forward" option in your email client.
- In the "To" field of the forwarded email, enter your designated Argenta Archiver email address.
- Click "Send."
Scenario B: Logging an Email You Are Sending (e.g., to a donor)
- Compose Your Email: In your external email client, compose your email as you normally would.
- To: Enter the primary recipient's email address (e.g., the donor).
- From: This will be your email address.
- CC or BCC the Archiver:
- In the "Cc" (Carbon Copy) or "BCC" (Blind Carbon Copy) field, enter your designated Argenta Archiver email address.
- Tip: Using BCC will hide the archiver email address from the primary recipient.
- Send the Email: Click "Send." The email will go to your intended recipient(s) and a copy will be sent to the Argenta archiver for logging.
Part 3: Accessing and Managing Logged Emails in Argenta
1. Navigate to the External Email Log:
- In Argenta, go to the main menu on the left.
- Click on "Communication."
- From the dropdown, select "External Email Log."
- You will see a list of emails that have been sent to the archiver. Emails are listed in descending order by date and time sent/received (newest at the top).
- A padlock icon indicates a record has been locked with specific permissions.
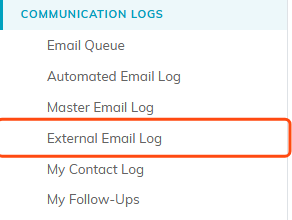
External Email Log sits under Communication Logs in the sidebar.
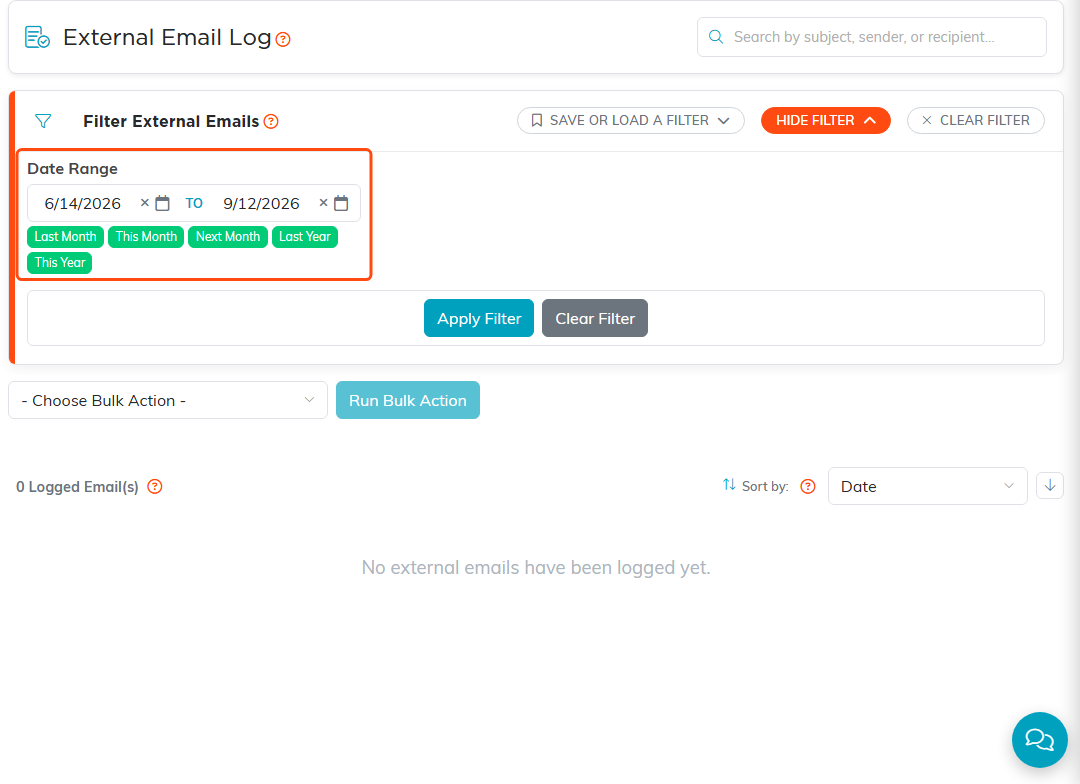
The log itself, with search, the Date Range filter and bulk actions. It opens on the last 90 days. This one has nothing logged yet.
2. Open an Email Workspace:
- Click the green Open icon at the right of the row you want to read or manage. This opens the Logged External Email Workspace. Its workspace menu holds four pages: Email Details, Related Files, Notes and Record Permissions.
3. Email Details Tab (Default View):
- Information Displayed: Date Sent/Received, Subject, From Email Address, Recipient(s) email address.
- Assigned Constituent SENDER: Argenta will attempt to automatically match the sender's email to a constituent record. The constituent's name and ID will be displayed.
- Assigned Constituent RECIPIENT: Argenta will attempt to automatically match the recipient's email(s) to constituent record(s).
- Manual Correction/Assignment:
- If Argenta couldn't find a match or matched incorrectly, you can manually assign constituents.
- Start typing the person's name in the Assigned Constituent SENDER or Assigned Constituent RECIPIENT box, then pick the right constituent from the list that appears.
- You can also manually type or correct the email address in the "From Email Address" or "Recipient(s)" fields if needed.
- Subject: You can edit the subject if you need to.
- Date Sent or Received: You can correct this if the archiver recorded the wrong date or time.
- Record Level Permissions: Two switches sit at the top of this page. Set As View Only lets people open the email but not change it. Lock This Record keeps it away from anyone you have not granted access to. You grant that access on the Record Permissions page, covered below.
- Saving Changes: Click Save All Changes. Delete This Record and Exit Workspace sit next to it.
4. The Email Body:
- Where it is: The body of the email sits in the Email Body editor at the foot of the Email Details page.
- Editing it: The editor is always open, so there is no button to switch editing on. Type straight into it and your changes to the body are saved as you go.
- Formatting:
- Emails sent as plain text may lose their original formatting, line breaks included. Use the editor to put it back, adding paragraph breaks, bold text or links.
- Emails sent as HTML, which is what most modern email apps send, generally keep their formatting.
- Saving everything else: Click Save All Changes at the top of the page to save the other fields on it.
5. Record Permissions Page:
This page is where you say who may reach a locked or view only email. The two switches that lock it in the first place are on the Email Details page, covered above.
- Locked Record Access: Use the Add User box, start typing a name, pick the people who should have full access to this locked record, then click Add.
- View Only Access: Use the Add User box the same way to pick the people who should keep being able to edit this record while Set As View Only is on, then click Add. Everyone else can read it but not change it.
- Important Tip: If you lock a record or set it to view only, and you are not a Master Admin, make sure to add yourself to the right list. Otherwise you may lock yourself out.
- Removing Access: Click the pink X next to a person's name to take that access away.
6. Related Files Tab:
- Upload any attachments or other files relevant to this email.
- You can drag & drop files or browse to select them.
- Click "Save The Selected File(s)." There's no limit to the number of files.
7. Notes Tab:
- Add any internal notes about this email communication.
- Click Add A New Note.
- Write and format your note in the editor.
- Click Add This Note.
Part 4: How a Logged Email Is Tied to Your Constituents
An archived email is stored once, in the External Email Log. The people Argenta matched it to are recorded on the logged email itself, as its Assigned Constituent SENDER and Assigned Constituent RECIPIENT, and you can correct either one on the Email Details page as described in Part 3.
So the External Email Log is the single place to go looking for an archived email. To find the ones involving a particular person, open the log and use the search box at the top, which searches by subject, sender and recipient. The log opens on the last 90 days, the same window as the Automated and Master Email Logs; set the Date Range further back and click Apply Filter to reach older email, or click Clear Filter to see everything.
The Email Log page on a constituent's own record is a different log. It shows the email Argenta itself sent that person from the Mail Room, batches and automations, and it does not include messages you forwarded or copied to the archiver.
Important Tips & Considerations:
- Archiver Email is Key: Always use the correct, designated archiver email address provided by Argenta.
- Sender/Recipient Matching: Argenta relies on the email addresses in the "From," "To," "Cc," and "BCC" fields of the email sent to the archiver. Ensure these email addresses are present in your constituent records for automatic matching.
- HTML vs. Text: Emails sent as HTML generally retain their formatting. Plain text emails might require reformatting in the Argenta editor if you want a specific appearance.
- Permissions: Be mindful when locking records or setting them to "View Only." Always ensure appropriate users (including yourself if not a Master Admin) have the necessary access.
- Availability: This feature is available upon request. There's generally no additional cost unless your archiving needs are significantly higher than expected (in which case Argenta will discuss this with you).
- Knowledge Base: For more details on specific Argenta functionalities (like the Rich Text Editor), refer to the Argenta Knowledge Base.
