Knowledge Base Article
How to Use the Mission Trip Master Staff List
The Mission Trip Master Staff List shows every staff placement on every mission trip in one place: who is going on which trip, when they arrive, what role they have and whether they are confirmed. Use it to see your whole staff picture across trips, find a person's placements, or export a list for travel planning.
Opening the list needs Staff Manager or Admin access.
Open the list
- In the menu on the left, click Mission Trips.
- Under Accounts & People, click Mission Trip Staff List. The page opens as Mission Trip Master Staff List.
If you do not see that menu group, an admin can turn it on in Menu Settings at the top of the menu.
Read the list
Each card is one placement: one staff member on one trip. It shows the placement ID and the staff member's name, the placement status (such as Confirmed or Tentative) at the right, the Mission Trip, the person's Arrival Date, the Placement Type and the Staff Member. The trip and the staff member's name open their own records in a new tab.
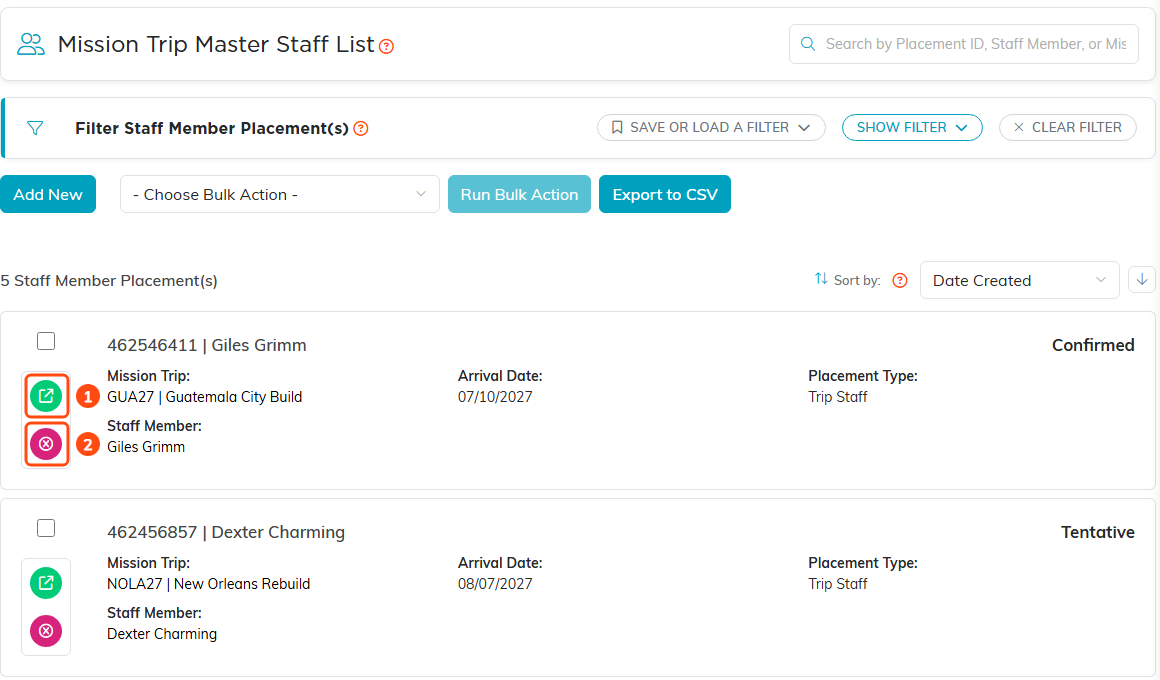
1 opens the placement; 2 deletes it.
To change or see the rest of a placement, such as its departure date, arrival method or special instructions, click the green Open icon on its card. A padlock on a card means the placement is locked.
The Arrival Date is when that person arrives, which can differ from the trip's start date.
Find placements
To search, type a placement ID, a staff member's name or a trip code or title in the search box at the top right.
To filter, click Show Filter, set any of these, and click Apply Filter:
- Mission Trip and Staff Member: start typing and select one.
- Placement Status, Placement Type and Mission Trip Type: select one or more.
- Arrival Date Range and Departure Date Range: enter a start date, an end date or both, or click a quick range such as This Month. Both ends are included. If you leave one end blank, that side stays open. A placement with no arrival date drops out as soon as you set an arrival date, so clear the range to see those again.
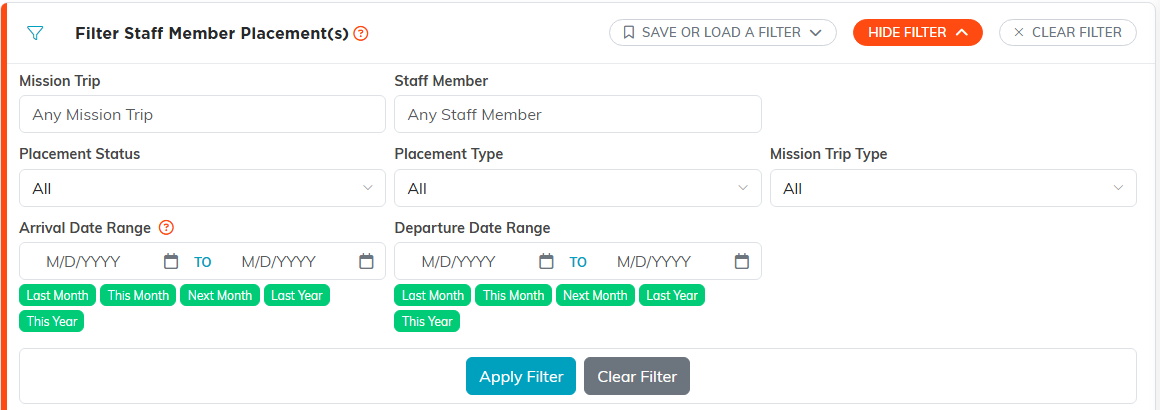
The filters, ready to set.
Your filters stay set the next time you open the list. To start over, click Clear Filter. To keep a set of filters you use often, use Save or Load a Filter.
To change the order, choose Date Created, Staff Member Name or Arrival Date in Sort by, and use the arrow beside it to flip the direction.
Add a placement
- Click Add New.
- In Mission Trip, start typing the trip and select it.
- In Staff Member, start typing the person's name and select them.
- Click Save & Continue. The new placement opens so you can set its status, placement type, arrival and departure dates and travel details.
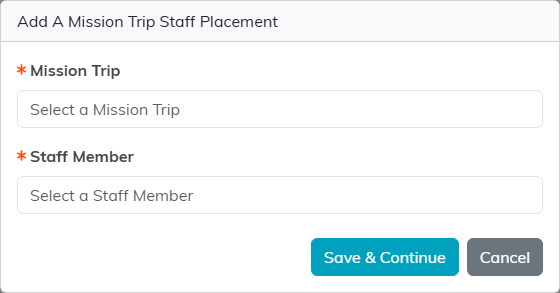
Pick the trip and the person, then fill in the rest on the placement.
If the trip is locked or set to view only, you cannot add placements to it unless you are an admin, created the trip, or were given access to it in its Record Permissions.
Delete placements
To delete one placement, click the pink Delete icon on its card and confirm. A locked placement must be unlocked first: open it, clear Lock This Record, and save. A Master Admin can delete it without unlocking.
To delete several at once, select their check boxes (or choose Select All Records That Meet The Current Filter Criteria in Choose Bulk Action), choose Delete All Selected & Unlocked Records, and click Run Bulk Action. Locked placements are skipped, and a summary tells you how many were deleted.
To change the placement type on many placements at once, select them and choose Change Classification Code for Selected Records.
Export the list
Click Export to CSV. (If you do not see it, ask an admin for export access.) The file includes every placement that matches your current search and filters, not only the page you are looking at, with the placement ID, status, placement type, trip, staff member, arrival and departure dates and times, arrival method, where they are traveling from, special instructions and the date created.
