Knowledge Base Article
How to Set Up the Items a Campaign Sells
Sales Item Settings is where you set up everything a campaign sells on its public sales form: pies for a bake sale, T-shirts, tickets, sponsorships. Each item has its own price, the part of that price that is tax deductible, and the dates it can be bought.
Open Sales Item Settings
Open the campaign and click Sales Item Settings in the workspace menu.
Sales Item Settings has a short Show Me How To Use This Page video at the top right; click it to watch, and use its chapters to jump to the part you need.
At the top of the page are two switches:
- Public Sales Form (On or Off) opens or closes the sales form. It is the same switch as the one on Public Form Design.
- Skip ecommerce Payment & Allow Mail In Check lets a buyer place an order without paying online. The sales form then offers Finish Order & Send Check beside the card payment.
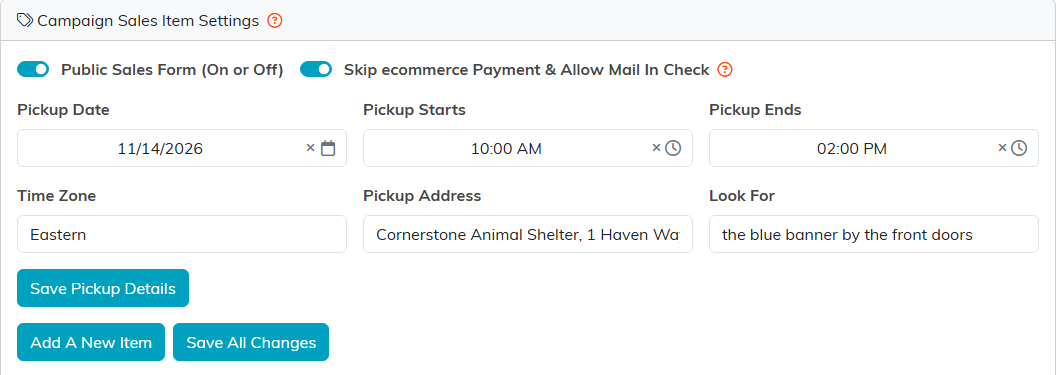
The switches, the pickup details and the two buttons sit above the item list.
Tell buyers where to collect
If buyers collect what they buy, fill in Pickup Date, Pickup Starts, Pickup Ends, Time Zone, Pickup Address and Look For (something to spot when they arrive), then click Save Pickup Details. Every field is optional. Whatever you fill in goes on the buyer's receipt email and on the screen they see after paying. Leave them all empty for goods you ship.
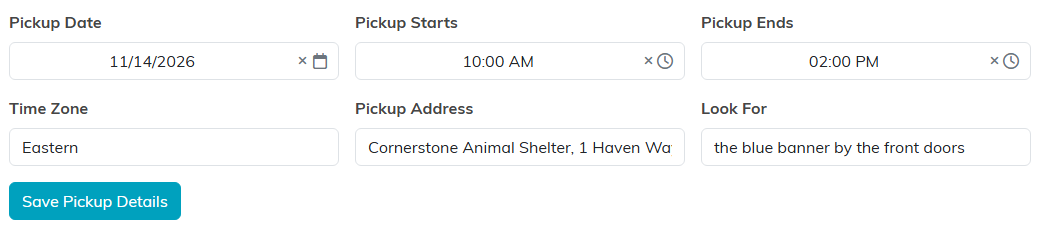
Pickup details print on the receipt, so buyers know where and when to come.
Add an item
- Click Add A New Item.
- Enter the Item Name, and a short Item Description that tells the buyer exactly what they get.
- To cap how many you sell, tick Limit The Amount Available and enter the number in Max. Available.
- Enter the Item Price and the Tax Deductible Amount, the part of the price above the fair market value of what the buyer receives. That part is recorded as a donation, so it cannot be more than the Item Price; a larger figure is refused with a message naming both amounts.
- Set the Start Sales Date and End Sales Date. Left blank, the start becomes today and the end a year from today.
- Click Add This Item.
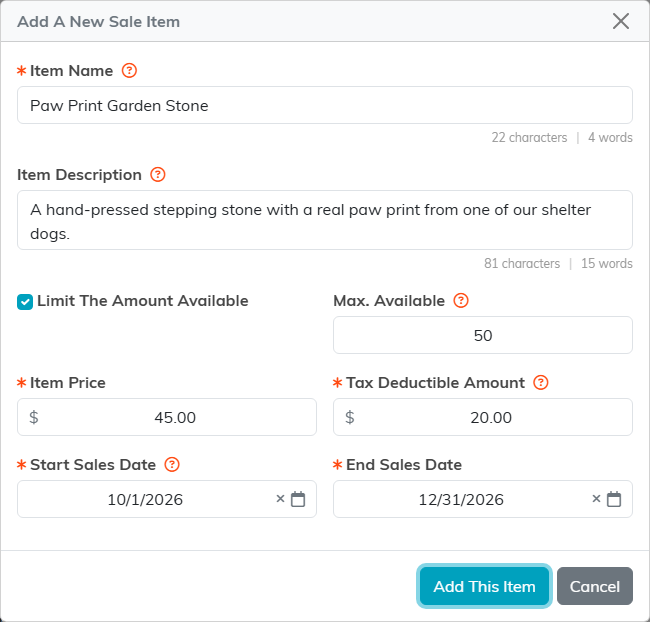
An item that is part gift: $45, of which $20 is tax deductible.
Work with your items
Every item is listed with its ID, how many have sold (Current Total Sold), and the money it has brought in (Current Sales). You can change any of its fields right on the list. Display Order on Form sets where it sits on the sales form, lowest number first.
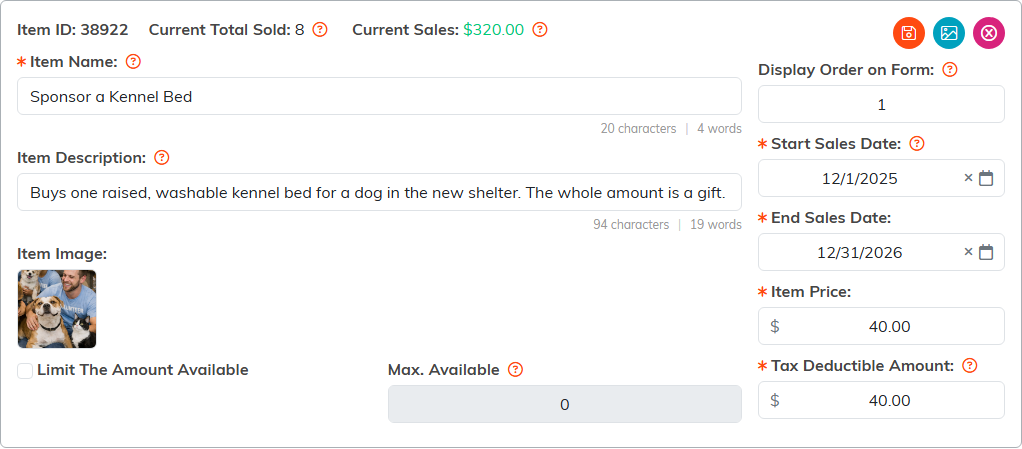
An item shows how it is selling, and holds every field you can change.
Three round buttons sit in each item's top right corner:
- The orange Save button saves that one item.
- The blue Item Image button picks a picture for it.
- The pink Delete button removes it, after you confirm. An item that has sold even once cannot be deleted; take it off the form by ending its sales dates instead.

Save, Item Image and Delete, left to right.
To save every item and the pickup details at once, click Save All Changes.
Give an item a picture
Click the item's Item Image button. Pick a folder on the left, or click Upload to add a new picture, then click the picture and click Save As Item Image. The item's current picture shows on the right, with Remove Item Image under it.
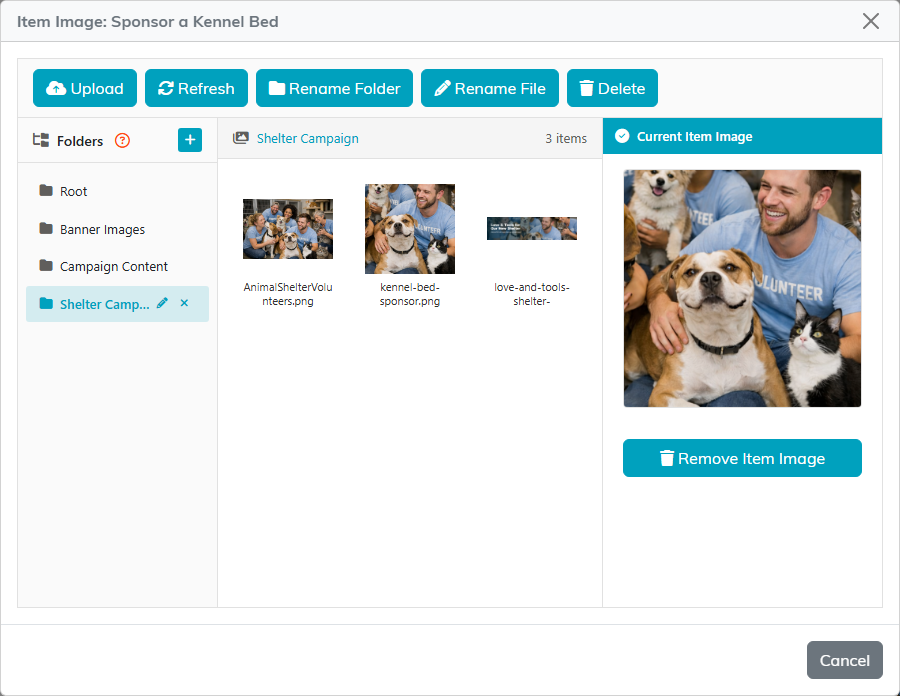
Pictures come from your team's own image library.
Pictures show on the sales form only once Show Item Images on the Public Sales Form is turned on under Form Settings on Public Form Design. See How to Build Campaign Sales Forms.
What buyers see
The sales form lists every item whose sales dates include today, in display order, with its picture, price and description. A limited item shows how many are left, and it leaves the form by itself once it sells out.
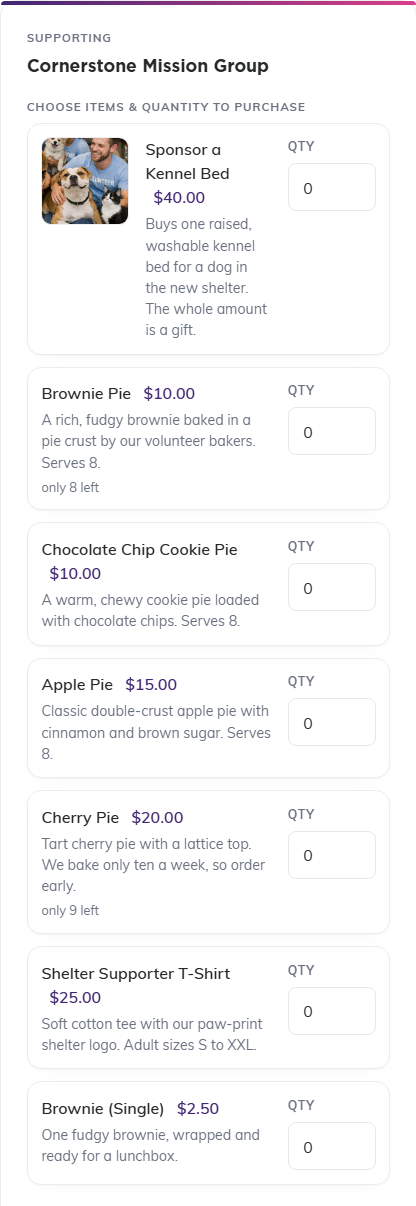
The items as a buyer sees them on the sales form.
For a tour of every page in the Campaign Workspace, see Overview, Working with Campaigns.
