Knowledge Base Article
How Reservations Work: Stays, Rooms, and Occupants
Reservations lets your organization book people into the rooms, cabins, beds, or other spaces you have to offer. You set your spaces up once, create a stay for each guest, hold a room for a run of nights, and record who is in the room.
Reservations is switched on for a whole team, and then opened to each person who needs it with the Reservation Manager permission. Set it on the person's user record under Settings > System Users, or on a user role you apply to them. Without it, the Reservations section does not appear in their menu, and a link to one of its pages takes them to an access-denied page. A Master Admin has access without it. View Only Access and record-level permissions still decide who can change what.
Where Reservations Live
Reservations adds six entries to your menu:
- Reservations is the list of stays.
- Occupancy Chart shows which spaces are taken on each night.
- Bookable Spaces is where you set up the rooms themselves.
- Occupants is the list of people who have been in a room.
- Occupant Roles and Reservation Statuses are where you manage the roles and statuses your team uses.
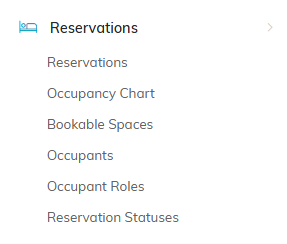
The Reservations menu.
Every Reservations page, from the lists to each tab of a stay, a space or an occupant, has a short Show Me How To Use This Page video at the top right. Click it to watch, and use its chapters to jump to the part you need.
Setting Up Your Bookable Spaces
Set your spaces up before you take a booking, because a room segment has to name one.
- Open Bookable Spaces and click Add A New Space.
- Enter the Space Name. Each name belongs to one space, and Argenta refuses a second space on your team under a name another one already holds.
- Enter Sleeps, which is how many people the space holds.
- Enter a Description for anything worth knowing about the room.
- Leave Active turned on while the space is available to book.
- Click Save. Argenta creates the space and opens it so you can add its files and notes.
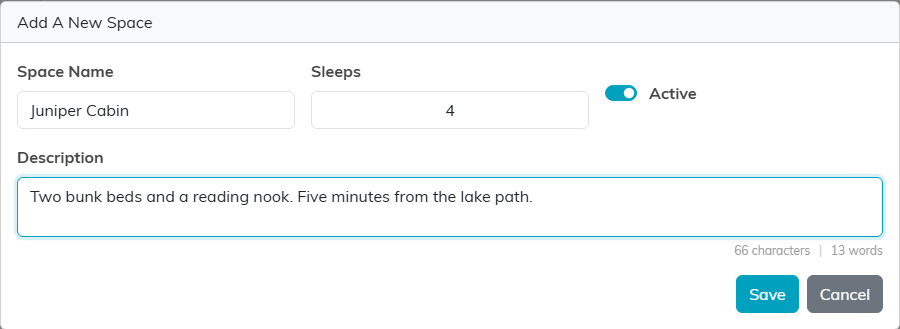
Add A New Space. Nothing is created until you click Save.
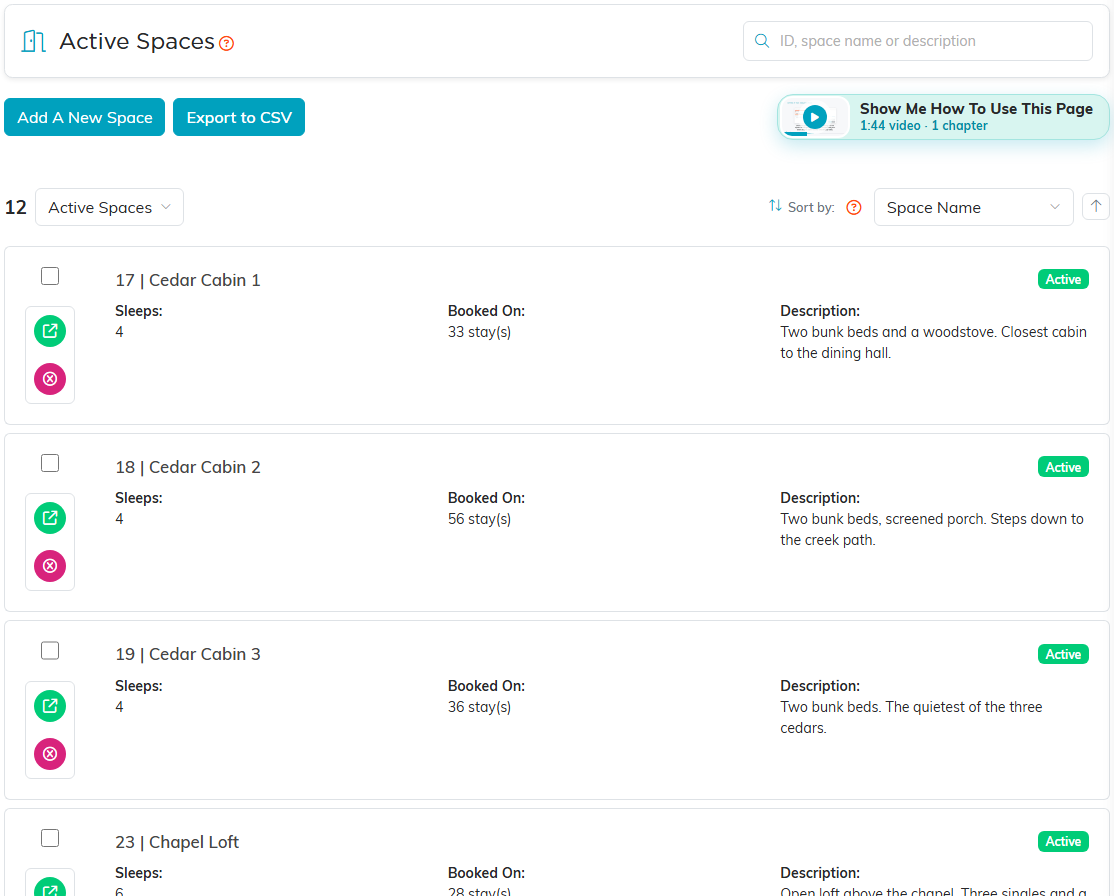
Every space you can book, with the number it sleeps.
Open a space to reach the Bookable Space Workspace. Space Details holds the Space Name, Sleeps, and Description, alongside Booked On, which counts the stays holding this room and is filled in for you. Turn Active off to take a space out of use. That takes the space out of the picker for new room segments without disturbing the stays already holding it: each of those keeps showing the room's own name, marked (inactive), so an old stay never looks as though it was moved into a different room. The workspace also carries Space Files, Space Notes, and Record Permissions.
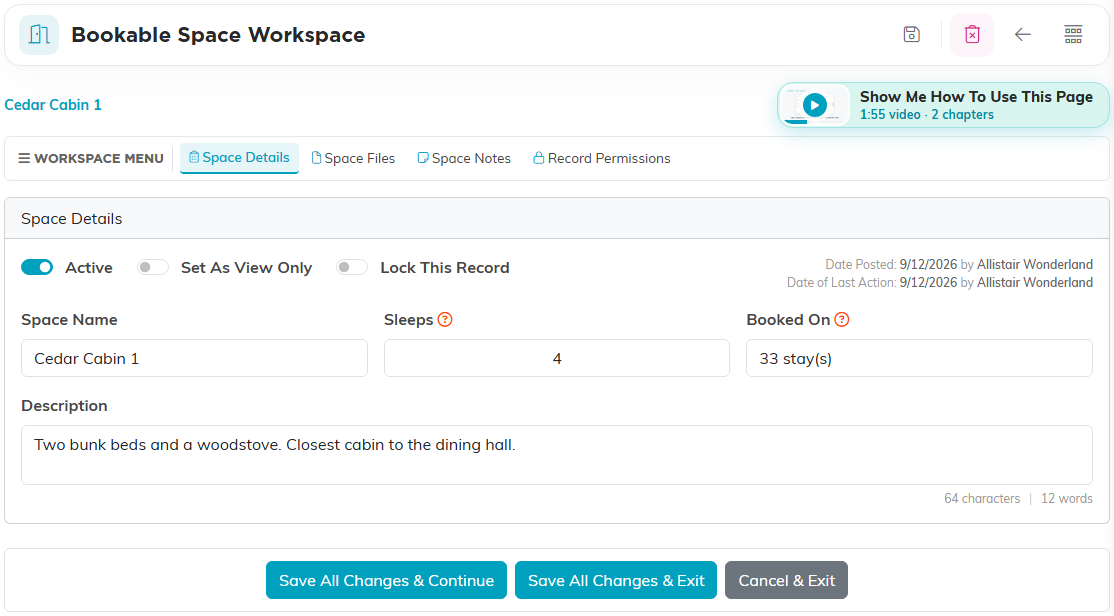
Space Details. Booked On counts the stays that hold this room.
Booking a Stay
- Open Reservations and click Add A New Reservation.
- Enter Booked By, which is the constituent the stay belongs to.
- Set the Status to Pending, Waitlisted, or Confirmed. Status decides how firmly the stay holds a room.
- Enter the Deposit if you have taken one.
- Enter the Arrival Date and the Departure Date.
- Use Notes for anything the team should know about the stay.
- Click Save And Open The Reservation. Argenta creates the stay and opens it so you can add rooms and people. Cancel leaves nothing behind.
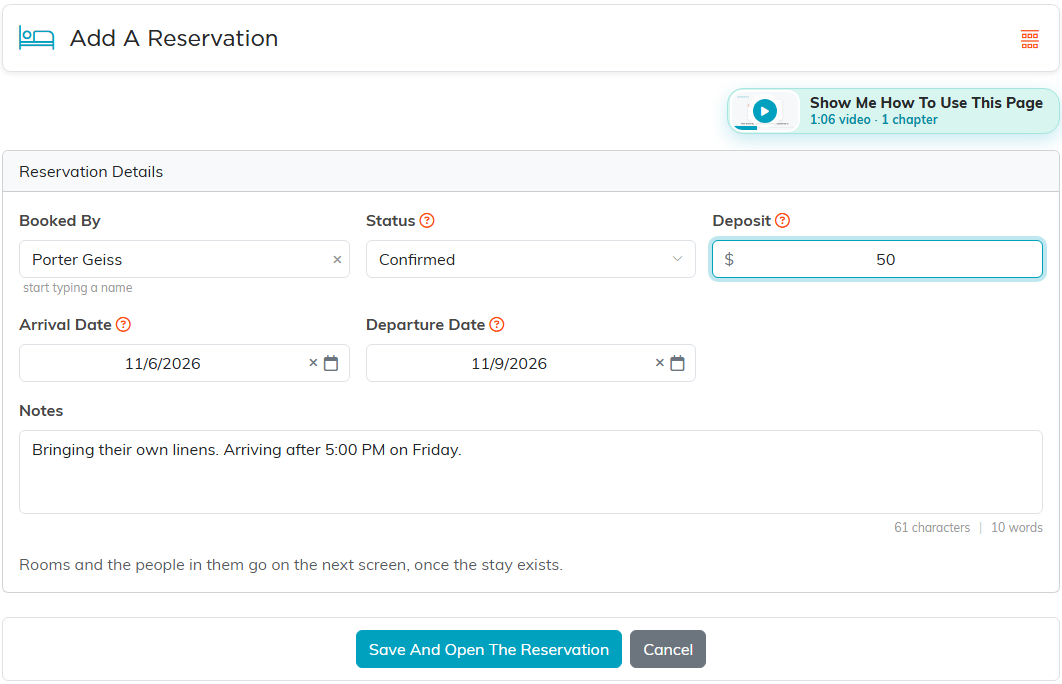
The Add A Reservation page. Rooms and people go on the next screen, once the stay exists.
Argenta works Nights out from the arrival and departure dates, so that field fills in for you and cannot be typed into. Once the stay has people on it, In The Room lists them across the top of Reservation Details.
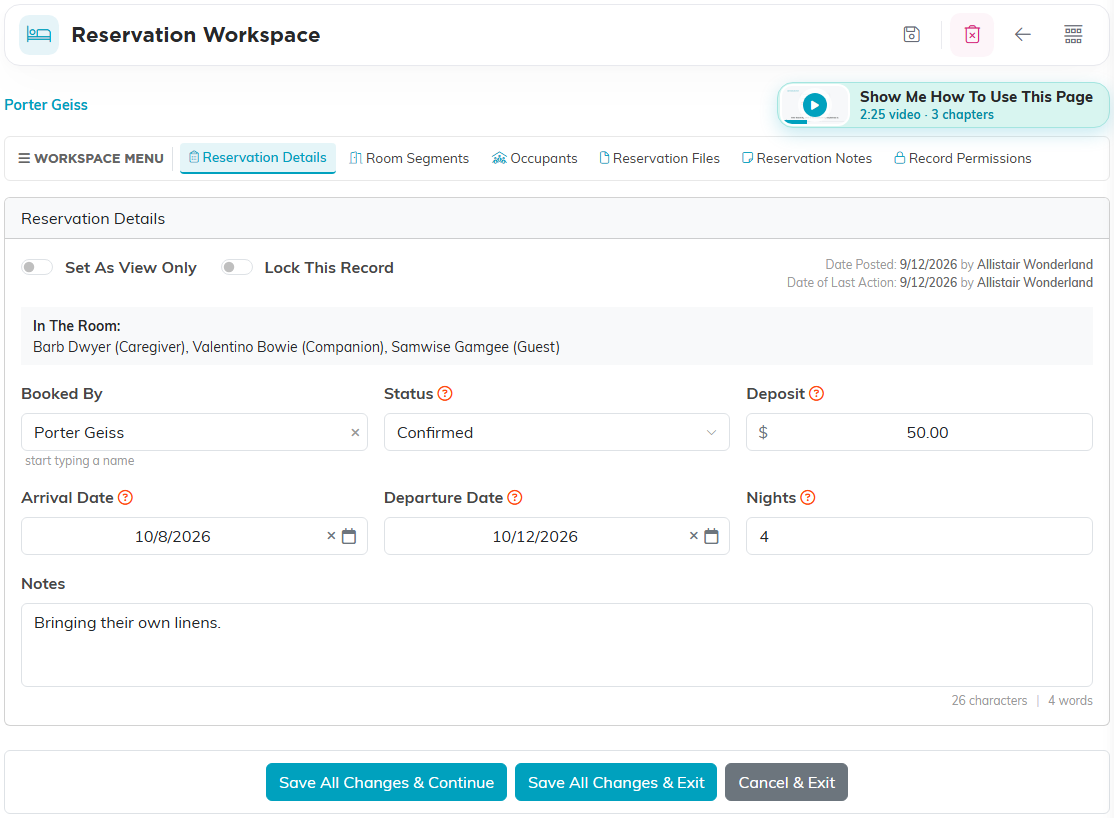
Reservation Details. Nights is worked out from the two dates.
The Reservations list opens on Current & Upcoming, and each card shows the stay's arrival, departure, nights, room, occupant count, and deposit.
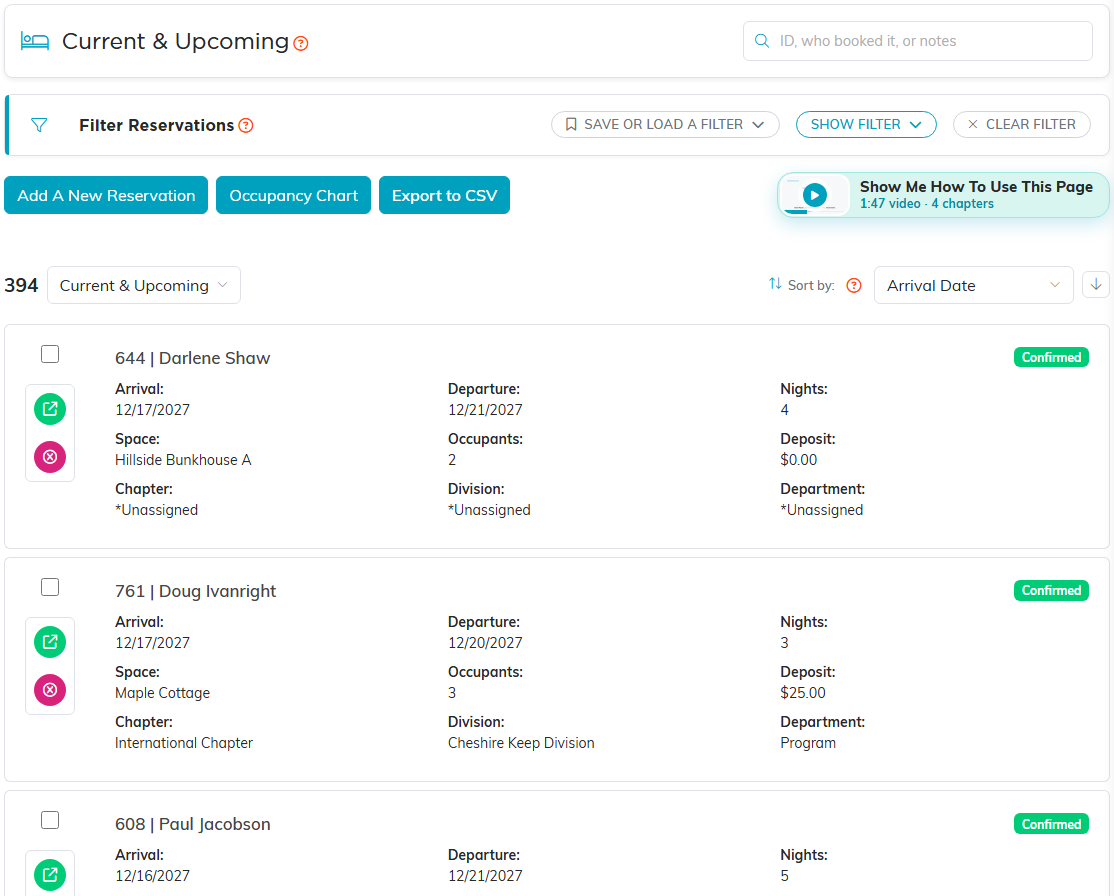
The stays list, with each stay's status badged on the right.
Putting the Stay in a Room
A stay holds its rooms as room segments. One segment is one room for one run of nights, so a stay that moves rooms partway through has two segments, and a family taking two rooms at once also has two. Add a second segment for the new room rather than editing the first one, and the record of which room the guest slept in each night stays whole.
- Open the stay and click Room Segments.
- Click Add A Room Segment.
- Select the Space.
- Enter the First Night and the Last Night. Argenta counts the nights for you at the end of the row.
- Click Save All Changes & Continue to stay on the page, or Save All Changes & Exit to go back to the stay.
Adding a segment adds a row to the page rather than a record to your database. Nothing is saved until you click one of the save buttons, so clicking Add A Room Segment and changing your mind costs nothing.
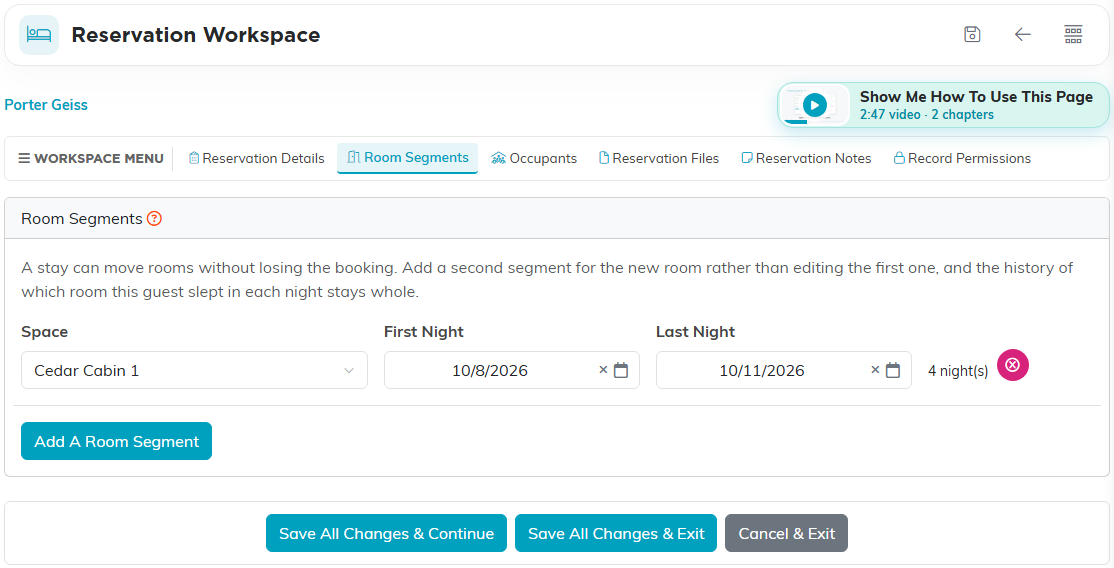
One room, one run of nights. Add a second segment for a second room.
Who Is in the Room
- Open the stay and click Occupants.
- Enter the person in Add A Person.
- Set the Role to Guest, Caregiver, or Companion. The role starts unset, so choose one.
- Click Add To This Stay.
Adding a person takes effect straight away, which is different from a room segment. Removing someone asks you to confirm first and names the person you are about to take off.
Everyone on a stay is a real constituent, so a caregiver or a companion recorded here reaches your mailing lists like anybody else.
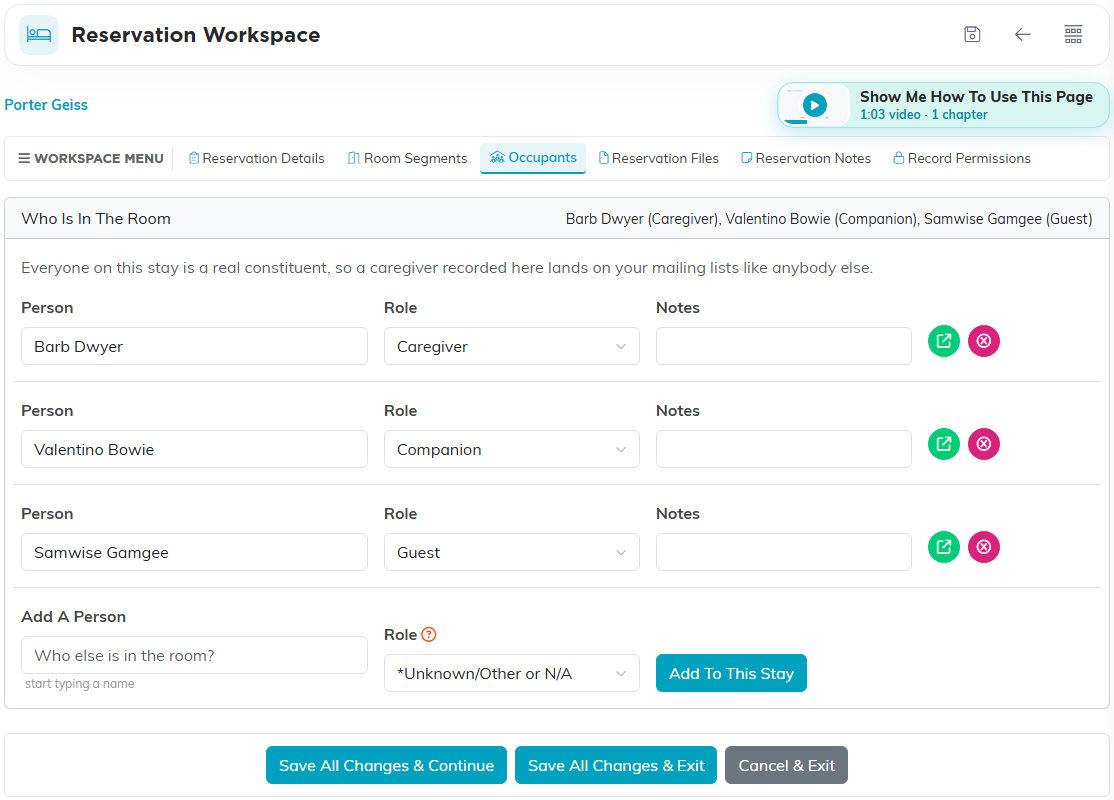
Everyone on the stay, each with their role.
What Argenta Checks When You Save
Argenta refuses some bookings outright, because they would not make sense. Each message names the room and the dates that are in the way.
- A room segment has to name a room. A segment with nights and no room is refused.
- A segment cannot end before it begins.
- A segment has to fall inside its stay. It cannot start before the stay arrives or run past the day the stay departs.
- A stay cannot depart before it arrives.
- Changing a stay's arrival or departure is refused if the new dates would leave one of its own room segments outside the stay. Move the segments first, then change the stay.
- Two Confirmed stays cannot hold the same room on the same nights. Argenta names the reservation that already holds it.
Other things Argenta allows and flags, because they are often deliberate:
- A room another stay wants, where one of the two is not confirmed. Nothing is blocked while either stay is still Pending or Waitlisted.
- More people on the stay than the room sleeps. A cot or a caregiver is normal, so Argenta lets it through and asks you to check the room will take them.
- Two different rooms on the same night. That is what a family taking one room for the parents and one for the children looks like.
- The same room twice over the same nights. That is usually a duplicate segment rather than a real second booking, so check whether one should come off.

A flagged booking names the rooms and the nights rather than leaving you to guess.
Seeing Which Rooms Are Free
The Occupancy Chart lists your bookable spaces down the side and the nights across the top, with a bar for each room segment. A solid bar is Confirmed and a striped bar is not confirmed yet. Click Occupancy Chart in the Reservations menu or on the Reservations list to open it, and click a bar to open that stay. For the filters, blank and Unclear nights, and the list of segments that cannot be drawn, see How to Use the Reservations Occupancy Chart.
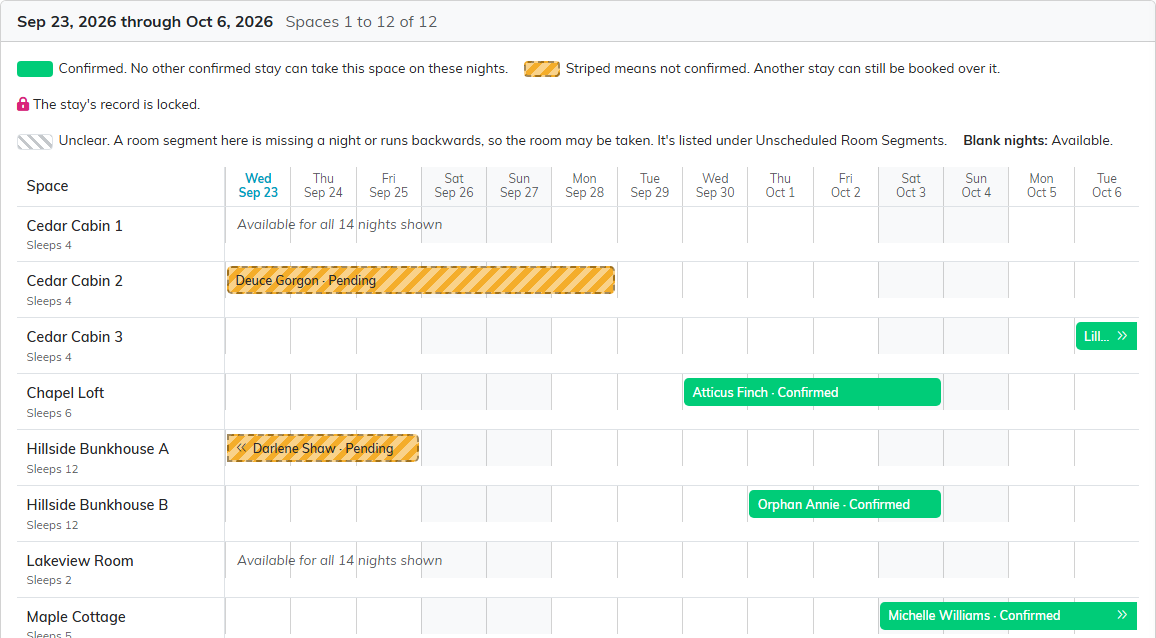
Solid bars are confirmed. Striped bars are not confirmed yet.
The Occupant Record
Click Occupants in the Reservations menu to see everyone who has been on a stay, across every reservation. The list opens on Current & Upcoming; switch it to Everyone Who Has Stayed to take in past stays as well. Each card shows the person, their role badge, the Reservation, who it was Booked By, the Stay Status, the Arrival and Departure, and whether they May Be Mailed. Search by name, email or reservation ID, or filter by Occupant Role, Reservation Status and Arrival Date, and click Export to CSV to take the list with you, for example every caregiver for a mailing. On each card, the green icon opens the occupant and the orange bed icon opens the stay.
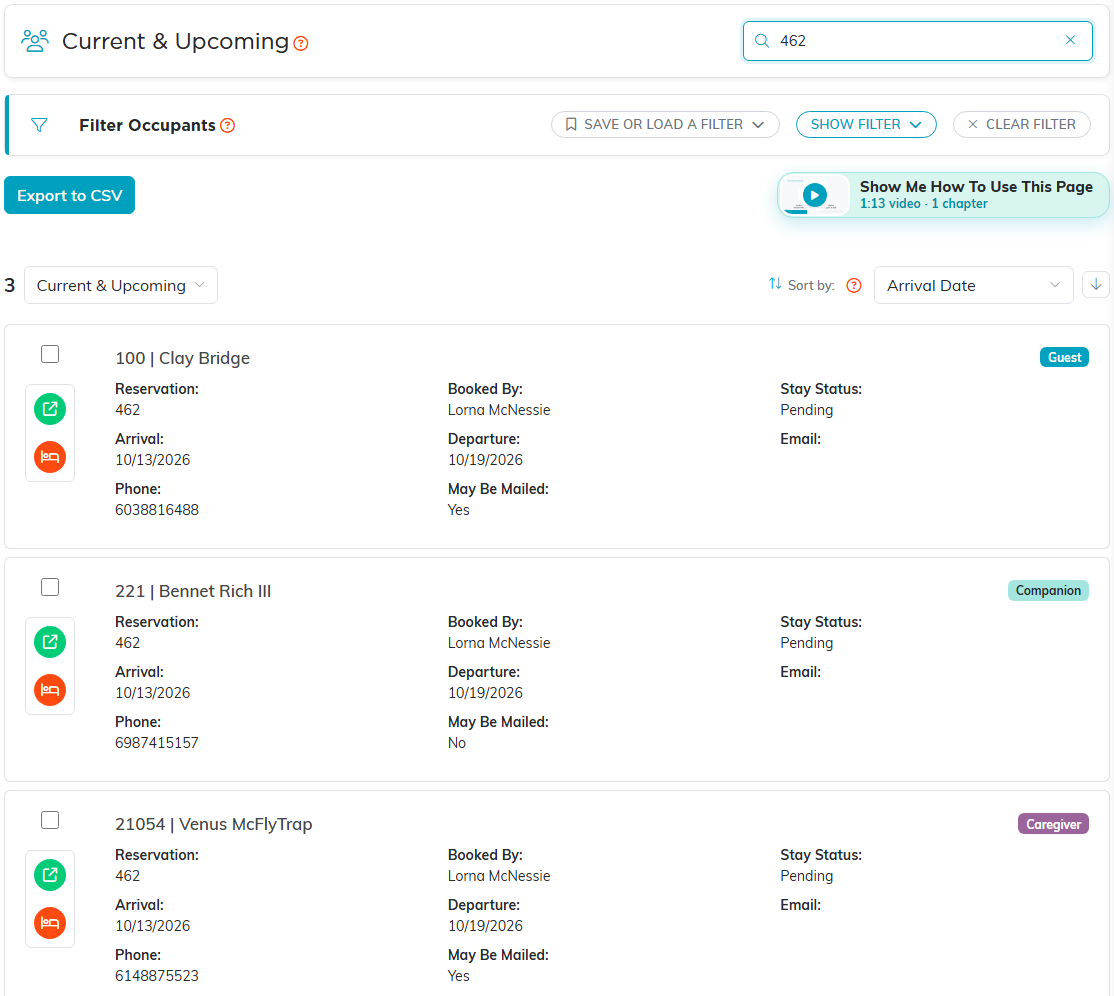
One card per person. Here the list is searched for reservation 462, so it shows that stay's three people.
Everyone who has been in a room has a record in the Occupant Workspace. You set the Role and the Notes here. Person, Reservation, Email, Phone, and May Be Mailed are shown so you can see who you are looking at without leaving the stay, and they come from the person's constituent record rather than being edited here.
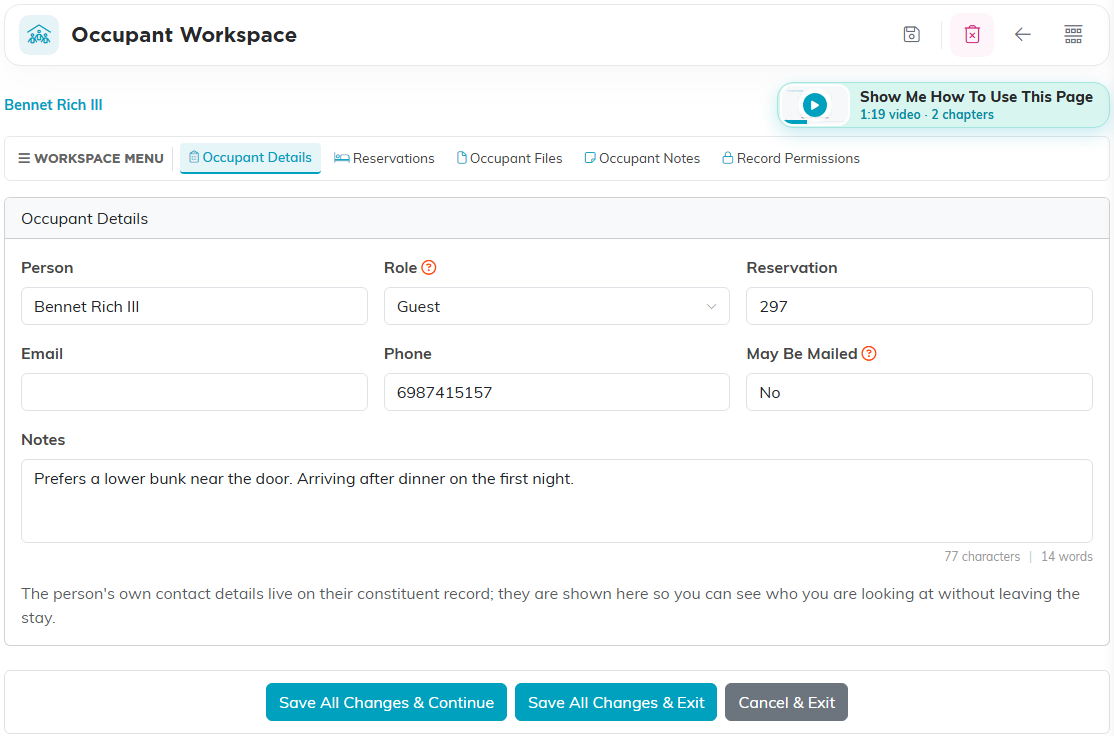
An occupant record. Only Role and Notes are edited here.
Click Reservations on an occupant to see every stay that person has been on, which is how you check whether somebody is a returning guest. Each stay carries two badges, one for the person's role on that stay and one for the stay's status, and the status colors are set by Argenta rather than by you: Waitlisted, Confirmed, Pending and Cancelled each have their own, and any other status your team adds shows grey.
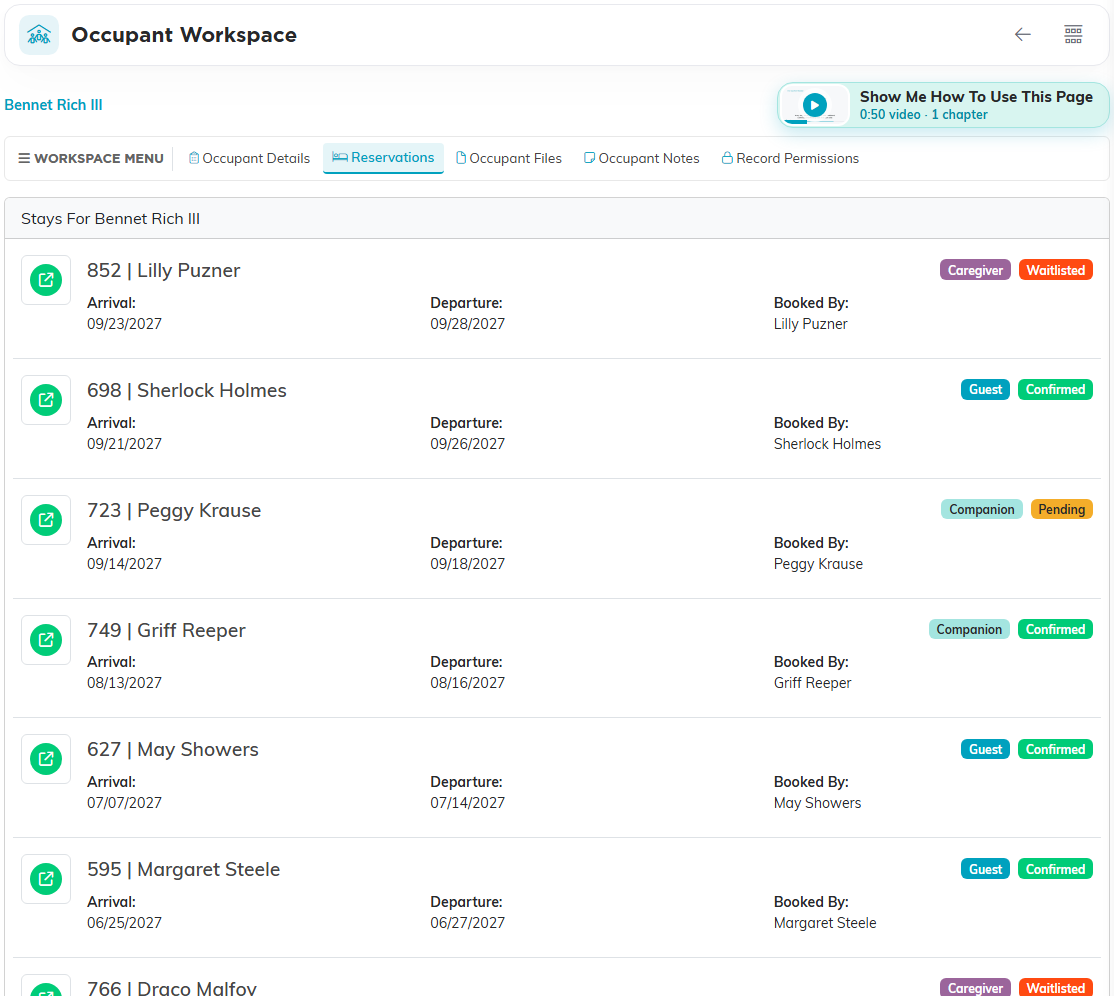
Every stay one person has been on, with Waitlisted, Confirmed, and Pending each in its own color.
Files, Notes, and Who Can Change a Record
Reservations, bookable spaces, and occupants each open in a full workspace with their own files and notes pages, so a signed waiver or a note about a guest lives on the record it belongs to.
A reservation or a bookable space can be deleted from the pink delete icon on its card in the list, or from its own workspace. Deleting a reservation takes its room segments and its occupants with it. An occupant is taken off a stay from the stay's Occupants page or with Remove From The Stay in the occupant's workspace; the Occupants list has no delete. Argenta asks you to confirm before it removes anything.
Two switches control how a reservation or a bookable space can be changed. Turn on Set As View Only to leave the record readable but not editable. Turn on Lock This Record to close it to changes. Record Permissions opens for everyone who can use Reservations, and it names the record at the top so you know what you are setting permissions on.

Set As View Only and Lock This Record sit at the top of the record.
On a files page, drag files onto Drag & Drop Files Here, or click it to choose them, then click Save The Selected File(s). Click a file's name to open it, the green icon to download it, and the pink icon to delete it; Argenta asks you to confirm first.
On a notes page, click Add A New Note, write the note, and click Add This Note. Each note shows its Date Created and who it was Created By. The green icon edits a note and the pink icon deletes it, after you confirm.
When a record is view only or locked for you, its files and notes can be read but not added, changed or removed.
Reservation Files
Open a stay and click Reservation Files for its paperwork, such as a confirmation letter or arrival directions.
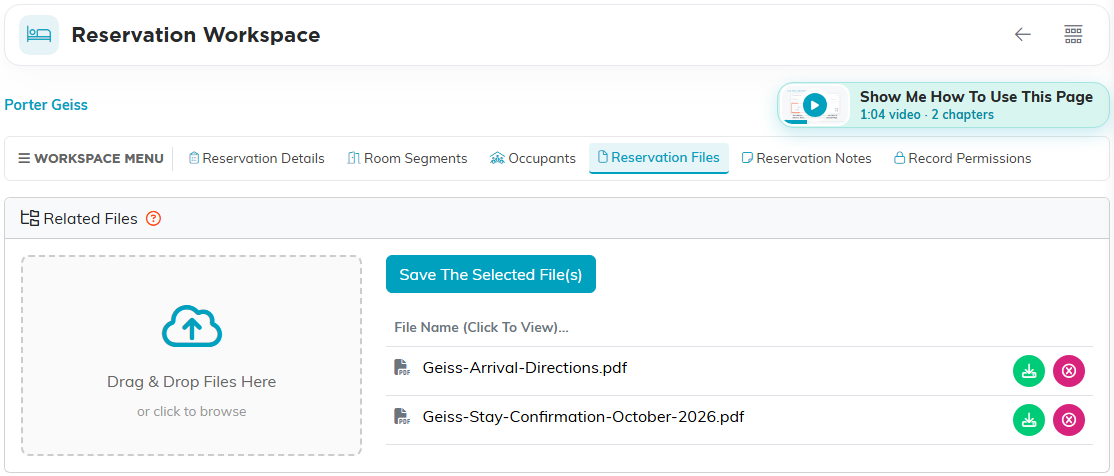
Reservation Files on Porter Geiss's stay.
Reservation Notes
Click Reservation Notes to keep running notes on a stay, such as an arrival time or a payment received.
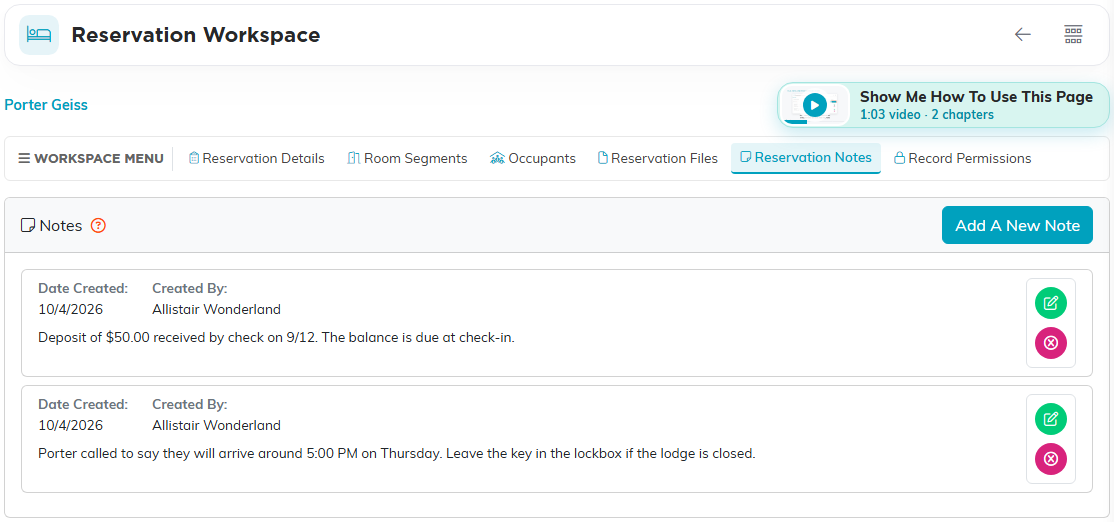
Reservation Notes on Porter Geiss's stay.
Space Files
Open a bookable space and click Space Files for documents about the room itself, such as a floor plan or a safety checklist.
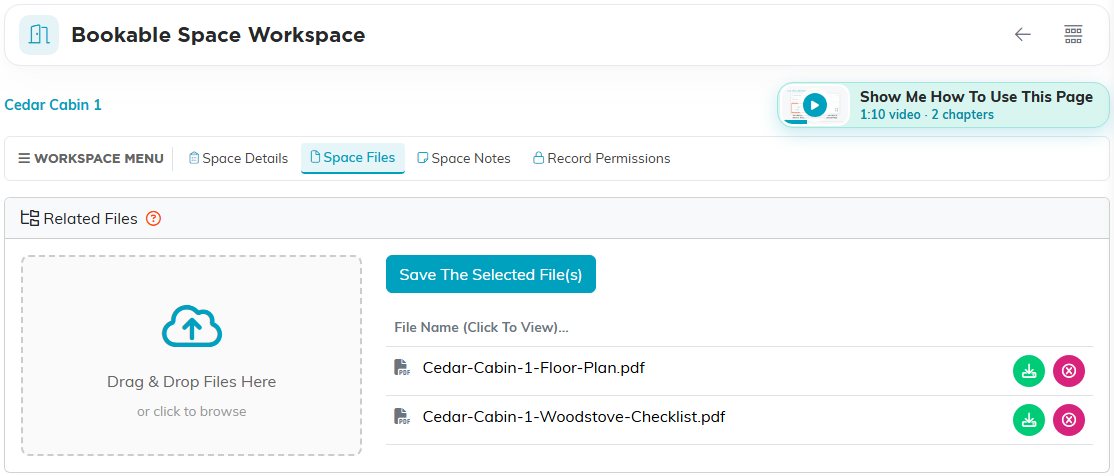
Space Files on Cedar Cabin 1.
Space Notes
Click Space Notes for upkeep and anything else the team should know about the room.
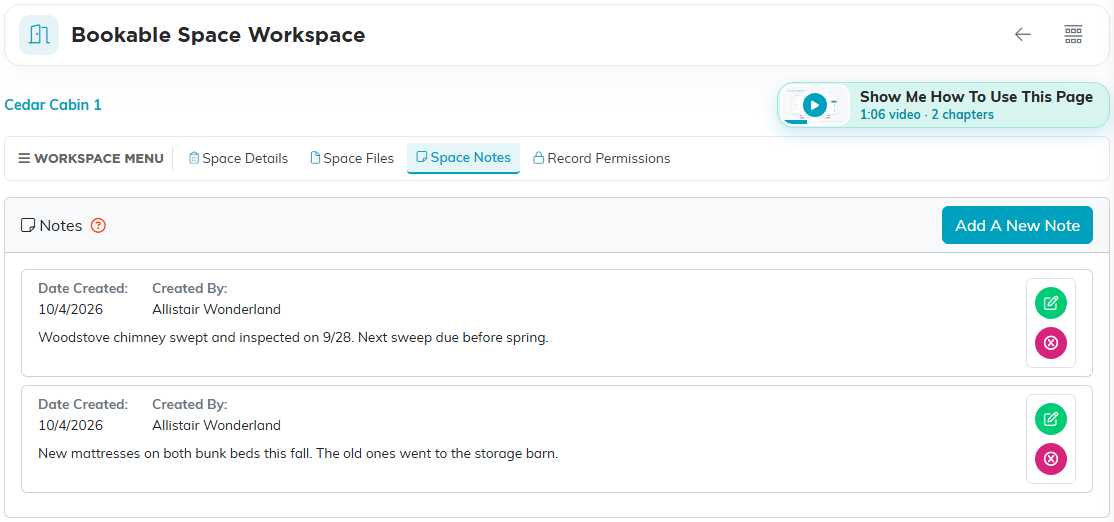
Space Notes on Cedar Cabin 1.
Occupant Files
Open an occupant and click Occupant Files for that person's paperwork on the stay, such as a signed guest agreement.
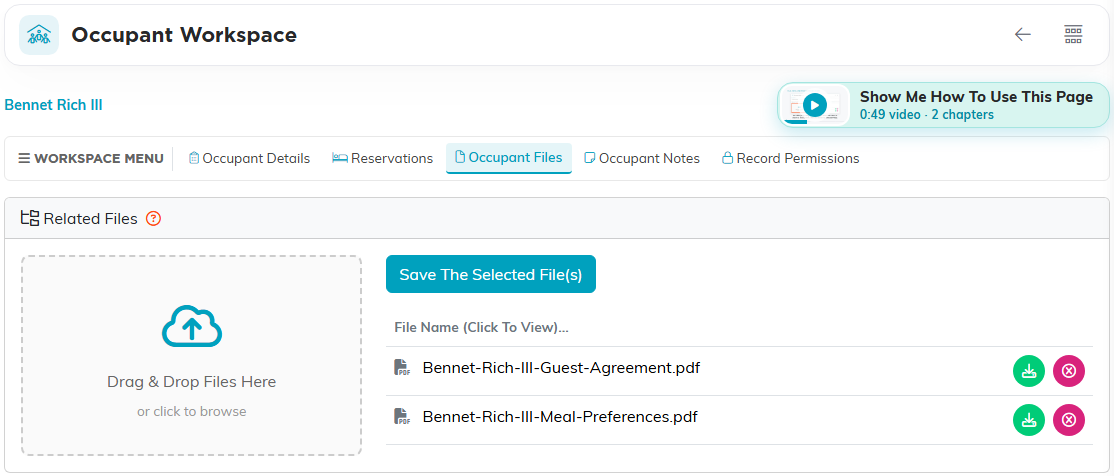
Occupant Files on Bennet Rich III.
Occupant Notes
Click Occupant Notes for notes about the person, such as a bunk preference.
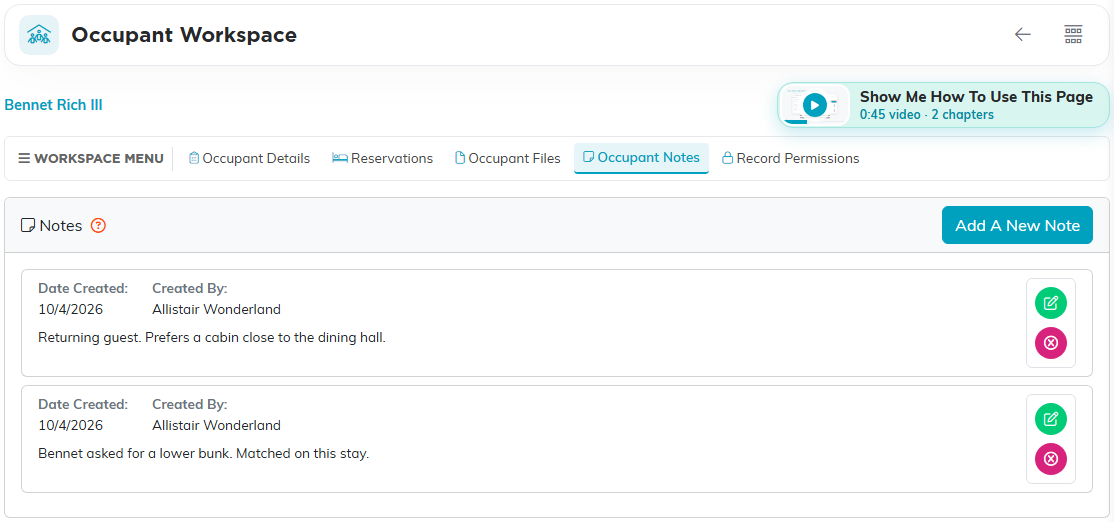
Occupant Notes on Bennet Rich III.
